
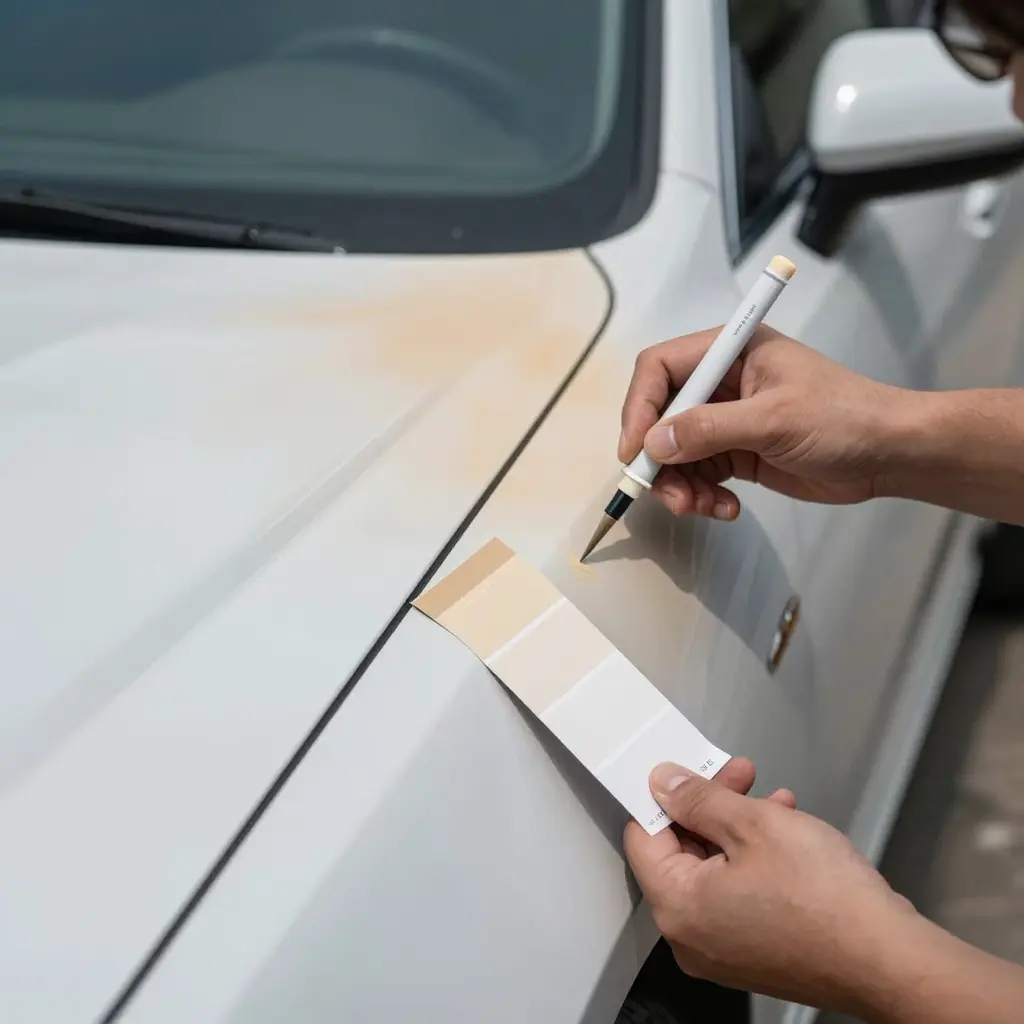
Replacing a damaged fairing is only half the job. The harder part is making the new panel look like it has always been there. A replacement fairing paint match means the repaired panel blends with the surrounding bodywork in any light, at any angle, with no visible seam.
Two things make that harder than it sounds. An OEM color code describes the factory formula, not the shade a panel carries today, and it says nothing about how the color varied across production runs and plants. Sun fade keeps changing the original paint, so the finish on an older vehicle has drifted away from what the code specifies.
None of that makes matching impossible. It means the code is where the job starts, not where it ends.
What OEM Color Codes Actually Represent
An OEM color code identifies the paint formula a factory used for a specific build. It tells a painter which pigments, metallic flake, and clear coat the manufacturer specified on the line. It is not a description of the vehicle as it sits today, and it cannot promise the shade you get when a freshly painted panel goes next to an aged one.
Manufacturers pack several layers of information into these short alphanumeric strings. A code usually points to a manufacturer identifier, the model line it was assigned to, and the model year or build range where that formula applied. Because the same color name gets reused across years and models, the code narrows down the intended mixture rather than describing what your eye perceives. That is what makes code matching a starting point rather than an endpoint.
The distinction matters most when replacing damaged bodywork. A new fairing painted to the OEM code can look noticeably different from original panels that spent years in the sun, because the original finish has aged. The factory paint formula behind the code is still correct. The surface it is being matched against may not be.
What a code does and does not contain
- Does: the manufacturer, model line, and year variant the formula was released for.
- Does: the mixing ratio and pigment components of the factory paint formula.
- Does: a reference point any paint supplier can look up in a database.
- Does not: a guarantee of the current, real-world shade sitting in your driveway.
- Does not: an account of fading, oxidation, or previous repair resprays.
- Does not: a match under every lighting condition or viewing angle.
An OEM code gives you the factory recipe. The vehicle in front of you is what years on the road produced. Any credible color match has to account for both.
How Factory Paint Is Built Up
A factory paint finish is not a single coat of color. It is a stack of layers, and that structure explains why a replacement fairing so often refuses to blend and why sunlight does not fade every coat the same way.
A typical OEM system has three essential layers, and UV exposure acts on the topmost surface first.
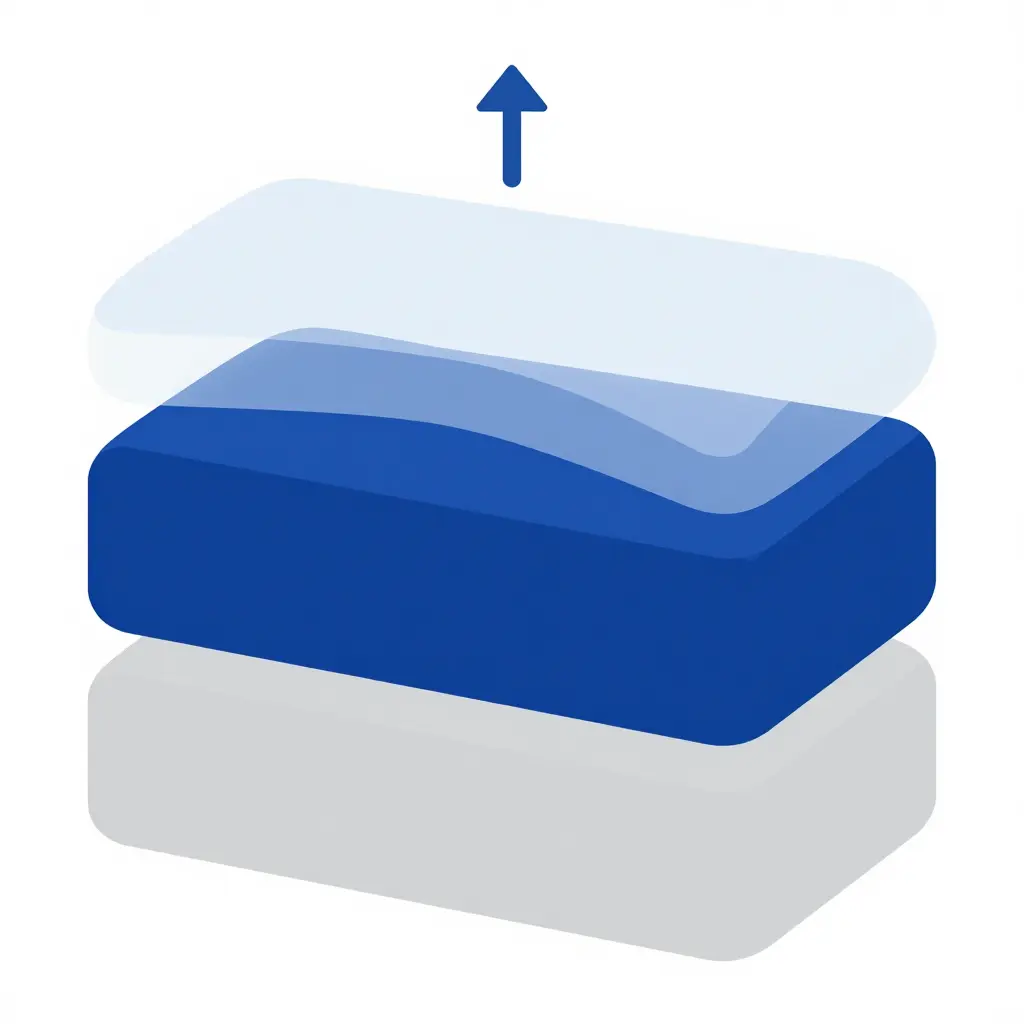
- Primer bonds to the bare panel and creates a uniform surface for color, sealing the substrate and smoothing minor imperfections.
- Base color coat carries the actual pigment that defines the OEM shade, and its thickness directly affects how the color reads in different light.
- Clear coat is the transparent top layer that protects the pigment from UV radiation, chemicals, and abrasion while delivering gloss and depth.
UV attacks the clear coat first, so the top layer oxidizes and yellows long before the pigment underneath shifts. That is why a faded panel and a fresh fairing can read as two entirely different colors even when the paint code matches.
Why OEM Color Codes Fall Short
An OEM color code describes an intent, not a measurement. Manufacturers publish codes to define a target finish, yet the paint that actually leaves the factory rarely holds one single value over time. For anyone sourcing a replacement fairing, the code is a useful label and a poor guarantee.
Several things cause the mismatch.
- One code, several factory shades. Brands revise formulas between production years without changing the code. The same label can describe two or three distinguishable tones depending on the build date.
- Paint supplier variation. Different suppliers serve the same plant over time, and each mixes to its own reference standards. Small differences in pigment sourcing shift the final appearance.
- Different application equipment. Robotic sprayers, electrostatic bells, and manual guns lay down film at different thicknesses, which changes how the basecoat reflects light.
- Different clear-coat chemistry. Clear coats vary in UV inhibitors and gloss, and those differences change perceived color even when the basecoat is correct.
- Aftermarket fairings built to a vendor reference. Many suppliers mold and paint panels to an internal standard rather than an exact OEM sample, so an aftermarket fairing can be close without being identical.
Color drift makes it worse. It is the slow, cumulative shift in a finish as it ages. UV exposure, oxidation, and repeated washing break down pigment and clear coat at different rates across a vehicle. Panels that face the sun fade faster than shaded ones, so one truck can hold several versions of its original shade. A new replacement fairing arrives with fresh, unweathered paint, which often places it closer to the original code than the faded body beside it. That contrast is exactly what owners notice, and it widens every season the original panels stay exposed. Before drawing any conclusion, it helps to clean road film and tar off the surface first, since grime masks the true tone and makes any comparison less reliable.
The table below shows how OEM color codes hold up across the situations shops and owners run into most often. The code itself rarely changes; the real-world conditions around it almost always do.
How OEM color codes perform across common matching scenarios
| Scenario | OEM Code Available | Variables That Break the Match | Likelihood of a Visually Exact Match |
|---|---|---|---|
| Same-year replacement (e.g., swapping a damaged panel on a truck built the same model year) | Yes – printed on the factory ID tag and parts catalog | Paint batch and toner shifts between factory runs, film thickness, clear coat gloss level | High, but rarely perfect |
| Replacement spanning a different production year | Yes, though the formula may have been revised | Supplier changes, mid-year color adjustments, reformulated toners | Moderate – usually close enough to notice under bright light |
| Aftermarket fairing painted to the code | Yes, usually supplied by the customer or parts vendor | Substrate (ABS vs steel), primer color, shop mixing accuracy, spray technique and curing | Low to moderate – depends heavily on the painter |
| A faded original panel being matched | Yes, but it describes the original unfaded color | UV and sun fade, oxidation, uneven panel aging, past repairs | Low – the code points to a color the panel no longer is |
How to read this: A “Yes” in the OEM Code Available column only means the code exists. It does not mean the code will get you a match. The further a scenario sits from a fresh, same-year factory panel, the more the surrounding variables – fade, substrate, and shop process – take over.
How Sun Fade Shows Up on Fairings
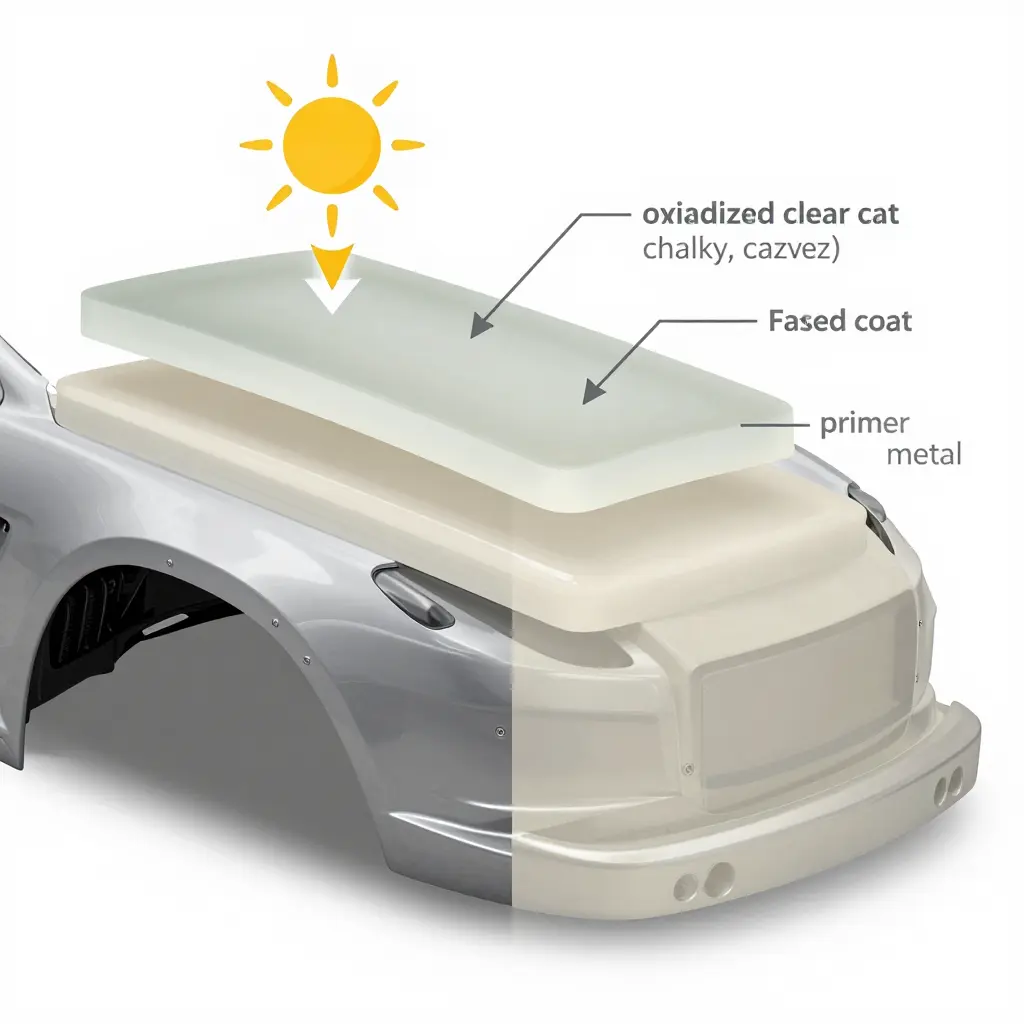
Fairings live in constant sunlight, so they are often the first panels to show their age. Sun fade is the gradual change in paint appearance caused by long-term ultraviolet exposure. The damage starts at the surface and moves inward, which is why a freshly washed panel can still look slightly “off” out in the lot.
UV Exposure and Clear-Coat Oxidation
The clear coat is the transparent top layer that protects the color underneath. UV fade breaks down the resins in this layer, a process called clear-coat oxidation. As it oxidizes, the clear coat turns chalky, hazy, and slightly rough. Instead of reflecting light cleanly, it scatters it, so the paint loses gloss and depth.
Pigment Degradation
Beneath the clear coat, the same UV rays attack the color layer itself. Pigment degradation changes the actual hue by breaking down dyes and additives in the base coat. Reds, oranges, and yellows tend to fade fastest, while blues and blacks often just look washed out. Keeping surfaces clean and free of buildup helps slow that surface damage, so routine professional cleaning methods are worth the effort.
Uneven Fade on Sun-Facing Panels
Fade is rarely even. Roofs, hoods, and the sun-facing side of a truck collect the most radiation and fade faster than shaded areas. A single fairing can show two or three tones across one panel, and the change is gradual enough that owners often miss it until a new part sits beside the old finish.
How Fade Affects a Replacement Paint Match
A sun-faded surface reads lighter, warmer, or duller than a fresh panel. When you install a replacement fairing sprayed to the factory OEM code, the color may be technically correct yet still clash with the faded body around it. That is why technicians often tint, blend, or adjust the new paint to sit closer to the aged finish rather than chasing a perfect out-of-the-box match.
Charting the Fade: Why OEM Color Codes Fall Short
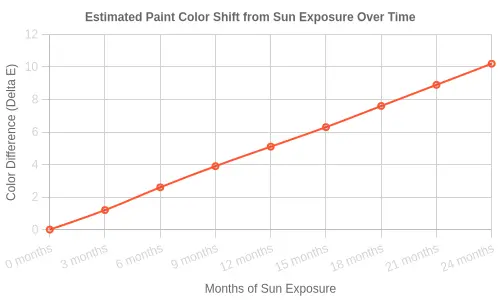
Color-matching a replacement fairing is rarely the plug-and-play process owners expect. The factory assigned a code when the truck rolled off the line, but that number describes a new finish – not the weathered paint sitting on the vehicle three summers later. The chart below plots how far paint typically drifts from its original factory shade as sun exposure accumulates.
What the Line Is Telling You
The shift starts slowly – a couple of “Delta E” units (the standard measure of how visually different two colors are) within the first six months. By the two-year mark the same paint has drifted roughly ten units from where it started. Depending on the pigment, a Delta E above 2 or 3 is already visible to a trained eye, and double digits usually reads as a completely different color outdoors.
For anyone ordering fairings, the point is simple: an OEM color code can only reproduce the original finish, not the accumulated fade layered on top of it.
The Numbers Behind the Curve
| Months of Sun Exposure | Estimated Color Difference (Delta E) |
|---|---|
| 0 (factory fresh) | 0.0 |
| 3 | 1.2 |
| 6 | 2.6 |
| 9 | 3.9 |
| 12 | 5.1 |
| 15 | 6.3 |
| 18 | 7.6 |
| 21 | 8.9 |
| 24 | 10.2 |
The drift never levels off. That is why a brand-new fairing painted to the factory code can look too vibrant next to faded bodywork: the old panels no longer match the code they were built to.
Why This Matters in the Real World
- Sun is relentless on pigment. UV radiation breaks down the resins and dyes in automotive paint, and the process accelerates with more direct exposure and hotter climates.
- Not all colors fade equally. Reds, yellows, and organic pigments tend to shift fastest, which is why a faded red truck can be the hardest match in the shop.
- Your eyes adjust, photos do not. Owners often do not notice the slow drift until a fresh panel goes on and the mismatch jumps out.
Regular care slows the fade curve. Washing away grime, dust, and contaminants keeps paint surfaces from trapping heat and abrasives that speed up the aging process – it is one of the simplest habits to protect your finish and your future color matches.
The Practical Fix
When a fairing needs replacing, do not just trust the code. Have the existing paint read with a spectrophotometer, then adjust the mix to match the current shade of the vehicle – not the shade it wore on the showroom floor.
Factors that change how much a fairing fades and how hard it is to match
- Exposure direction and climate – A fairing that faces the sun all day in a hot, high-UV climate will fade much more than one shaded by buildings or parked in a milder region, because heat and ultraviolet light break down the finish unevenly across the panel.
- Pigment and clear-coat type – Reds, oranges, and yellows tend to shift faster than whites and silvers, and a single-stage paint or a thin, low-quality clear coat offers far less protection than a modern two-stage urethane system.
- Panel age in service – Every year a fairing spends on the road adds gradual color drift, so a five-year-old panel rarely matches the factory reference even when the original formula is perfect.
- Wash and cleaning habits – Harsh brushes, strong alkaline soaps, and infrequent rinsing strip wax and dull the surface, while gentle, regular care preserves gloss and keeps the color closer to spec; shops that follow proven cleaning practices see noticeably less surface degradation over time.
- Storage conditions – Trucks kept indoors or under cover fade slowly, whereas units parked outdoors in direct sun, snow, or salt air age quickly and unpredictably.
- Paint batch variation – Even within a single OEM code, different production batches carry slight tint differences, which is a major reason an exact replacement fairing paint match is so difficult to achieve.
These factors tell a technician roughly how a panel has aged before paint is ordered. Rather than trusting the color code alone, a professional replacement fairing paint match starts with a physical color reading of the actual panel, because real-world conditions change the finish in ways no catalog value can capture.
Practical Ways to Get a Replacement Fairing Paint Match
A replacement fairing paint match rarely comes down to a single code. It comes from a repeatable process. Work through these steps in order.
Start With the Code, but Only as a Reference
The OEM color code is your starting point, not your answer. It tells you the factory formulation, but it ignores years of sun fade, repaints, and production variance. Use it to pick the base mix, then verify everything against the real panel.
Read the Actual Panel
Use a spectrophotometer or a color camera to measure the painted surface directly. These tools read the true hue, value, and flake orientation instead of trusting a printed label. Measure a clean, flat area of the existing fairing, away from faded edges. Faded panels often read several shades lighter than the original code predicted, so always clean the surface first – learn how in this guide to removing grease and tar from your trucks fast.
Tint and Spray a Test Card
Mix your candidate color, then do a test spray-out on a card. Spray it with the same gun, pressure, and technique you will use on the fairing. Let it cure fully before assessing it, because fresh and cured paint read differently.
Check the Color Match in Two Light Sources
Compare the test card and the panel in daylight, then again in shade. A color match that looks perfect under shop lights can drift badly outdoors. Metallic and pearl finishes shift the most, so check from several angles before you commit.
Blend or Repaint Adjacent Panels
When the match is close but not exact, blend into the neighboring panels. Fogging color across the seam hides small differences. If the gap is large, repaint the adjacent panel fully so the transition disappears.
Work in that order, and the replacement fairing will look like it belongs.
Comparing fairing paint matching methods
No single approach works for every fairing, so the right choice comes down to how much fade, budget, and visible surface area you’re dealing with. Use the comparison below to weigh speed against accuracy and pick the method that fits the job.
| Method | How It Works | Accuracy Level | Best Use Case | Limitations |
|---|---|---|---|---|
| Code-only matching | Looks up the OEM paint code in the manufacturer’s database and orders that pre-mixed formula. | Low to moderate | New or unfaded panels and full factory-fresh resprays. | Ignores sun fade, batch variations, and past repairs, so the result often looks noticeably off. |
| Spectrophotometer reading | A handheld device scans the existing paint and generates a formula based on the actual measured color. | High | Matching aged or sun-faded fairings that no longer match the code. | Needs a clean, flat, correctly angled surface; metallic and pearl flakes plus contamination can skew readings. |
| Test spray-out and tinting | Spray a small sample card, compare it to the vehicle in natural daylight, then manually adjust (tint) the formula. | Very high | Critical or large, highly visible areas where a close blend matters. | Time-consuming and depends on an experienced painter’s eye. |
| Full panel repaint or blend | Repaint the entire fairing, or blend color into the adjacent panels to hide any mismatch. | Highest visual consistency | Severe fade, mismatched panels, or when no formula produces an acceptable match. | The most expensive and slowest option; uses more paint, labor, and drying time. |
How to use this table: If your fairing is only lightly faded, a code-only or spectrophotometer approach may be enough. As fade deepens, lean on test spray-outs and tinting, and reserve full repaints or blends for panels where a seamless finish is non-negotiable.
The Fairing Paint Matching Workflow at a Glance
Matching paint on a replacement fairing is rarely a one-step job. The diagram below lays out the sequence most experienced shops follow, from pulling the factory code to the final spray-out. Each step exists because the previous one alone is never enough: a code tells you where to start, but only a measured panel and a daylight comparison tell you where to finish.
![A simple flat 2D flowchart showing the fairing paint matching process: read the OEM code, measure the actual panel color, mix and spray a test card, compare in daylight, then adjust or apply.]
Why the Sequence Matters
Each step depends on the one before it:
- Read the OEM code – establishes the baseline factory formula.
- Measure the actual panel color – captures how years of sun exposure have shifted the original shade.
- Mix and spray a test card – puts your blend onto the same substrate you’ll be painting.
- Compare in daylight – reveals metamerism and fade that indoor lighting hides.
- Adjust or apply – fine-tune the tint before committing to the whole fairing.
Skipping any box usually means redoing the job. For fleets that keep trucks looking consistent across many units, that discipline pays off the same way it does when you follow regular trailer maintenance routines to prevent bigger problems down the line.
Frequently Asked Questions About Replacement Fairing Paint Match
Why does a replacement fairing rarely match the OEM code exactly?
OEM color codes describe a factory formula, not the paint that is actually on your vehicle today. The original coating has already aged, and its pigment, clear coat, and metallic flake have shifted since the day it left the line.
Even a perfectly mixed batch from that code will look slightly off next to a panel that has spent years outdoors. Manufacturers also run color in different plants and batches, so the same code can vary between production runs.
How quickly does sun fade become visible?
Sun fade is a gradual process, so most owners do not notice it in the first weeks. On horizontal surfaces that face the sky, like the top of a fairing, noticeable dulling can appear within one to two years of regular UV exposure.
Vertical panels fade more slowly, often taking three to five years before the change is obvious. The shift is easiest to see when you compare a shaded area, such as behind a bracket, with an exposed area right next to it. Consistent care and regular trailer maintenance help slow this process.
Can a faded panel be matched without repainting?
Sometimes, yes. A skilled painter can tint a blendable color and feather it into the surrounding panels to hide the transition. This works best when the fade is mild and the finish is a solid color.
Metallic, pearlescent, and tri-coat finishes are much harder to blend, because the flake lies in a specific direction. In those cases, a full repaint of the adjacent panels is usually the only way to achieve a seamless replacement fairing paint match.
Are aftermarket fairings pre-painted to OEM codes?
Many aftermarket fairing suppliers do offer pre-painted options, and they typically list an OEM code as a reference. However, that reference is a starting point, not a guarantee.
What you receive may still differ in sheen, flake size, or tone from your specific vehicle. Cheap pre-painted panels are the most likely to show a mismatch, because corners are often cut on primer and clear coat quality.
How do I test a color match before installing?
Do not bolt the panel on first. Hold it against the original bodywork in direct daylight, not under shop lighting, and compare it from multiple angles.
For a stronger check, ask the supplier for a spray-out card or a small sample of the exact paint. Place the sample directly beside your factory panel and study it both in sun and shade. If the tone drifts at an angle, the match is not close enough for a clean result.
Conclusion
Matching replacement fairing paint is never about finding one magic number. OEM color codes serve as a useful starting reference, not an exact specification – manufacturers tweak formulas, batch tones drift, and the same code can look noticeably different across model years. On top of that, sun fade quietly shifts original paint over time, so even a flawless factory code rarely lands on a perfect match once a vehicle has logged years of UV exposure.
The approach takes patience and measurement. Begin with the OEM code as your baseline, then read the actual panel, account for sun fade, and refine the formula through test sprays until the tones agree under real-world lighting. Treat replacement fairing paint match as a process rather than a single value pulled from a database. Do that, and you get a finish that blends.