
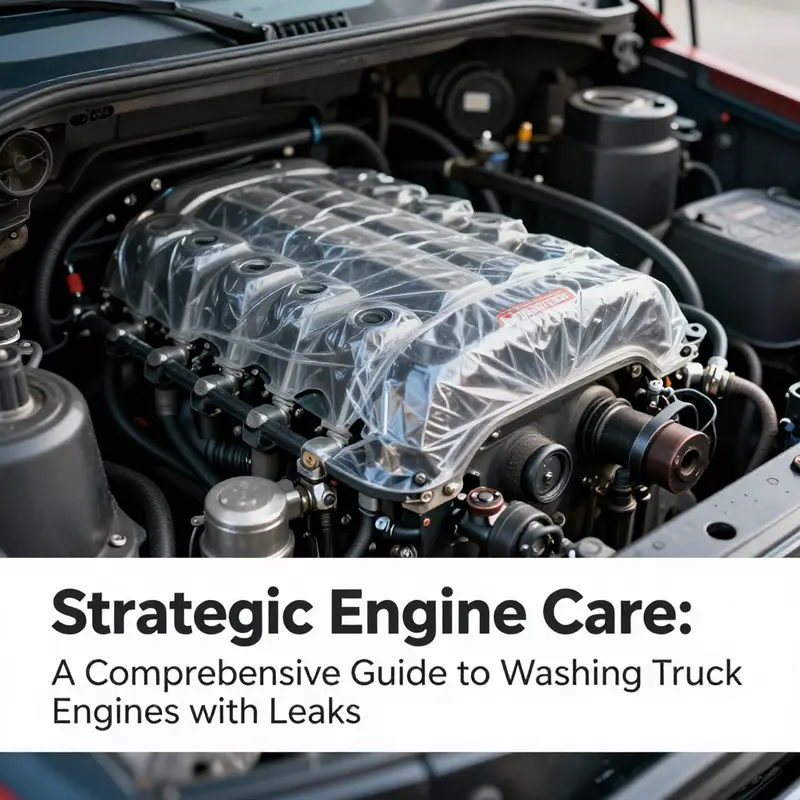
Ensuring the longevity and performance of your fleet’s trucks demands regular maintenance, especially when addressing engine leaks. The cleaning process, however, presents challenges that must be navigated with care. This guide offers essential insights tailored for logistics and trucking professionals, detailing how to safely wash truck engines without exacerbating existing leaks. The subsequent chapters will elaborate on immediate safety measures, effective protection for sensitive components during the cleaning process, and specific cleaning techniques tailored to different types of leaks. By understanding these protocols, fleet managers and operators can maintain their vehicles’ integrity and performance, ensuring safety and efficiency on the road.
Calm, Controlled Cleaning: Immediate Safety Protocols for Washing a Leaking Truck Engine

When a truck engine shows signs of a leak, washing it becomes less about removing grime and more about managing risk. The act of cleaning in that scenario is a test of discipline, not a sprint to a spotless bay. The safety stakes rise because fluids can ignite, electrical systems can short, and damp grime can conceal the exact origin of a leak. In those moments, the goal is to create a clear, safe working environment where you can both identify the source of the seep and prevent any additional damage. This chapter follows a steady, unhurried path that treats safety as the first and last step, guiding the reader through a sequence of precautions and techniques that minimize risk while still allowing thorough cleaning. It is not a generic wash; it is a deliberate safety protocol designed for leaking engines, where every action is weighed against the possibility of fire, shock, or further contamination.
The moment you notice a leak, you are faced with decisions that extend beyond the cleanliness of the engine bay. A leak signals that the vehicle’s systems may be compromised, and the fluids involved—oil, coolant, fuel, or a mixture—bring with them different hazards. Oil can ignite, coolant can erode seals if mismanaged, and fuel introduces a flammable element that makes any spark particularly dangerous. The prudent path is to halt movement and secure the scene before you even think about cleaning. Let the engine cool completely, then park on a flat, well-ventilated surface that allows for proper drainage. A clean, level work area reduces the chance of slips and helps ensure that any runoff does not migrate into soil or water sources. In the long run, a controlled environment pays for itself in safety and in the clarity it brings to the leak’s true source. The delicate balance between cleanliness and caution should be the guiding principle as you step into the engine bay.
With safety established, the next essential step is to address the electrical risk head-on. A truck engine’s electrical system is a dense network of sensors, wires, and connections that respond poorly to moisture. The simplest and most effective precaution is to disconnect the battery before any cleaning begins. This action eliminates the risk of electrical shorts, sparks, or arcing that could ignite leaking fluids if droplets find their way into a connector or a sensor. Disconnecting the negative terminal first and then the positive terminal ensures that you break the circuit comprehensively, reducing the chance of accidental reattachment or inadvertent contact. The moment you remove power, you create a safer canvas on which to work. You are no longer contending with live circuits that can flare up in the presence of water and cleaners; you are instead acting within a controlled system where the risk of electrical shock or flame is dramatically diminished.
Once power is secure, the personal safety equipment becomes the next line of defense. Protective gear is not optional; it is the foundation of safe work. Rubber gloves shield your hands from harsh cleaners and any residual fluids that may irritate skin. Safety goggles protect eyes from splashes, and non-slip footwear reduces the danger of slips in a wet, oily environment. A long-sleeve shirt or overlayer helps guard the arms from splashes, while a dust mask or respirator can be valuable if fumes from cleaners or evaporating fluids are a concern in a confined space. The work area itself benefits from careful organization: store rags and towels nearby, keep a fire extinguisher within easy reach, and ensure lighting is adequate so you can clearly see every crevice and joint you touch. This PPE and setup are the quiet but unyielding guardians of safety in a scene where a single lapse can turn routine maintenance into an emergency.
Having prepared the space and yourself, you then turn to the components most at risk: the electrical systems and the places where leaks are most likely to obscure. The engine bay contains a constellation of sensors, wiring harnesses, and critical components whose integrity must be preserved. To prevent accidental water ingress, you cover or seal exposed electrical parts with plastic bags or waterproof covers. Battery terminals, the fuse box or relay center, ignition coils, the alternator, and intake ducts demand extra attention. Plastic sheeting can be used to shield gaps and openings, and tape or sealant materials can help prevent moisture from finding its way into corners where you cannot easily see what you are touching. The aim is not to create a waterproof fortress but to minimize water contact with areas that could short out, corrode, or misinterpret signals after the wash. The more you respect this protective layer, the less you risk turning a leak-cleanup into a cascade of new problems.
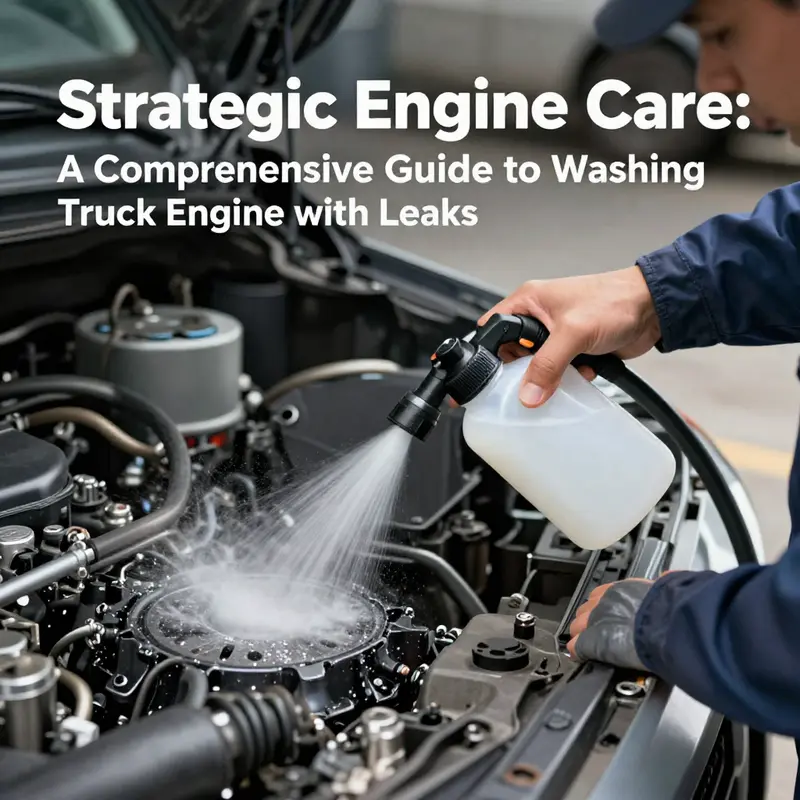
With the scene secured and protection in place, you face the core decision: how to wash a leaking engine without aggravating the leak or compromising sensitive parts. The approach varies with the type of leak because oil and coolant bring different challenges. Oil leaks call for a degreaser, preferably biodegradable and non-corrosive, applied only to oily surfaces and away from electrical components. Let the cleaner dwell for a few minutes to break down greasy residues, then gently scrub with a soft brush or old toothbrush around the suspected leak points—think valve cover gasket, oil pan, or around the oil filter area. A gentle rinse with low-pressure water follows; a spray bottle or a garden hose with a gentle stream is ideal. The emphasis is on avoiding high-pressure washers, which can force water into seals and bearings, potentially winding up with more dramatic issues than grime. After the rinse, you dry the engine using compressed air or by letting it idle briefly. The goal of this drying step is to remove moisture that would otherwise promote rust and could short out electrical paths once power is restored.
If the leak involves coolant or other water-based fluids, the cleaning approach should still be careful, but with additional caveats. Choose a coolant-safe, pH-neutral cleaner to avoid degrading rubber hoses and gaskets. The same sequence applies: protect electronics, work with a light touch, and avoid aggressive scrubbing near the leak source if the area is fragile or actively dripping. If the coolant appears to be leaking from a radiator connection or hose, resist the impulse to scrub aggressively around the seam. Instead, inspect and repair the source first, because a clean surface does nothing to stem a drip if the underlying fault remains present. In other words, cleaning should never replace repair; it is a diagnostic tool that helps you see the leak more clearly but not a substitute for the fix itself.
The guidance above aligns with a broader, safety-centered philosophy of engine maintenance. It emphasizes restraint with cleaner choices and sophistication in technique. It is not about blasting away grime at any cost but about cultivating a method that reveals the leak while preserving the integrity of seals, hoses, sensors, and the electrical system. Those considerations echo the proven strategies for cleaning grease and tar off your trucks fast. The aim is to strike a balance between cleanliness and caution, a balance that protects both the vehicle and the person working on it. The process benefits from a patient, measured rhythm. Instead of rushing to a fully clean engine bay, you move step by step, confirming that every component remains dry where it should be, that openings are covered, and that you have minimized the chance of pushing water into joints where it could cause harm.
A key safety feature of this approach is the explicit limitation on the use of aggressive tools and solvents near critical areas. Do not use gasoline, kerosene, or strong solvents; they are flammable and can degrade rubber seals and paint. Likewise, never use a high-pressure washer directly in the engine bay, because that force can drive water into bearings and electrical connectors. Even seemingly benign cleaners can cause trouble if they are used indiscriminately near wiring or sensors. Alcohol- or acetone-based cleaners should be avoided for the same reason; they can degrade plastics and rubber components. These cautions are not mere cautions, but practical guardrails that keep the cleaning process from turning into a source of new problems, especially when a leak is already stressing vehicle systems.
In this context, a subtle but important tactic is to temporarily cover or seal the leaking area during cleaning. If a leak is active, placing a plastic bag or other temporary barrier over the site can prevent cleaning fluids from mixing with leaking oil or coolant. This reduces the chance of creating hazardous fumes or slipping hazards while you address the source. It also helps keep the cleaning fluids from entering crevices or gaps that would otherwise trap moisture and complicate drying. The objective here is not to hide the leak but to control the environment long enough to analyze and address it without compromising safety.
Ventilation is another cornerstone of safe engine cleaning. Work in a well-ventilated area and keep ignition sources away from the scene. Exhaust fans, open doors, or outdoor spaces can dramatically reduce the risk of fume buildup and fire hazards, especially when dealing with oil and fuel leaks that could emit vapors. If you are in a garage or enclosed space, consider temporary ventilation or extraction to maintain air quality and limit the accumulation of flammable vapors. The NFPA guidelines, which offer broad safety principles for engine cleaning and other maintenance activities, underscore the importance of a ventilated, controlled environment in minimizing fire hazards and exposure to harmful vapors. While the core steps of the wash remain practical and hands-on, connecting them to formal safety standards adds a layer of legitimacy and confidence to the process. For formal guidance, refer to the NFPA resources.
As the cleaning progresses, it is essential to monitor for any signs that you have uncovered the true source of the leak. A thorough inspection after washing—looking for fresh wet spots, seepage around gaskets, or dampness along seams—can reveal whether you have struck the correct target or whether the real fault lies elsewhere. The act of cleaning can sometimes wash away grime that was concealing a small but persistent leak, and the moment you notice a change in the dripping pattern or a new, localized wet patch, you should reassess the situation. If your assessment points to a persistent oil puddle, a smoking engine, a burning smell, or a sudden drop in oil or coolant levels, you should not delay getting a professional diagnosis. These indicators suggest that a gasket, a seal, or even an internal component may be failing, requiring more extensive inspection and repair than a routine wash can provide.
The decision to seek professional help should be clear and timely. If leaks persist after cleaning, or if signs of trouble continue to appear—persistent oil puddles that do not diminish after cleaning, smoke rising from the engine, a burning odor, or unexplained drops in fluid levels—arrange for a certified mechanic to diagnose and address the root cause. The goal is not to delay repairs in the name of a cleaner engine bay, but to use cleaning as a diagnostic tool that clarifies the leak’s location and severity while ensuring that the vehicle remains safe to operate. In many cases, the source may be a failed gasket, a cracked component, or a more serious internal issue that requires professional repair. The difference between a successful wash and a risky one often lies in recognizing when to stop and call in the experts.
Bringing this all together requires a disciplined mindset. The immediate safety measures while washing a leaking truck engine hinge on cooling the engine, isolating electrical risk, protecting sensitive components, choosing the right cleaners, applying them with restraint, and maintaining ventilation and environmental responsibility. The narrative is not one of dramatic action but of careful, methodical steps that reduce risk while enabling a clearer view of the leak’s source. The result is a cleaner engine bay, a safer working environment, and—most importantly—a more accurate understanding of what needs to be fixed. If a reader takes away one principle beyond the practical steps, let it be this: safety is the foundation of any maintenance task, especially when fluids are leaking. A clean bay without safety yields little benefit; a safe approach yields clarity, protection, and the possibility of a timely repair.
To connect this careful approach to broader maintenance practices, consider how the same disciplined mindset applies to other truck-wash tasks. Cleaning strategies that emphasize low-pressure application, targeted degreasers, and the preservation of seals and sensors align with best practices for a range of maintenance scenarios. The same principles that guide safe engine cleaning—protective barriers, controlled environments, and measured, thoughtful actions—also support long-term reliability and safety on the road. This unity of purpose helps fleets and individual drivers alike to manage risk, reduce the chance of unexpected failures, and keep operations running smoothly while still maintaining a level of cleanliness that reflects professionalism and care. For readers seeking related context on how crews manage grime and maintenance in challenging environments, the linked resource offers practical insights into keeping trucks clean and efficient under real-world conditions.
Proven strategies for cleaning grease and tar off your trucks fast
In closing, the act of washing a leaking engine is less about achieving a perfect shine and more about preserving safety, aiding diagnosis, and setting the stage for an effective repair. The steps outlined above—cooling the engine, disconnecting power, wearing proper PPE, protecting electronics, choosing appropriate cleaners, using gentle cleaning methods, temporarily isolating the leak area if needed, maintaining ventilation, and knowing when to stop for professional help—form a coherent, practical framework. This framework ensures that the work you do will not compromise the vehicle’s reliability or the safety of the people around it. It keeps the door open to fixing the leak rather than masking it, and it preserves the engine’s integrity so that a proper diagnosis can follow. The work is careful and methodical, not reckless; and the result is a clearer understanding of what needs attention, a safer work environment, and a step toward returning the truck to reliable service.
External resources follow for readers seeking formal safety guidance and best-practice standards that extend beyond the practical steps described here. For official safety guidelines and broader context on the prevention of fire hazards and electrical risks during engine maintenance, consult the NFPA resources: https://www.nfpa.org/.
Shielding the Circuitry: Protecting Electrical Systems While Washing a Leaky Truck Engine
Preparing and Shielding Critical Electronics
Washing an engine that shows signs of a leak requires more than just degreaser and a hose. Electrical components are delicate. Moisture, even in small amounts, can cause shorts, corrosion, or intermittent faults. Modern trucks rely on complex electronics to manage engine timing, fuel delivery, emissions, and safety systems. One soaked connector can set off a chain reaction of warning lights and driveability problems. That risk makes deliberate protection the first priority before any cleaning begins.
Start with a calm, methodical assessment. Park the truck on level ground with good drainage. Let the engine cool fully. Hot metal and water are a dangerous mix. Visualize every electrical item within or near the engine bay. These include the engine control unit or ECU, the battery and its terminals, the fuse box, alternator, ignition coils, sensors and their connectors, and wiring harnesses routed near the intake and exhaust. Treat each as a separate vulnerability. Aim to prevent water contact entirely rather than just reduce it.
Before applying covers, remove loose debris and heavy grime by hand. A dry brush and a rag will remove surface dirt that can trap moisture. If fluid is pooling under the truck, place absorbent pads or containment trays beneath the leak. This keeps runoff contained and makes it easier to see new drips once cleaning begins. Wear gloves and eye protection; oily residues and cleaning agents irritate skin and eyes.
Disconnecting the negative battery terminal is a simple but powerful safety step. It removes the chance of accidental shorts and prevents the unintended activation of electrical systems during cleaning. Use a wrench to loosen the clamp, then move the cable away from the terminal. Cover the exposed terminal with a non-conductive cap or a thick rag to prevent accidental contact. Never disconnect the positive terminal while the negative remains connected.
Select protective materials that resist tearing and slip. Heavy-duty plastic bags work well. So do reusable silicone sleeves and purpose-built engine-cover garments designed for automotive use. Wrap plastic tightly around battery terminals, the fuse box, and the ECU. When covering sensor connectors or coil packs, use smaller bags or silicone caps that fit snugly. Secure every cover with rubber bands, zip ties, electrical tape, or hose clamps. A loose cover can billow and allow water to pool on connections.
Avoid permanent sealing methods that could trap heat. Engine compartments warm up during operation. Heat trapped under airtight covers may damage wiring insulation or degrade seals. Instead, allow for minimal airflow while ensuring no direct spray can reach components. For devices with vent slots, such as alternators, place a cover that blocks direct spray but leaves edges exposed for cooling.
Protect wiring harnesses by routing them away from the wash area when possible. If harnesses cross near a suspected leak, gently lift and drape them upward. Use zip ties to hold them out of the path of runoff. For connectors that are difficult to reach, use waterproof booties or plastic wrap sealed with electrical tape. The goal is to maintain the connector dry while allowing you to clean oil or coolant residues nearby.
The ECU often sits in a vulnerable spot. It is the brain of the engine and can be catastrophically harmed by moisture. If the unit is externally mounted with removable connectors, consider removing it and carrying it indoors before cleaning. If removal is not practical, ensure the housing is covered with a thick, folded plastic bag that seals at the edges. Do not apply degreaser directly to the ECU or its connectors.
Alternators and starters must also be treated with care. Both contain rotating parts and open vents that invite water into bearings and windings. Cover the alternator with a flexible, breathable shield that blocks direct spray while allowing heat to dissipate. If the starter or alternator is heavily contaminated with oil, clean the surrounding area gently by hand and then dry it thoroughly before starting the engine.
Ignition coil boots and spark plug wells are moisture-sensitive. A wet boot can cause misfires. Use individual silicone sleeves for coil boots or place small plastic bags over boots and secure them tightly. When cleaning around these areas, use a brush and degreaser sparingly and wipe away residues rather than rinsing vigorously.
Sensor connectors, especially those near the exhaust manifold or intake, are often small and tucked into tight spaces. Block them with tiny pieces of plastic or reusable silicone caps. If a connector has a secondary locking tab, ensure it remains engaged before covering. If a connector shows signs of corrosion or loose pins, flag it for repair after cleaning.
Fuse boxes are compact and contain many vulnerable circuits. A small amount of water inside a fuse box can short multiple systems. Either remove the fuse box cover and place it somewhere dry, or wrap the entire box in a thick plastic bag sealing around its base. Check that vents or drainage pathways are not obstructed by the cover.
Keeping the air intake dry is critical for preventing hydrolock and sensor damage. Block the intake with a dry rag or a fitted plastic cap. Remove or secure any cyclone or pre-cleaner elements that could trap water. Ensure the ducting downstream is not left unprotected.
When all covers are in place, review every secured point. Tug gently on each cover to verify the seal. Look for gaps where water could stream in under pressure. If you applied tape, ensure it will not leave adhesive residue on delicate components. Rubber bands can snap when stretched; replace any strained bands with a new one.
Cleaning technique matters as much as the covers. Avoid direct, forceful sprays aimed at connectors or seals. Use a low-pressure outlet or a spray bottle for rinsing. Apply degreaser only to greasy areas and allow it to dwell for no more than ten minutes. Use soft brushes to dislodge stubborn grime. Work from the cleanest area toward the dirtiest, and rinse away from electrical parts. Keep water temperature moderate to prevent thermal shock to cooled parts.
Drying starts while the cover is still on. Use compressed air to blow moisture away from crevices and connector backs. If compressed air is not available, wipe exposed surfaces with clean, dry microfiber cloths. Remove the protective covers one at a time, inspecting each component before uncovering the next. This prevents the release of trapped water onto newly exposed hardware.
A short idle run can help evaporate residual moisture, but only after the engine has been inspected and covers removed. Monitor the instrument panel for warning lights. Listen for unusual noises and watch for smoke or smells. If anything seems off, shut the engine down immediately and re-check wet areas.
Aftercare, Inspection, and Troubleshooting
Once the wash is complete and covers are removed, conduct a thorough inspection. Check connectors for moisture, grime, or visible corrosion. Look for clean contact surfaces and ensure pins are straight. If you find dampness, dry the area thoroughly with compressed air and apply a small amount of contact cleaner designed for electrical systems. If corrosion is present, plan for connector repair or replacement.
Assess the battery terminals for tightness and cleanliness. Corrosion builds quickly after exposure. Clean terminals with a brush and a mild neutralizing solution if necessary, then tighten clamps to the specified torque. Reconnect the negative terminal last, and ensure the cable path is secure and not resting on areas that get hot.
Check fuse integrity and relay operation. If any fuses melted or showed signs of water ingress, replace them with the correct amperage fuses. Avoid swapping in higher-rated fuses to mask an underlying problem. If multiple relays failed, it may indicate a deeper issue from water exposure that requires professional diagnosis.
Monitor the truck for returning leaks. Washing often reveals the true origin of seepage by removing built-up grime. Clean lines, gasket faces, and mating surfaces are easier to inspect when free of contaminants. Use a flashlight and feel for dampness with a clean hand while the engine is cold. If the leak is still present, do not delay repairs. Continued operation with a leak can damage seals and electronic systems.
If you detect electrical anomalies after cleaning, follow a systematic approach. Check battery voltage and charging system output. Inspect ground points and ensure they are clean and tight. Test any suspect sensors or modules with a diagnostic tool if available. Many intermittent faults come from a combination of moisture and a marginal connection that only needs cleaning or tightening.
Certain problems are best left to professionals. If the ECU was wet and now behaves unpredictably, seek a certified technician. If you smell burning or see smoke, shut down and tow the truck. Internal engine leaks that spray oil onto alternators or wiring may require component replacement. Similarly, a coolant leak that seeps into wiring harnesses under the intake often needs skilled disassembly for a proper repair.
Adopt a routine for future washes that prioritizes protection. Keep a small kit of supplies on hand: heavy-duty bags, silicone caps, zip ties, rubber bands, and a rag. A pre-wash checklist saves time and prevents mistakes. Encourage team members to follow the same steps and to report any component that looks worn or at risk.
If you operate or manage a truck wash facility, integrate these protection steps into your standard operating procedures. Clear signage and training reduce accidents. For larger operations, consult guides on facility planning and workflow to balance efficiency and safety. One useful resource on this topic is the facility management page that outlines ways to run a safe, compliant truck wash operation: facility management for truck wash businesses.
Mistakes to avoid are as important as recommended actions. Never use flammable solvents for degreasing. Do not aim high-pressure water at seals, bearings, or connectors. Avoid leaving covers loosely fitted. Do not start the engine if you suspect water is trapped inside a component. Each misstep can escalate into a complex repair.
A careful washing routine preserves both the engine and the electronics that control it. Protecting electrical components prevents costly downtime and extends system life. Clean first with intent, then expose only what you must. When uncertain, step back and call in a pro. A proper wash reveals leaks without introducing new ones.
More detailed guidance on safe engine cleaning practices can be found in the referenced external resource. For additional reading, see: https://www.autoblog.com/2025/08/07/how-to-safely-clean-truck-engine/
Leak-Smart Cleaning: Tailoring Engine-Wash Techniques to Oil and Coolant Leaks in Heavy-Duty Diesels
When a heavy-duty diesel truck shows a drip or a sheen forming on metalwork beneath the hood, it marks more than a messy engine bay. It signals a leak that can quickly escalate into a reliability issue or environmental risk if not handled with care. In these moments, washing the engine is not merely about appearances; it is a deliberate, safety-minded process that can reveal the true source of trouble while protecting sensitive components. The approach is not a one-size-fits-all routine. It hinges on diagnosing the leak type—oil, coolant, or a blend of fluids—and then applying a method that cleans without compromising seals, wiring, or plastics. The goal is to clear away grime enough to see the leak clearly, not to flood the engine with water or solvent that could mask the fault or ruin nearby parts. This chapter unfolds as a continuous narrative of practical decisions, grounded in safety, environmental considerations, and the realities of operating in busy fleets that run in regulated zones and urban corridors.
The first step is safety and preparation. Stop the vehicle and ensure the engine is cool before touching anything around the bay. A hot engine can suffer from thermal shock if treated with aggressive cleaning, and hot fluids or hot metal can create dangerous splashes. Park on a flat, well‑ventilated surface that has a proper drainage setup to catch runoff. In many yards, that means a concrete floor with a defined sump or pit that prevents contaminants from seeping into the ground. This is not just about cleanliness; it is about preventing environmental contamination and protecting maintenance staff from slips and burns. With the engine at rest, put on appropriate PPE—gloves, eye protection, and a mask if vapors are a concern. Covering exposed electrical components is a crucial preparatory move. Plastic bags or waterproof covers over battery terminals, the fuse and relay area, ignition coils, the alternator, and air intake paths create a protective barrier against water intrusion. The goal is to shield the electronics and sensors while allowing safe cleaning around the outside of the engine. A light layer of plastic sheeting or taped openings can prevent splashes from migrating into sensitive corners.
Once preparation is complete, the choice of cleaning method must be tied to the leak type. Oil leaks, which are the most common in aging fleets and in vehicles that accumulate grime during long routes, require a dedicated engine degreaser. The cleaner should be non-corrosive and preferably biodegradable to minimize environmental impact. Apply the cleaner to oily areas rather than sweeping it across every surface; focusing on the gasket seams around the valve cover, oil pan, and the oil filter housing makes the most sense. Let the degreaser dwell for a moderate period—about five to ten minutes—so it can break down grease and tar-like residues that build up over time. After the dwell, gently scrub with a soft brush or an old toothbrush, taking care not to abrade rubber hoses or delicate metal finishes. Rinse using low-pressure water to avoid forcing liquid into seals and bearings. A spray bottle or a garden hose with a gentle stream is sufficient for a controlled rinse. High-pressure washers should be avoided in the engine bay because they can push water into seals, bearings, and electrical connections. The important follow‑up is thorough drying. Use compressed air to evaporate moisture in crevices, and consider a brief idle run to help evaporate remaining moisture from metal surfaces. This moisture management reduces rust formation and lowers the risk of electrical shorts that can mimic or mask new leaks.
If the leak is coolant or another water-based fluid, the approach requires its own safeguards. Choose a coolant-safe, pH-neutral cleaner to avoid harming rubber hoses, gaskets, or seals. The cleansing steps are similar to the oil scenario: apply to the affected area, let it sit briefly, and rinse with a gentle stream. The emphasis here is to avoid aggressive scrubbing near radiator connections or hose fittings where the solvent could loosen clamps or accelerate wear. If coolant pooling or a leak originates near a radiator hose connection or a fitting, it is wise to treat cleaning as a diagnostic step rather than as a cure. In those cases, the true fix often lies in replacing a gasket, tightening a clamp, or repairing a hose rather than simply washing away the evidence. A careful inspection after washing will reveal whether the source is indeed the inlet or outlet of a cooling circuit or a more subtle seam. The cleaner used for coolant should be compatible with the materials in the cooling system; otherwise, it can degrade hoses or gaskets over time.
Across both leak types, a key principle is avoiding the dangerous methods that can aggravate the problem. Gasoline, kerosene, or other strong solvents may be tempting for their apparent strength, but they can degrade rubber seals, plastics, and coatings. A high‑pressure washer aimed at the engine bay is another misstep: the force can push water deep into bearings, electrical connectors, and gaps where it will not drain easily. Alcohol or acetone‑based cleaners can also damage plastics and dyes and should be avoided. The overarching message is simple: use purpose‑built cleaners that are compatible with automotive materials and are designed for engine cleaning, and apply them with patience rather than brute force.
After the washing, a disciplined post‑cleaning routine matters. Inspect the cleaned area closely for fresh leaks or any water streaks that point to the earlier culprit. Check the levels of oil and coolant after the cleanup, and top them up if needed. It may seem counterintuitive, but cleaning can reveal the actual leak source that grime previously obscured. A fluid level check helps distinguish a mild leak from a more systemic issue and guides the next steps. Ongoing monitoring is equally critical. If oil drips resume or if coolant wet spots reappear after a day or two, you may be looking at a gasket failure, a cracked component, or another internal problem that warrants professional diagnosis.
When should professional help be sought? The signs are clear and persistent. Oil puddles that keep returning after cleaning, smoke or a burning smell indicating overheated components, and noticeably low oil or coolant levels despite regular tops‑ups are red flags. In such cases, a certified mechanic should assess the integrity of gaskets, seals, and internal passages. Cleaning alone cannot resolve certain root causes; it can, however, dramatically assist the diagnostic process by removing grime that hides the symptom and by providing a clear view of where fluid appears to be leaking from. In fleets that operate under strict environmental rules or in urban repair yards, professional service also brings compliance benefits, ensuring that the disposal of used cleaners, oily rags, and contaminated water follows local regulations and corporate policies. The broader takeaway is that cleansing is a visibility tool, not a treatment in itself for significant leaks.
A broader context for these practices emerges when we consider the realities of heavy‑duty operations in regulated zones. Fleets that run in dense urban corridors or in environmentally sensitive areas face additional constraints. Environmentally friendly, non‑abrasive cleaners minimize the risk to water sources while protecting the integrity of rubber hoses and plastic fittings. Water management matters too. Dirty wash water, if not contained and treated properly, can become a pollutant. That is why the careful staging of a wash, the use of low‑pressure rinsing, and the containment of runoff are not administrative hurdles but essential components of responsible maintenance. In this spirit, a generic fleet maintenance philosophy emerges: keep the engine bay cleaner to see the fault clearly, use cleaners that respect the environment and materials, and preserve the life of the components that keep trucks rolling.
To connect this approach with the broader practice of maintenance in the field, consider the idea of leak sightlines. A workshop or yard that routinely documents leak events—where they occur, their type, and how they responded to cleaning—builds a practical map of potential problem areas. Minor leaks near noncritical areas can be managed with careful cleaning while keeping an eye on the same zones for new signs of seepage. More significant leaks, especially those involving the cooling system or lubrication system, should trigger a formal inspection. The documentation should record the leak type, the observed response to cleaning, any adjustments made to fluid levels, and the subsequent inspection results. This approach supports a learning loop that helps maintenance teams identify recurring failures, such as gasket wear, hose degradation, or aging seals, and then prioritize replacements during scheduled maintenance.
In considering the educational dimension of this practice, it is helpful to keep in mind the environmental imperatives that govern modern truck maintenance. Many fleets operate in zones where waste management, runoff control, and air quality considerations are strictly regulated. The choice of cleaners becomes a statement about stewardship. Non‑abrasive, biodegradable degreasers reduce the risk of harming soil and waterways, while water‑based cleaners with low volatile organic compounds limit emissions and odors. The mechanical portion of the process—scrubbing with gentle brushes, using compressed air for drying, and employing low‑pressure rinses—reflects a practical balance between effectiveness and preservation. Cleaning is thus not an isolated chore but a component of a broader maintenance discipline that includes inspection, timely part replacement, and environmental responsibility.
From a practical perspective, the narrative of cleaning by leak type becomes a coherent practice because it aligns with the common failure modes of heavy‑duty engines. Oil leaks often originate around gasket interfaces where heat cycles take a toll, or at oil pan seals that degrade with time. Coolant leaks frequently involve hose connections, clamps, or radiator seams that show signs of stress after years in service. By cleaning with the specific aim of exposing these fault lines, maintenance teams improve their chances of detecting gradual wear early. The process can also help differentiate a leak from a stray spill that occurred during pouring or topping up fluids. In this sense, the act of washing serves as a diagnostic aid when done with care and discipline rather than as a mere attempt to hide a leak beneath a layer of grime.
For readers curious about how these principles translate to fleet realities, the next practical step is to align the wash technique with your shop floor capabilities and environmental policies. A well‑designed wash plan considers the availability of biodegradable cleaners, the presence of protective covers for electrical components, and the availability of safe drying methods like compressed air. It also recognizes the need to document and report leak findings in a way that supports maintenance scheduling and regulatory compliance. The underlying philosophy is straightforward: preserve engine life, minimize downtime, and protect the environment by choosing the right cleaner for the leak type and by applying a measured, respectful cleaning method.
In the spirit of continuous improvement, it is worth noting a widely accepted practice in the industry: keep a simple, durable checklist for each wash. The list can include: engine cool‑down confirmation, leak type assessment, protection of electronics, selection of cleaner, dwell time, gentle scrubbing, low‑pressure rinse, thorough drying, fluid level verification, and leakage monitoring over the ensuing days. While this chapter charts the method by leak type, the checklist ensures consistency across shifts and technicians. The result is a more predictable maintenance process that yields clearer insights into where a leak originates and how it should be addressed, whether through gasket replacement, hose repair, or more extensive engine service.
The internal logic of this approach also dovetails with the realities of modern truck maintenance that emphasize safety, accountability, and environmental responsibility. As fleets grow and routes become more complex, the capacity to rapidly identify and verify leak sources becomes a critical asset. The practice described here respects the engine’s delicate balance of seals, sensors, and wiring, while providing a practical workflow that technicians can follow without risking collateral damage. It is not about aggressive cleaning; it is about intelligent cleaning—an approach that reveals the true fault without creating new ones. For fleets navigating regulatory expectations around emissions and waste, this alignment is essential. It supports not only the mechanical health of the engine but also the long‑term viability of the maintenance program and the communities that host the trucks’ operations.
To connect this discussion to broader professional resources, consider that the cleaning strategies described here live best when embedded in a culture that values compliance and continuous learning. For fleets that want to deepen their understanding of industry expectations around cleanup and environmental stewardship, see the discussion on truck wash industry compliance and emissions regulations. This resource anchors the practical steps above in a regulatory and best‑practice context, helping fleets translate hands‑on technique into responsible operations. As you apply these methods, you will likely notice that the moment you stop a leak and clean the area with care is also the moment you empower your team to prevent a repeat event and to manage the environmental footprint of your operations. In that sense, the chapter you have just read is not a single procedure but a lens on how to think about leaks, cleaning, and maintenance as parts of a disciplined, forward‑looking fleet program.
External resource: https://www.osha.gov
Final thoughts
Maintaining a leak-free and efficient fleet begins with proper cleaning methods for truck engines. By following the detailed safety protocols, protecting sensitive electrical components, and applying targeted cleaning techniques according to the type of leak, fleet managers can effectively manage their vehicles without causing further damage. This not only preserves the operational efficiency of the trucks but also extends their lifespan and ensures safer journeys. Regularly updating your maintenance knowledge and adhering to best practices is key in optimizing your fleet operations.