Maintaining a truck’s paint finish is crucial for operators and fleet managers invested in their vehicles. A well-maintained exterior not only preserves aesthetic appeal but also shields against long-term damage. This article outlines the essential strategies for washing trucks without scratching the paint. Each chapter will delve into the right products, preparation and environmental considerations, effective washing techniques, and post-washing care — all aimed at securing a shiny, scratch-free finish for your fleet.
The Gentle Path to a Pristine Finish: Mastering Scratch-Free Truck Washing Through Smart Product Selection

Choosing the right cleaning products is more than a matter of scent or suds. It anchors every stage of a scratch-free wash and guards the truck’s paint from micro-scratches that accumulate with careless cleaners, gritty tools, or harsh routines. When you start with a purpose-built approach—one that favors pH neutrality, paint-safe chemistry, and a respect for the clear coat—you set the foundation for a finish that shines longer and resists dulling. The logic is straightforward: automotive-oriented soaps are engineered to lift dirt without dissolving wax, stripping sealants, or roughing the surface, while household detergents are not. Dish soap and laundry powders often sit at the far end of the pH scale, tending toward alkaline or abrasive properties that can degrade wax layers and erode protective coatings over time. The consequence isn’t obvious after one wash; it accumulates as micro-scratches appear and the paint loses its luster. A well-chosen product lineup, used with the right technique, keeps the paint supple, the color true, and the finish resilient against the inevitable grime of road life.
The core choice is to reach for dedicated car or truck wash soap that is pH-neutral or only mildly acidic. These formulas are designed to emulsify dirt and lift contaminants without aggressive interaction with the clear coat. They are formulated to work with the paint system and sealants found on most modern trucks, so you don’t have to guess whether a cleaner is safe. In practice, this means avoiding any cleaner labeled as a heavy degreaser, a strong solvent, or an all-purpose household cleaner when the goal is paint preservation. The temptation to reach for a stronger cleaner in the name of “getting the job done” is strong, especially after a long road trip or a stubborn stain, but the risk to the finish is not worth the momentary relief. A milder, vehicle-specific wash, applied with patient technique, tends to outperform quick, harsh measures, especially on newer coats and delicate finishes such as pearl or metallic paints.
Beyond pH, the soap’s chemistry matters in how it interacts with wax and sealants. When you wipe away the dirt, you’re not merely removing grime; you are preserving the protective layer that locks in shine and guards against UV aging and micro-marring. A wash soap that is gentle on wax will not strip the protective film with everyday use. In contrast, cleaners with stripping agents or aggressive surfactants can strip, dull, or leave behind residues that attract new grime. The subtle difference is often invisible after a single wash but becomes evident after a few cycles—the paint becomes dull, water behavior shifts, and the polish job loses its pop. This is why product selection is a long-term investment in the truck’s appearance and resale value.
The best practice is to adopt a two-bucket wash ritual with a high-quality microfiber wash mitt. The distinction between a sponge and a microfiber mitt is more than tactile; it’s about abrasion control. A smooth, plush mitt is designed to lift dirt off the surface while keeping grit suspended in the wash water, where it can be rinsed away rather than dragged across the paint. This is where the science of lubrication meets the art of technique. When you dip the mitt into the soapy water and glide it over the body, you want a calm, non-scratch contact—no heavy scrubbing. Light pressure and a gentle circular or straight-line motion, depending on the area, are plenty to lift embedded grime. The rinse water should remain clear, signaling that the dirt is being removed rather than redeposited.
The two-bucket method is not a gimmick; it is a concrete hedge against abrasive grit reintroduction. One bucket contains clean water for rinsing the mitt, the other holds the soapy solution for washing. After each section, a quick dip in the clean water bucket releases the trapped dirt before the mitt touches the soapy water again. This simple step dramatically reduces the risk of dragging grit across the paint and is a quiet reminder that patience often beats brute force. In practice, you work from the top down—the roof, then the windshield and pillars, followed by the cab and doors, and finally the lower panels and bumpers. Washing top to bottom prevents dirty water from running onto areas you’ve just polished, and it keeps the lower panels from bearing the brunt of gravity’s dirt shower.
Even the choice of washing aids connects to the broader aim of preserving finish integrity. A soft microfiber wash mitt, supplemented by a gentle brush made for spot-cleaning stubborn grime, supports a careful approach to entrenched contaminants, such as bug residue or sap, without leaning into abrasive pressure. When encountering stubborn spots, you can use a bit of extra time and a lighter touch rather than scrubbing with force. If a spot still clings, switch to a dedicated tool for that area only and keep the rest of the body protected. The idea is to keep friction at a minimum, and to treat the surface like a surface you want to preserve rather than wear away.
There are moments when the nature of the soil calls for a targeted strategy. For example, tar and asphalt residues demand a different kind of solvent action than general dirt. In such cases, a dedicated tar and asphalt remover that is labeled non-corrosive and safe for paint becomes appropriate. The key rule with any specialty cleaner is to test a small, inconspicuous area first. A simple dab and wait test can reveal whether a cleaner attacks the finish or simply loosens the grime for easy removal. If you choose to pursue this route, remember to follow the product’s instructions to the letter, including any dwell times and pre-rinse requirements.
The vehicle wash is not a stage for improvisation. Instead, it is a chore that rewards a measured, deliberate approach. In this context, the role of branding is deliberately minimized in favor of chemistry and process. You do not want to rely on “one-ingredient fixes” that promise miracles but deliver risk. Instead, select a reliable, purpose-built wash system that is designed for automotive finishes. The objective is clear: lift dirt while preserving clarity, gloss, and protective layers. The difference between a wash that suffices and a wash that safeguards the finish is often a matter of subtle choices—neutral pH levels, nonabrasive surfactants, and the absence of harsh solvents.
To address the broader question of contaminants, consider the daily realities of a truck’s life. Dust from dry roads, road grime, brake dust from wheels, and organic deposits all accumulate in different patterns and with different levels of adhesion. The wash soap’s job is to emulsify or suspend these substances so they can be rinsed away, rather than broken free through aggressive scrubbing. The paint’s surface finish also plays a part in how you observe dirt. Some finishes reveal contamination more readily, such as fine micro-scratches that look like faint trails when light catches them. A careful eye, guided by experience, helps you decide when a second pass is warranted or when a different area requires attention.
The wheels and tires are a special case. They collect brake dust and road grime that carries gritty minerals. It is prudent to use a separate mitt for the wheels and tires to avoid cross-contamination. A wheel-specific cleaner, applied with a dedicated brush, allows you to break free of tough grime without risking the body finish. Rinse thoroughly, then rinse again, ensuring that any residue from wheel cleaning is gone before you resume washing the body. The separation of tools is a small but meaningful ritual that reinforces the idea that care in one area should not compromise another.
When the washing is complete, the final rinse becomes the closing act. A thorough cleansing to remove all soap residue ensures that no films stay on the surface, which can otherwise attract new dirt or leave a hazy veil when the sun reappears. Drying immediately with a clean microfiber towel is equally important. Allowing water to air-dry can leave spots and micro-marring along edges and trim. The drying sequence—top to bottom, with gentle, deliberate passes—echoes the washing philosophy: patience over force, restraint over haste. If you notice any residual spots, you can handle them with a light, targeted pass rather than reworking large areas, preserving the work you have already completed.
The choice of products is not a decision made in isolation. It is part of a broader care routine designed to keep a truck’s appearance aligned with its performance. A wash that respects the paint’s integrity will also respect other protective layers, helping to extend the life of waxes or sealants that often serve as the first line of defense against environmental exposure. The habit of choosing the right products, applying them with the right tools, and following a disciplined procedure becomes a habit that pays dividends in the form of better-looking trucks, easier maintenance, and higher owner satisfaction.
For those seeking a succinct path through the noise, the recommended approach is simple: opt for purpose-built, paint-safe wash products that emphasize gentle cleansing, avoid anything aggressively abrasive or highly alkaline, and pair them with soft microfiber tools and a two-bucket workflow. Add a dedicated wheel routine and a careful, top-to-bottom wash order, and you have a reliable method for keeping paint in prime condition. If you ever need guidance on handling stubborn contaminants while maintaining surface safety, consider turning to proven strategies for cleaning grease and tar off your trucks fast, which offers a concise framework for tackling tough soils without compromising finish integrity. Proven strategies for cleaning grease and tar off your trucks fast.
As the truck community continues to share experiences and refinements, this approach remains a dependable baseline from which to grow. The specifics of a given week—sunlight, temperature, or the particular mud’s hardness—may require small adjustments, but the core principles endure: cleanliness with care, protection with purpose, and a willingness to slow down enough to protect what makes the truck look good in the first place. In the end, the paint’s resilience comes from a holistic routine, not a single splash of soap. The right products, used thoughtfully, deliver a result that’s more than clean; it’s a testament to the art of preserving a vehicle’s finish through disciplined practice.
For those who want to broaden their understanding beyond the wash itself, it’s worth noting how the right product choices tie into long-term fleet care. When maintenance routines are consistent, protective coatings and clean finishes contribute to a professional appearance that supports a fleet’s brand, driver pride, and resale value. In this context, the decision to invest in quality wash soaps and appropriate tools becomes part of a larger conversation about fleet standards, safety, and the daily realities of keeping a heavy vehicle in top shape. The chorus of benefits—shining paint, easier maintenance, and a longer-lasting finish—builds a compelling case for taking the time to select the right products and to wash with care.
External resource: For a broader overview of car washing best practices, see https://www.consumerreports.org/care-maintenance/how-to-wash-a-car-safely/.
Ready, Respect, Rinse: Preparation and Environmental Stewardship for Washing a Truck Without Scratching the Paint
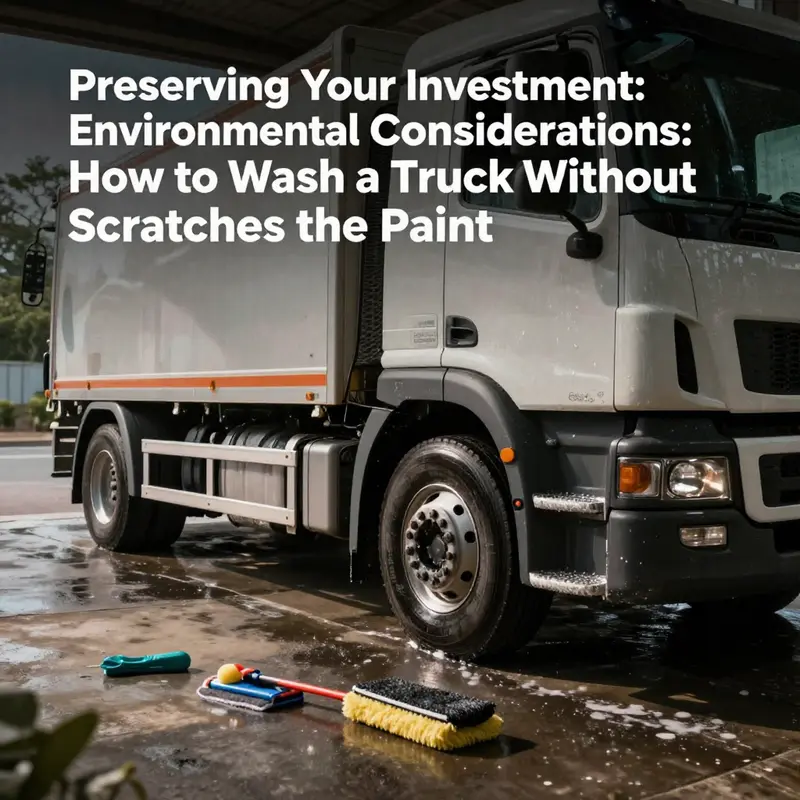
Washing a truck without scratching the paint begins long before the nozzle hits the surface. It starts with deliberate preparation and a mindset that blends meticulous technique with respect for the environment. In practice, preparation means curating the right tools, selecting the right products, choosing a suitable location, and understanding how water and runoff interact with the world around you. This chapter builds a foundation that supports every clean finish you want to achieve. It explains not only the how but also the why—why certain methods reduce the risk of micro-scratches, why a shade-grown sun can save you soap and time, and why choosing the right solutions matters for the long-term health of the truck’s finish and the waterways beyond. The goal is a wash that leaves a showroom shine without removing waxes, sealants, or protective coatings, and without creating unnecessary environmental stress from careless runoff. In this sense, preparation is not a separate step; it is the first act in a broader ritual of care that respects both the vehicle and the environment it occupies.
The tools you assemble set the stage for everything that follows. A high-pressure washer is useful, but it is only a tool, and its effectiveness hinges on how it is used. A bucket and a secondary bucket are not mere frills; they are central to maintaining a clean working environment for the paint. Soft sponges or microfiber cloths are essential for lifting dirt without grinding it into the surface. A dedicated car wash solution, free of harsh alkalinity and insoluble abrasives, protects the finish while breaking down grime. A tire cleaner and a glass cleaner complete the suite of responsibilities, ensuring that wheels and windows receive attention separate from the body without cross-contamination. And a clean drying towel—soft, plush, and lint-free—caps the process by absorbing remaining moisture without pulling or dragging any residue across the finish.
The location where you wash matters as much as the tools you bring. An ideal environment is flat and open, with drainage that directs runoff away from sensitive areas. Commercial wash bays or designated outdoor spots with proper containment are preferable to improvised spaces that funnel dirty water into storm drains or groundwater. If you do wash in an open area, mind the path of the water so it doesn’t flow toward flower beds, sidewalks, or street grates. This is not merely about cleanliness; it is about stewardship. By planning a space with good drainage and minimal risk of splatter or splash, you reduce the chance that grit and soap solution will be carried into places where they do not belong. Shade plays a practical role as well. Direct sun accelerates evaporation, which can leave soap film, water spots, and hidden dirt exposed only after the surface heats up. Washing in a shaded spot or during early morning or late afternoon hours keeps the surface cooler, allowing you to see dirt more clearly and work more precisely without rushing cleanup while the sun blazes overhead.
Environmental considerations are not afterthoughts but integral elements of an effective wash routine. The emphasis is on biodegradable, pH-neutral car wash products that are gentle on protective wax and sealants and friendlier to the aquatic environment. The goal is to avoid cleaners with high alkalinity or gritty abrasives, which can strip protective layers, accelerate paint aging, and create more work later as you chase micro-scratches with increasingly aggressive methods. The choice of product should be guided by its ability to balance cleaning power with paint-protective behavior. When possible, select solutions designed for automotive finishes that rinse away cleanly and leave minimal residue. This is not about compromising cleanliness; it is about aligning with a responsible approach to fleet maintenance that respects the ecosystem.
Time itself is part of the preparation equation. Washing during peak sunlight or heat can cause the cleaning solution to dry too quickly, leaving streaks or spots and making it harder to see and treat areas that require attention. Cool temperatures and low sun intensity reduce evaporation and help you monitor the process in real time. Early mornings or late afternoons, especially in warm climates, become not only more comfortable but also more efficient. A well-timed wash saves water—read as less runoff and less rework—because you are not battling rapid drying that can trap grit within nooks and crevices. This is why the environmental aspect of preparation is really about choosing the right moment and the right method, not simply about buying greener products. When your plan respects the weather, you also respect the paint by allowing you to wash with calm precision rather than hurried motions.
With the right tools and the right environment, you begin the washing procedure itself. The most fundamental rule is to start with a thorough rinse. A garden hose or low-pressure source helps remove loose dirt, sand, and debris from the top of the truck down to the lower panels, reducing the chance that gritty particles will be dragged across freshly cleaned surfaces. The top-to-bottom approach is more than intuitive; it is protective. Dirt and runoff flow downward naturally, so cleaning from the top first prevents the grime from rolling onto areas you’ve already cleaned. This simple sequence is the backbone of a scratch-minimizing routine. It is paired with another discipline that cannot be skipped: the two-bucket method. One bucket holds clean water for rinsing the mitt, while the other holds the soapy solution. The process of dipping the mitt into the sudsy water, washing a defined section, and then immediately rinsing the mitt in the clear water bucket keeps grit from being reapplied to the painted surface. It sounds simple, but it is one of the most effective barriers against micro-scratches. If a stubborn spot resists the gentle wash, you may use a soft-bristled brush lightly with soapy water, but never apply force. The goal is to lift, not grind, dirt away. This mindset—gentle contact, mindful pressure, and a clean rinse—transforms washing from a routine into a careful act of stewardship.
A crucial, sometimes overlooked, element is how you manage the wheels and tires. The wheels are a repository for brake dust, road grime, and other abrasive residues. A dedicated wheel-and-tire cleaner, used separately from the body wash, protects the paint from abrasive contaminants carried on the mitt if cross-contamination occurs. Apply the cleaner to the wheels, allow it to dwell briefly according to the product’s guidance, and scrub with a stiff-bristled wheel brush before a thorough rinse. Do not reuse the same wash mitt for the body on the wheels; cross-contamination can transfer harsh particles back to the glossy panels. Even a careful approach here pays dividends in preventing tiny scratches from recurring as you move to the bodywork.
Rinsing and drying steps need their own discipline as well. After washing each section, rinse thoroughly to remove soap residue, then perform a final rinse to ensure nothing is left to dry in place and create spots. Drying immediately with a clean, soft microfiber towel prevents water spots and helps preserve the finish. The microfibers’ plush structure is designed to lift water away rather than rub it into the paint, reducing the risk of introducing micro-scratches during drying. Start from the top and work downward again, mirroring the washing order. A mindful drying routine completes the cycle of care that began with preparation and environmental awareness. The result is a finish that looks freshly waxed and smooth, with no telltale scratches or water marks to mar the glossy surface.
The environmental stance carried through this chapter is not a separate instruction set but an integrated philosophy. It emphasizes products that are biodegradable and pH-neutral, practices that avoid unnecessary chemical exposure to the paint, and a water-conscious workflow that minimizes waste and contamination. The approach also considers the broader impact of the wash on waterways and ecosystems. By choosing a space with proper drainage, by controlling the wash’s path to prevent pollutant runoff, and by selecting products that break down cleanly, you reduce the environmental footprint of each truck wash without sacrificing the cleanliness or appearance of the vehicle. This is a practical demonstration of how maintenance and responsibility can align. It proves that a meticulous, paint-safe wash can be achieved without compromising environmental health, and that the best results come from a disciplined routine that treats dirt as something to be managed, not merely tolerated.
For readers who want to explore how these practices fit within broader standards, there is a growing body of guidelines that connect everyday maintenance to industry-wide commitments. The emphasis on responsible runoff management, proper containment ofdirty water, and the use of pH-neutral detergents is consistent with the standards that govern modern truck wash facilities. See the discussion on truck wash industry compliance and emissions regulations for a broader perspective on how these practices align with regulatory expectations and the evolving priorities of fleet maintenance. This link anchors the practical steps here to a larger framework of environmental stewardship and professional responsibility that transcends a single vehicle wash. It reminds us that precision in cleaning is part of a bigger picture of care—care for the vehicle, care for the environment, and care for the people who work with both every day.
As you move from preparation through the washing sequence to drying, the arc of care becomes clear. Preparation shapes everything that follows; the environment you choose to work in protects both the paint and the ecosystem around you. The tools you select and the methods you employ amplify the effectiveness of your effort, turning a routine chore into a controlled, repeatable process that reduces the chance of micro-scratches and preserves protective finishes. This coherence between preparation, technique, and environmental responsibility is what turns a simple wash into a trusted practice for any fleet operator or enthusiast seeking long-lasting paint health. The next steps—whether continuing with paint protection layers, or transitioning to an interior detailing or wheel restoration—are easier and more predictable when the groundwork has been laid with care, precision, and respect for the world in which the truck travels. In one sense, the chapter on preparation and environmental considerations is the map; in another, it is the infrastructure that makes every subsequent maintenance action accurate, efficient, and respectful of the vehicle and its surroundings.
Washing Techniques for a Scratch-Free Finish on a Truck: A Gentle-Hand Approach to Preserving Paint
A clean truck is not just a matter of appearances; it is an investment in the metal, clear coat, and the long life of the finish that keeps a fleet looking professional and protecting value over time. The secret to achieving a true scratch-free wash lies in a disciplined, almost ritualistic approach that treats dirt as a hazard to the paint rather than as a nuisance to be eradicated with brute force. When you wash a truck with care, you create a micro-environment where dirt is loosened and lifted away, never ground into the surface. The aim is not to remove grime by sheer force but to lift it away using soft tools, correct cleaners, and a sequence that minimizes friction. This chapter binds practical steps with the reasoning behind them, offering a cohesive path from preparation to the final dry, so every wash becomes a safeguard for the finish rather than a risk to it.
The first breath of any successful washing routine is choosing the right tools and setting. The choice of soap matters as much as the choice of mitt. A dedicated, pH-neutral wash soap designed for automotive finishes is essential. Household cleaners, including dish soap, laundry detergents, or any product with strong alkalinity or abrasive carriers, strip wax and pose a slow threat to the protective layers that defend the paint. When the duty is to preserve, not just to clean, gentleness is the operating principle. With that foundation, you assemble your polishing of the surface with soft tools. A high-quality microfiber wash mitt or a soft chamois is not a luxury; it is the primary line of defense against micro-scratches. These tools are engineered to slide across painted surfaces, lifting particles rather than dragging them across the finish. Sponges and old towels often harbor grit that can be ground into the paint. If you want to know how fragile the surface can be when treated roughly, you only need to hear the sound of a light scraping through a smooth panel—a sound that should never occur on a well-tended finish.
Preparation extends beyond selecting soaps and mitts. The environment in which you wash matters as much as the equipment you use. Direct sunlight is an unkind companion to washing. Heat accelerates drying, which sounds efficient until you realize it also traps mineral deposits and leaves unsightly water spots. When water dries quickly, dirt particles that would otherwise be carried away can become embedded or dragged across the paint as the sun bakes the droplets into tiny, etched halos. The shade, or cooler hours, helps you see where the dirt actually sits and how resistant it is to removal. If you can, wash in a shaded bay, or dawn and dusk when the light is gentler. A car can emerge from such a ritual with a finish that looks brighter, cleaner, and more uniform because you have avoided the heat that makes you rush and skimp on technique.
Rinse is the quiet hero of scratch-free washing. Begin with a thorough pre-rinse to remove loose dust and large debris. The top-down method matters here as much as it does in the washing stage. Start from the roof and move down to the windshield, down the sides, and toward the lower panels. A garden hose with gentle, steady pressure is ideal for this step. If you notice a stubborn patch of grime—bird droppings, tar, or tree sap—a pre-rinse may reveal how stubborn the spot is and whether it will require targeted treatment later. The pre-rinse reduces the risk that grit will be ground into the paint during washing. It also helps you allocate more care to areas that tend to hold more grime, such as the rear panel and wheel wells, where the blend of dust and road grime meets the surface at angles that invite abrasion if not treated with patience.
With the surface wet and the dirt loosened, you move into the wash phase using the two-bucket method. One bucket holds clean water for rinsing the mitt, the other holds the soapy solution. The routine is simple but powerful: dip the mitt into the soapy water, gently work a section with light pressure and small circular motions, then rinse the mitt in the clean water bucket before returning to the soapy bath. This ritual prevents the gritty dirt from being carried back onto the paint, a common source of micro-scratches. The circular motion that many find comforting is not a brute tool; it is a controlled, light touch that helps lift, not grind, the dirt from the coated surface. If stubborn spots linger, switch to a soft-bristled brush dipped in soapy water and apply as needed with minimal pressure. The brush is a precise instrument for limited areas, not a weapon for entire panels.
Top-to-bottom washing is more than convenience; it is a principle born of gravity and control. Dirty water should never run from a dirty area onto a pristine one. By washing from the roof to the bumpers, you ensure that any runoff carries away contaminant rather than re-depositing it. It also supports the two-bucket method by allowing you to work in a systematic, predictable pattern, keeping the most vulnerable surfaces—such as soft finishes or plastic coatings—under the least amount of friction for as long as possible. The cognitive discipline of this approach translates to a smoother, more consistent finish in the final appearance. When working in sections, you can visually track what has been cleaned and what remains, which reduces the temptation to rush just to “finish.” The finish, however, benefits from that calm, unhurried tempo.
The heart of the technique rests on the colorless truth: the quality of the wash is tied to the cleanliness of your water and the cleanliness of your mitt. A dirty mitt reintroduces dirt with each pass. A dirty water bucket recontaminates your entire section after every scrub. The superiority of the two-bucket system is widely acknowledged because it isolates the dirt-laden wash from the clean rinse, letting gravity and agitation do the work without trading places with your paint. If you encounter a stubborn stain, a soft cloth or sponge can be helpful, but apply it with minimal pressure and only where necessary. Remember that the goal is to minimize friction between abrasive contaminants and the paint. Friction is the quiet path to micro-scratches that accumulate over time, dulling the glossy finish that makes a truck stand out on the road.
Wheels and tires deserve special attention, not because they are less important but because their grime can behave differently from body panels. We treat them as a separate system with dedicated tools. A wheel-specific cleaner helps to break down baked-on brake dust, and a stiff wheel brush is used to attack the grime in the outer spokes and behind caliper covers. The key is to avoid cross-contamination: never use the same wash mitt or cloth on the wheels that you used on the body. Contaminants on the wheels are often coarser and more abrasive than road grime on painted panels, and transferring those particles to the body increases the risk of micro-scratches and swirls. A separate mitt, a separate bucket for wheels, and a separate drying towel ensure a cleaner, safer process. If you insist on a single toolkit, then dedicate one set to wheels and keep it segregated from the body-handler set from the outset of the wash.
Stubborn contaminants like bird droppings, tar, or tree sap require targeted treatment. Instead of scrubbing aggressively in hopes of faster results, apply a specialized detailing product designed for those contaminants. Use it as directed, usually by applying a small amount to a soft cloth and allowing it to dwell briefly before removing with a gentle wipe. The dwell time is a careful balance: too long and you risk chemical interaction with the paint; too short and the residue may resist removal. In practice, a patient approach pays off. You may find that certain patches yield to a short, precise wipe rather than a full-heavy scrub, which reduces the risk of dragging grit. This mindful handling becomes second nature as you gain confidence with the surfaces and the products you are using. For areas that require extra attention, you can consult trusted resources that outline proven strategies for cleaning grease and tar off your trucks fast, which can provide a careful, stepwise method for those particularly stubborn residues. Proven strategies for cleaning grease and tar off your trucks fast.
After you have washed the entire truck with the two-bucket method and addressed any stubborn spots, you move to the crucial drying stage. Drying should be immediate and deliberate. Allowing water to air-dry on the surface invites water spots, mineral deposits, and the occasional streak. A clean, soft microfiber towel is your best tool for this step as well. Begin at the top and work downward, using a blotting motion that absorbs water rather than dragging it across the finish. In some cases, a second towel is useful to avoid transferring residual moisture from one panel to another, especially if you notice a patch that still holds a small bead of water. The goal is not to achieve a perfectly dry surface by wicking away every droplet in a single pass; it is to ensure that the surface treated remains free of water drips long enough to allow for uniform drying across the entire vehicle. A consistent dry pattern also helps you spot any remaining contaminants that may require a final touch-up before you call the wash complete.
The final steps of a scratch-free wash are about habit and timing. Do not rush the process. The temptation to stint on time arises when you are anxious about parking and deadlines, but the paint pays for that pressure with micro-scratches that can accumulate into an overall dullness. The discipline of washing in shade, using pH-neutral products, and employing soft tools creates a chain of events that protect the clear coat and paint layers. It is a chain that begins with pre-rinse and ends with a careful, comprehensive dry, but it is the line of thinking that binds the entire process. You will notice as you practice that this line of thinking translates into faster washes over time, because you no longer waste effort fighting against preventable damage. The truck becomes a test bed for the quiet craft of maintenance: the sum of small, patient decisions that protect a vehicle’s appearance and value over years of service.
As you advance in your practice, you may consider integrating subtle enhancements that do not compromise the core philosophy of scratch-free washing. For instance, after you dry, you can apply a light guarding layer to the painted surfaces, choosing a product that fits your maintenance schedule and environmental conditions. The key is to read the surface correctly: if the paint feels slick and the water beads evenly, you have likely maintained a healthy surface condition. If you notice micro-marring after several wash cycles, revisit the washing steps with a renewed focus on the mitt’s cleanliness, water quality, and the method you use to tackle stubborn residues. The longer you practice deliberate, careful washing, the more you learn about your truck’s particular paint characteristics, how it responds to different contaminants, and what seasonal or regional variables affect the process.
From the perspective of long-term maintenance, the scratched-free finish is not the product of a single, perfect wash but the result of consistent practice. The steps described form a practical routine rather than a list of rules. They encourage you to observe, adjust, and refine your approach with experience. The effect is cumulative: fewer swirls, less dulling, and a finish that retains depth and shine even after many road miles. It is a method that respects the vehicle as more than a tool; it is a partner in the road ahead, deserving of the care that keeps it looking new longer. This approach does not require specialized equipment beyond a few essential items, and the payoff is immediate in the quality of the finish as you dry and inspect the panels. The goal is not to chase perfection on every wash but to minimize risk, maximize cleanliness, and preserve the integrity of the paint through conscientious technique.
For readers seeking a bridge between technique and broader practice, consider how these steps align with professional standards in the industry. The core ideas—gentle, non-abrasive tools; pH-neutral cleaners; top-to-bottom washing; the two-bucket system; careful wheel handling; immediate drying; shade and timing—are echoed in many industry guidelines. They reflect a philosophy of maintenance that protects paint rather than exposing it to unnecessary stress. The disciplined attention to moisture, friction, and surface condition creates a predictable, repeatable outcome that anyone can achieve with practice. It also underscores a broader message: the best way to protect a vehicle’s finish is to treat dirt as a contaminant to be managed rather than an adversary to be conquered with force. The simple, patient act of washing becomes a form of preventative care rather than a reactive chore.
In closing, a scratch-free wash is achieved not by a single miracle step but by a consistent routine. Each phase—pre-rinse, soap application with a soft mitt, strategic top-to-bottom washing, targeted treatment for stubborn residues, wheel-specific care, and immediate drying—contributes to a surface that remains bright and resilient. The practice invites you to slow down, observe closely, and handle the paint as if it were a delicate, living finish. When you adopt this mindset, the truck not only shines after each wash but maintains a degree of gloss and clarity that turns heads and preserves value. The long-term benefit is a finish that resists micro-scratches, reduces the need for corrective polishing, and keeps paint looking liquid and smooth under sunlight and road grime alike. The scratch-free result is more than aesthetics; it is a testament to thoughtful maintenance that respects the vehicle’s factory finish and the work it represents.
External resource: https://www.carcarepro.com/truck-washing-tips
After-Wash Vigilance: Mastering Protection to Keep Your Truck’s Paint Scratch-Free
The moment the last rinse taps away the suds, the work of preserving a pristine paint finish truly begins. The steps you take after washing are often what determines whether your truck emerges from the rinse with a brilliant, glassy look or with micro-scratches and dullness that betray years of exposure. This chapter follows the logic of care as a continuous practice, not a single ritual. It explains how deliberate aftercare—careful drying, protective coatings, mindful parking, and prudent driving—forms a cohesive shield against the everyday hazards that threaten a scratch-free finish. The goal is straightforward: create a durable, resilient surface that resists the everyday abrasives, environmental fallout, and the occasional careless moment that can mar a ride that’s otherwise spotless.
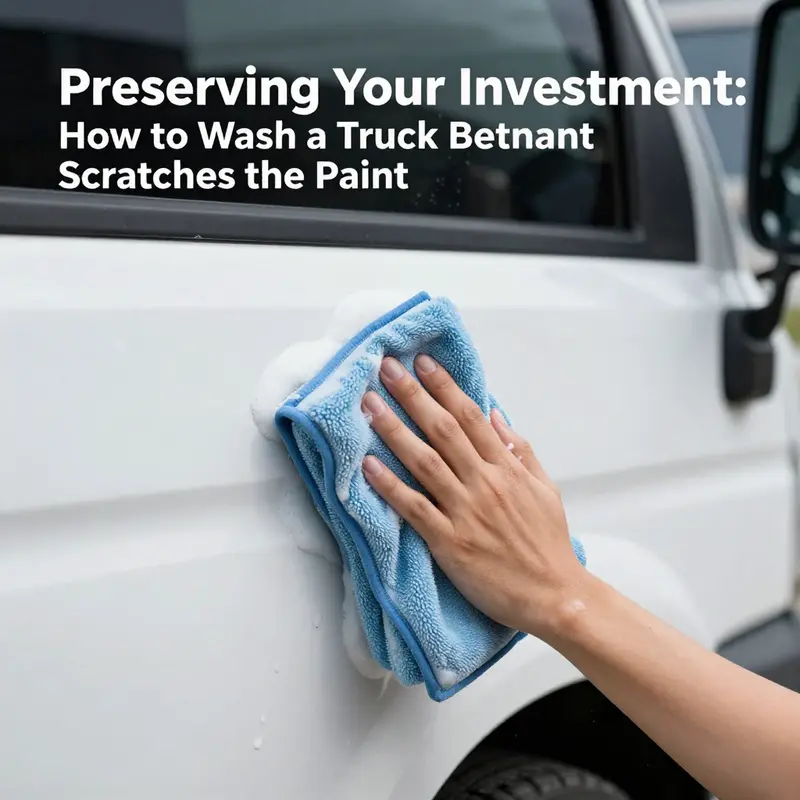
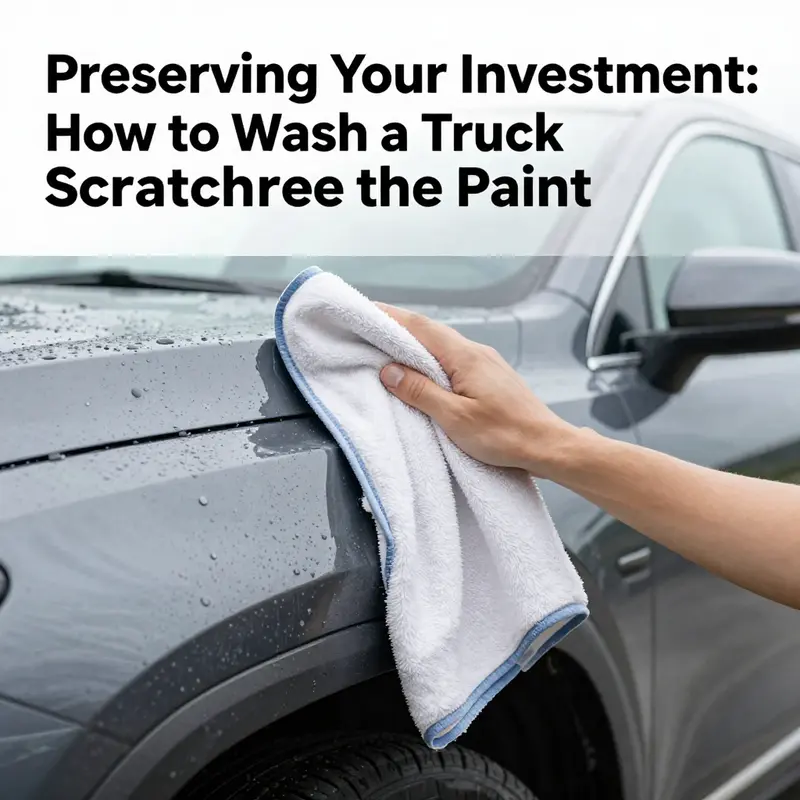
First, the act of drying is the hinge upon which the rest of post-wash care swings. Even after the soap has been fully rinsed away, residual moisture can cling to microscopic imperfections in the clear coat. To avoid inviting water spots and the faint, fine scratches that rough towels can leave behind, reach for a dedicated microfiber towel or a soft chamois and blot or gently pat the surface dry. The key is to use a light touch and to work in straight, overlapping strokes rather than harsh, dragging motions. Terry cloths, ordinary bath towels, or any fabric that feels stiff or has a rough texture should be banished from this stage. Their fibers can lift tiny grit and drag it across the paint with the drag of each pass, no matter how clean the fabric seems. In a pinch, a second, clean microfiber can be used to complete the final pass, ensuring the finish remains free of lint and micro-scratches.
Once dry, the next move is to apply a protective layer that can endure through the next several months of ultraviolet exposure, airborne contaminants, and the occasional brush with a low-speed, gravel-laden gust. The choice between wax and sealant is practical rather than dogmatic. A high-quality wax offers a warm, deep glow that enriches color and provides a sacrificial layer that can be buffed away if it becomes dull. A sealant, by contrast, often yields a sharper, more durable shield with less maintenance, especially in harsher climates or for hands-off owners who want fewer annual steps. Either option, applied correctly, slows the wear process and creates a barrier that makes washing easier next time. In practice, professionals often suggest reapplying every three to six months, depending on climate, vehicle exposure, and how aggressively you drive through wildlife, weather, or urban pollution. The exact cadence matters less than the discipline of consistent application.
To maximize the effect, treat the surface as a living layer that needs nourishment. Before you apply protection, inspect the paint at a relaxed pace. Look for swirl marks that may have formed during the wash or in earlier maintenance. If you notice micro-scratches, address them with a light polish or glaze that is compatible with your protective product. The aim isn’t to erase every imperfection but to reduce their visibility while building up a more uniform shield. The polish should be applied with a dedicated applicator pad, using very light pressure in small, overlapping circles, then wiped away with a clean microfiber while the surface remains cool and dry. The combination of careful cleansing and controlled polishing reduces the likelihood that any contaminants get embedded during future washes.
Another practical habit is to park in shade whenever possible. UV rays are not merely a cosmetic threat; they degrade protective layers and can weaken the bond between coating and paint over time. The shade slows this process, giving your coating longer life and ensuring the finish remains vibrant when you pull into the sun. If shade isn’t available, consider using a reflective, lightweight cover for outdoor storage, especially during peak sunlight hours. A cover can shield not just the paint but also the edges of panels where grit and road dust often accumulate. The goal is to minimize heat buildup and prevent rapid drying that can leave streaks or water spots during the drying stage.
Even with the best post-wash routine, the daily realities of driving demand attention to what you encounter on the road. Gravel, grit, and road dust act like tiny sandblasters when they meet a surface traveling at highway speeds—or even slower, if you’re stuck in stop-and-go traffic. Therefore, driving choices become part of post-wash care. Whenever possible, avoid gravel or dusty backroads that throw up fine particles at your paint. If you must pass through such terrain, maintain a steady speed, close the windows, and limit the amount of time your truck spends exposed to the worst of the debris. After a trip through dirty conditions, it’s prudent to give the vehicle a light inspection and, if necessary, a quick touch wash to remove loose particles that could embed themselves in a future wash.
The care mindset extends beyond any single event. It’s a rhythm: wash, dry, protect, park smartly, drive with care, and repeat. In this rhythm, a small but consistent practice pays off much more than a sporadic, high-intensity spotting and waxing routine. The more you practice gentle washing, careful drying, and timely protection, the less you’ll see the telltale signs of micro-scratches or dullness. The paint remains easy to clean in future washes, because the protective layer helps shed dirt rather than grip it. This is the essence of long-term preservation: a delicate balance between routine maintenance and mindful usage that respects the integrity of the finish.
From a practical standpoint, integrating a simple, repeatable schedule can keep post-wash care from slipping into neglect. Schedule a quarterly reminder for a light polish or sealant top-off and a semi-annual check for potential swirl marks or micro-scratches that accumulate from incidental contact with branches, brush, or car wash brushes that aren’t as gentle as a microfiber mitt. Even if you opt for a single, all-in-one protective product, the routine of reapplication at predictable intervals matters more than the exact product you choose. The goal is to maintain a stable barrier that repels contaminants and reduces friction during future washes.
A deeper layer of care involves thinking about the entire lifecycle of the finish, not just the surface. UV exposure, acid rain, bird droppings, industrial fallout, and even the fallout from winter road salt can slowly erode the clarity of the clear coat. While a protective coating won’t make the truck invincible, it will slow this degradation significantly and keep color, depth, and gloss more consistently across months and seasons. When contaminants do adhere to the finish, a careful pre-wash might be warranted before a full wash to reduce the chance that gritty debris is dragged across the paint. Again, the emphasis is on slow, careful, low-pressure interactions with the surface, coupled with the protective layer that minimizes scratching as you remove the dirt.
In guiding these practices, it helps to treat your vehicle like a living surface rather than a one-off project. The finish will reward the patience you invest in drying gently, applying protection with proper technique, and limiting the severity of environments you expose it to. It also pays to keep the tools and supplies organized nearby and to maintain their cleanliness. A dedicated space for washing that includes clean microfiber towels, a soft wash mitt, a separate wheel brush, and a shallow basin for protection products can reduce cross-contamination and keep abrasive grit from migrating back onto the body. A tidy workflow not only minimizes risk but also reinforces the habit of careful, deliberate care rather than rushed, improvised actions.
If you ever feel tempted to skip a step or rush through the post-wash process, pause and recall the purpose behind each action. Drying prevents water spots and micro-scratches, protective coatings extend the life of the finish, shade reduces UV-driven degradation, and mindful driving minimizes the introduction of new abrasives. Each element supports the others, forming a resilient system rather than a sequence of disjointed tasks. When this integrated approach becomes second nature, the result is a truck that maintains its showroom glow with far less effort, even after months of daily use.
To connect practical advice with proven strategies, consider drawing on established maintenance guidance. For example, a consolidated reference on post-wash strategies emphasizes the value of targeted, patient care and careful layering of protection that can stand up to harsher conditions. The idea is not to chase perfection after every wash but to invest in a durable, repeatable routine that keeps the finish resilient through time. If you want a concise summary of effective tactics that dovetail with this post-wash approach, you can explore this trusted resource: Proven strategies for cleaning grease and tar off your trucks fast.
In closing, post-wash care is not a separate task but an extension of the washing itself. It is the discipline of choosing the right tools, applying the principles of gentle handling, and planning maintenance with the same care you give to the wash. By drying promptly with soft materials, applying appropriate protection on a schedule, parking in shade when possible, and driving thoughtfully through potentially abrasive environments, you actively preserve the integrity of the paint. The shine you enjoy after a careful wash is not a one-off reward; it is the visible sign of a long-term commitment to a scratch-free finish that remains easier to clean, easier to inspect for wear, and more resistant to the inevitable challenges of road life. For readers seeking additional perspectives on post-wash maintenance and its role in protecting the paint, the Car and Driver guide offers a broader lens on best practices and protective strategies that complement the routine described here. You can access that external resource for deeper context here: https://www.caranddriver.com/features/a58217946/how-to-wash-a-truck-and-protect-the-paint/.
Final thoughts
Washing trucks without scratching the paint involves a careful selection of products, awareness of environmental conditions, precise washing techniques, and diligent post-wash care. By adhering to the recommendations outlined in this guide, fleet managers and operators can safeguard their investments, maintain aesthetic appeal, and prevent costly repaint jobs, ensuring that vehicles remain in optimal condition for the long haul.