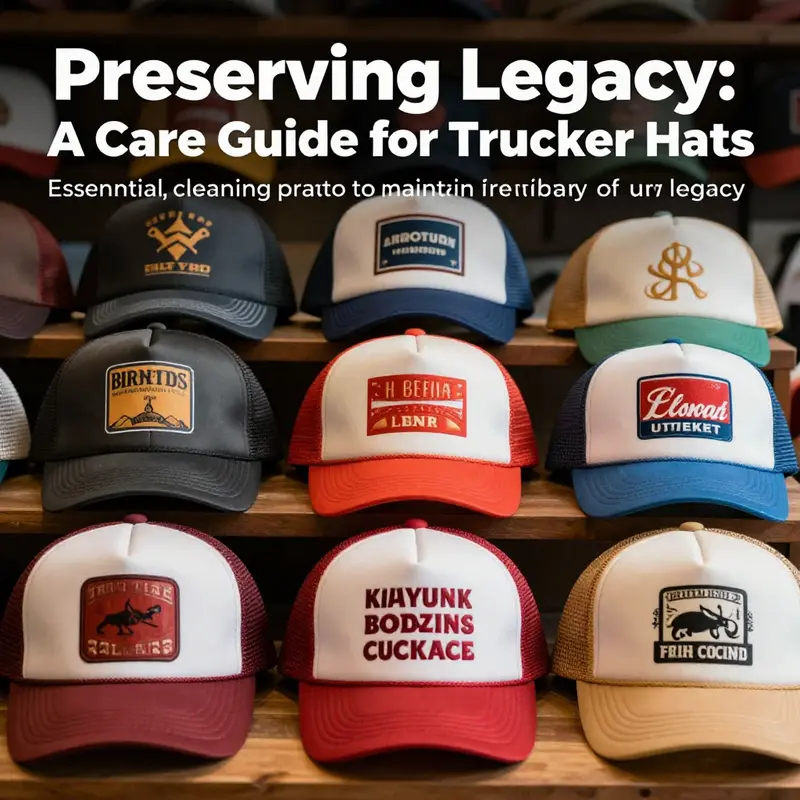
Maintaining fleet uniforms, including legacy trucker hats, is crucial for logistics professionals aiming to uphold a polished appearance and enhance brand identity. These hats, popular for their durability and comfort, require meticulous care to ensure longevity. The following chapters offer a comprehensive roadmap on cleaning techniques tailored specifically for these hats. We will explore effective washing methods, pre-treatment techniques for stubborn stains, post-wash care strategies, and common pitfalls to avoid during the washing process. Equip your team with the knowledge necessary to keep their legacy trucker hats looking sharp and professional.
Preserving the Shape and Soul: A Thoughtful, Thorough Method for Washing Legacy Trucker Hats

Legacy trucker hats carry more than fabric and foam; they carry stories of miles traveled, late-night rest stops, and the people who wore them through rain and shine. Cleaning them is not merely about removing grime; it is a careful ritual that respects the hat’s structure, the memory embedded in its materials, and the potential fragility of a vintage silhouette. The foam front, the mesh back, and the snap closure each contribute to the hat’s character, but they also demand a gentle approach. When done with patience and the right method, a legacy hat can regain its comfort and appearance without losing its essence. When done carelessly, it can sag, warp, or fade, muting the very features that make a legacy style distinctive. The goal, then, is to strike a balance between cleanliness and preservation, a balance that mirrors the care one uses when tending to a treasured work jacket or a well-worn pair of boots. To understand this balance, imagine unpacking a hat that’s aged gracefully: the brim may feel stiffer than a newer version, the mesh back might show subtle signs of wear, and the foam front could be slightly yellowed or dented in places where it once pressed against the forehead during a long shift. Each element tells a part of the hat’s story, and each element deserves a method that respects its role in the overall silhouette. The process begins with respect for the care labels, if present, and extends to a hands-on approach that emphasizes cool water, mild cleansers, and careful handling. A legacy hat’s shape is its signature; preserving that shape is the first test of a good wash. In practice, this means avoiding heat sources, avoiding agitation that could distort the foam or warp the brim, and avoiding submersion that could loosen stitching or loosen the snap. The steps that follow are designed to keep the hat intact while eliminating oils, dust, and odors that accumulate over time. They reflect a philosophy of care where restraint, rather than brute cleaning power, yields the best long-term results. The broader aim is to maintain the hat so that it continues to carry meaning for its owner and looks true to its vintage or legacy design, whether it accompanied someone through daily commutes, a long road trip, or a crowd of warm congratulations at a milestone event. The care approach extends beyond the visible surface. It respects the hat’s internal structure—the crown’s lining, the front foam, the stitching that binds the panels, and the adjuster that lets the hat fit again after years of wear. Each of these parts contributes to the hat’s fit, its silhouette, and its longevity. A method that preserves these elements is a method that honors the hat’s past while ensuring it remains usable in the present. The following guidance, drawn from careful observation of fabric behavior and stitching resilience, offers a cohesive path that treats the legacy hat as a valued artifact rather than a disposable accessory. Start with a careful assessment. If a care label exists, read it. Some hats will explicitly advise hand washing or even dry cleaning. If the label says machine wash or dry clean only, you should follow that instruction. If there is no label, proceed with caution and adopt a hand-wash approach as a default. This initial step sets the tone for the rest of the process, signaling respect for the hat’s materials and construction. Next, gather the gentlest tools you can find and prepare a clean space. You will need a basin or bowl, cool or lukewarm water, a mild detergent—think a gentle dish soap or a mild laundry detergent—along with a soft cloth and, if available, a soft-bristled brush. A clean towel for blotting and a passive, patient stance are essential. The aim is to control the amount of moisture and avoid rough handling. The actual cleaning begins with targeted pre-treatment of stains or spots. Focus on areas around the mesh back, the edges of the foam front, and any fabric panels that show smudges or sweat marks. Use a dampened corner of a soft cloth with a drop of mild detergent. Gently dab the stained areas, allowing the detergent to break down the oils without saturating the foam or soaking the crown. If you encounter stubborn spots, switch to a soft-bristled brush and give a light, circular pass. It is crucial not to scrub aggressively, not to push the brush into the foam cavity, and not to soak the entire hat in the cleaning solution. The front bill and crown deserve a slightly different approach because the bill is often a harder surface—plastic, card, or stiffened fabric—that doesn’t respond well to full immersion. A damp cloth, perhaps with a small amount of soap, is typically sufficient to lift marks without flooding the internal layers. Wipe gently, then rinse the cloth and repeat to remove any soap residue. After pre-treatment and careful spot-cleaning, the hat moves into the main washing phase. Fill the basin with cool water and add a few drops of gentle detergent. Submerge the hat and lightly agitate the water with your hands. Keep the entire hat in the water only long enough to ensure the fabric around the crown and the mesh back get a chance to loosen oils and sweat. The key is to avoid long soaks, which can soften adhesives, weaken stitching, or distort the brim. Let the hat soak for about five to ten minutes. Do not twist, wring, or scrub the brim. The brim, especially if it contains a plastic or cardboard insert, can warp easily under pressure or heat. When you rinse, drain the soapy water and refill with clean, cool water. Rinse thoroughly until no suds remain, repeating if necessary. This rinsing stage is critical; residual soap can irritate the hat’s fibers, attract more dust as it dries, and affect the fabric’s color. Once the rinse is complete, you will want to lift out the hat gently and remove as much water as possible without twisting or wringing. For the mesh back and crown, you can place the hat on a clean towel and softly press to absorb moisture. If you have two towels, you can lay the hat between them and press, dab, and lift. The mesh back often dries more quickly than the foam front, but you should still handle the crown with care to preserve its shape. Excess moisture in the foam can lead to compression or warping if left crowded in a towel or crammed into a heat source. The next step is shaping and air-drying. Reshaping while the hat is damp is the most important move you can make to maintain its original silhouette. Place the hat on a flat surface or use a soft hat stand if you have one. The crown should rest in a natural, rounded position, and the brim should sit as it would when worn. Do not place the hat near direct sunlight, heaters, or in a dryer. Heat can shrink fabric, melt foam, or distort the brim—especially with legacy or vintage styles that may rely on more rigid construction. Allow the hat to air-dry slowly in a cool, shaded area. For best results, you may leave it to dry for twelve to twenty-four hours. Rushing this step invites warping and uneven drying. If the hat has a particularly squarish silhouette or a stubborn crease, a hat shaper or foam head can be used to help the hat retain its circular form as it dries. This is especially helpful for hats with a firm brim or older stiffening materials. If you notice any damp spots after the initial drying period, you can gently reshape and air-dry a bit longer. A marginal difference in drying time can preserve the integrity of stitching and the alignment of panels. It’s also wise to avoid heat-induced odors by not letting the hat sit near radiators or vents that blow warm air. Some wearers worry about lingering smells; a light, natural refresh can help without introducing new residues. A small amount of baking soda inside the hat’s interior, left overnight, can absorb odors. Shake it out the next day; this method is a gentle alternative to synthetic deodorants or sprays that can leave residues. Baking soda is forgiving, non-reactive with most fabrics, and helps maintain a neutral interior environment without affecting the hat’s exterior color. When the washing is complete, and the hat is fully dry, you can reintroduce its fit and shape by placing it on the head of a clean stand or resting it on a round object that conforms to the crown’s curvature. If you’ve got an adjustable snap closure, ensure that it rests in a comfortable range of adjustment during drying. A tight snap can strain the stitching or cause the strap to warp, while too loose a fit can allow the hat to lose its shape while it dries. The overall result should be a hat that feels like a faithful version of its former self: clean but not sterile, intact but with the memories of its years of service preserved. You can also take a few steps after it dries to extend its life. Store the hat in a cool, dry place away from sunlight. If you store hats in a closet, avoid stacking them under heavy items that could flatten the crown. Consider a soft hat rack or a dedicated shelf where the hat can stand upright, allowing air to circulate and preventing moisture buildup. If you wear the hat for work in hot or humid environments, you may wish to apply a light, residual spray designed for fabrics after it has dried, but only if you are confident the product will not degrade the foam or stitching. Always test any product on a small, inconspicuous area first. In addition to the technical steps, a broader mindset helps ensure that the legacy hat remains a living piece of your wardrobe rather than a relic that shrinks or fades. For example, treat the hat as you would treat a beloved coat—spot-clean when possible, avoid soaking, and never expose it to high heat. Consider the environment where the hat lives; if the closet is humid, add a small moisture-absorbing sachet or ensure there is airflow. A dry environment reduces the risk of mold or mildew inside the crown. When you need to refresh a hat that has not been worn for a while, a gentle brushing or air-out with a fan is often enough to rejuvenate its shape and remove musty odors without a full wash. The goal is to preserve its identity as a legacy piece, not to erase its history through aggressive cleaning. For broader care practices that align with professional settings and large-scale care protocols, you can explore the topic of facility management for truck wash businesses, which discusses the importance of careful handling, controlled processes, and attention to materials that are designed to withstand frequent cleaning. This connection underscores a shared principle: whether you’re maintaining a fleet vehicle’s appearance or a beloved hat’s likeness, the most successful cleaning approach respects the material limits while delivering a clean, presentable result. You can read more about these practices in a broader context at this resource: facility management for truck wash businesses. In practice, the hat you wash today becomes part of the story you tell tomorrow, a quiet testament to care and patience. The ironing out of creases and the softening of a once-stiff brim reflect not just cleanliness but a continuity of use. As with any cherished object, the value lies not only in its current appearance but in its ongoing usability and the stories it will continue to carry on future journeys. The method described here is designed to balance effectiveness with restraint, delivering a clean, well-preserved legacy hat that can accompany you for many miles to come. If you ever find yourself unsure, err on the side of less water, a gentler detergent, and slower handling. The process is simple in principle but rich in care, and the result is a hat that remains true to its past while confidently facing the road ahead. External reference: https://www.wikihow.com/Clean-a-Hat
Preserving Legacy Trucker Hats: Pre-Treatment Techniques to Safeguard Style Before Washing
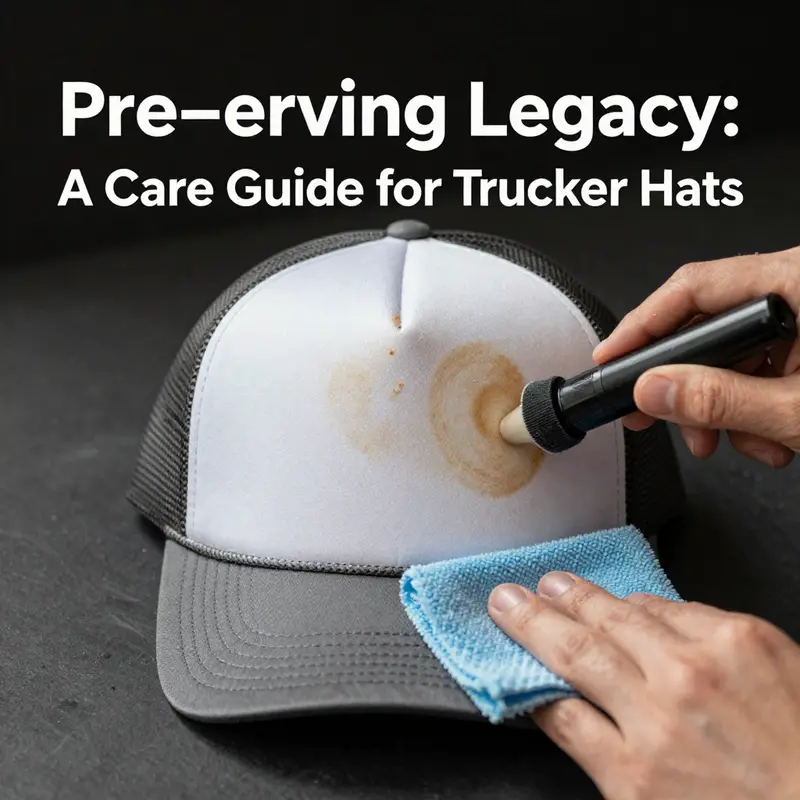
Preserving a legacy trucker hat begins before you dunk it in water. The pre-treatment phase stabilizes structure, protects finishes, and sets expectations for how the hat will behave during washing. Key ideas include gentle stabilization of the front panel and brim, mindful handling of the foam insert, and avoiding heavy coatings near sensitive edges. Stabilization helps keep the hat from collapsing or bulging during moisture and agitation, so the lines stay crisp after drying.
Beyond structure, pre-treatment considers UV exposure, colorfastness, and moisture management. A light UV finish can slow fading on bold colors and stripes, while careful material choices help prevent color migration during a wash. Moisture management, especially for the mesh back, helps the hat dry more evenly and reduces the risk of puckering or distortion.
Colorfastness remains important for hats with embroidery, patches, or distressed details. Pre-treatment focuses on locking color in place and limiting dye bleed during washing, without erasing desirable wear cues that contribute to the hat’s character. The snapback or closure deserves gentle handling, since repeated adjustments can stress plastic or metal components.
In practice, start with a quick material check, follow care labels, and apply stabilization or coatings only where necessary. Test a small area first and err on the side of restraint. The goal is to preserve silhouette, color, and texture, not to over intervene. This mindful approach aligns with sustainability goals by reducing post-wash repairs and preserving authentic details.
null

null
null
null
Final thoughts
Proper care and maintenance of legacy trucker hats are essential for preserving their quality and ensuring a professional appearance within your fleet. By following the outlined steps for washing, applying pre-treatment techniques to tackle stains, and adhering to post-wash care guidelines, fleet managers and supervisors can enhance the longevity and presentation of these fundamental accessories. Avoiding common mistakes further solidifies the commitment to maintaining high standards within your company’s appearance. Equip your staff with this knowledge and reinforce the significance of taking pride in their uniforms. A clean, well-maintained hat is more than an accessory; it symbolizes professionalism and attention to detail in your operations.