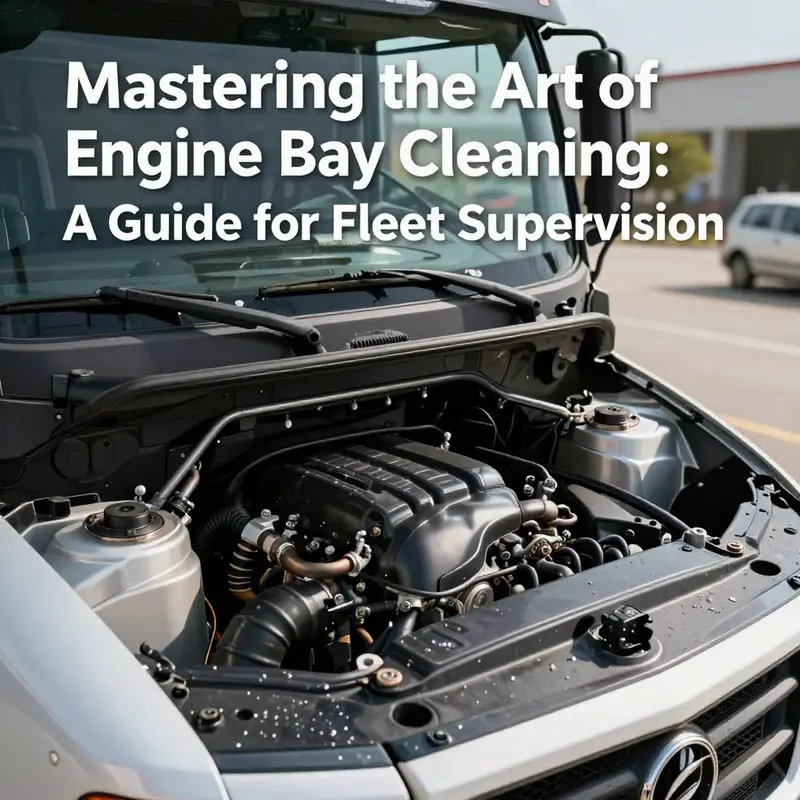
Maintaining the cleanliness of a truck’s engine bay is crucial for optimizing performance and extending its lifespan. Fleet managers, trucking company owners, and construction supervisors must understand the importance of effective engine bay cleaning, both to enhance vehicle reliability and to prevent costly repairs. Each chapter of this guide will unfold the essential techniques, from preparation and debris removal to applying cleaner, gentle scrubbing methods, and final rinsing procedures. Following these best practices will ensure a thorough and safe cleaning process that protects sensitive components, thereby maintaining the integrity of your operations.
Cool, Clean, and Connected: Mastering the Engine Bay Wash Without Risk

Washing the engine bay of a truck is more than a cosmetic task; it’s preventive maintenance that protects electrical and mechanical systems. Start by letting the engine cool to ambient temperature, then isolate the electrical system by disconnecting the negative battery terminal and shielding critical electronics with bags or coverings. Protect the air intake and exposed connectors from spray using tape or wrap and keep cleaners away from sensors. Begin with dry removal of dust using a microfiber cloth or soft brush, paying attention to crevices around hoses and wiring. Apply a neutral pH engine bay cleaner by spray, keeping it off electrical components, and let it dwell briefly to loosen grime. Gently scrub with a soft brush where needed, then wipe with a damp microfiber cloth to lift loosened residue. Rinse with a low-pressure method, directing water away from sensitive areas and avoiding high-pressure streams; a light misting from a spray bottle or garden hose at a safe distance is sufficient. Dry thoroughly with towels and, if needed, a blow dryer or air gun to remove residual moisture from hard-to-reach spots. Reconnect the battery in the proper order and perform a final inspection for leaks or damp areas before starting the engine again. For best results, finish with a light protective coating only where recommended by the manufacturer, and store your cleaning tools in a dry, organized space.
Clearing the Path: Precision Techniques for Removing Loose Debris from a Truck Engine Bay
The engine bay is a busy, tightly packed space where performance depends on visibility, accessibility, and the absence of stray particles.
Before you even think about introducing cleaners or water, the foundation of a safe, effective wash begins with removing loose debris. This phase is not a mere courtesy; it’s a crucial step that reduces the risk of trapping grit in crevices, compromising sensors, or clogging cooling fins when moisture finally arrives. The mindset is simple: create a clean, open canvas so subsequent cleaning tools can work without obstruction, and you minimize the chance of pushing dust deeper into critical components. A calm, methodical approach here pays dividends later, both in the quality of the wash and in the long-term reliability of wiring, connectors, and seals.
To start, visual assessment matters. Take a moment to scan the engine bay as if you were a service technician peering into a machine with a mind of its own. Leaves wedged under the radiator shrouds, dust perched along the tops of hoses, and loose debris rattling in the open space behind the fan belt are all signals to target areas first. The aim is not to wrestle every particle to the surface in a frenzy but to encourage a controlled, gradual removal that won’t disturb delicate parts. In practice, this means combining dry manual methods with a careful use of air to dislodge particles from abandoned corners and channels that are otherwise hard to reach.
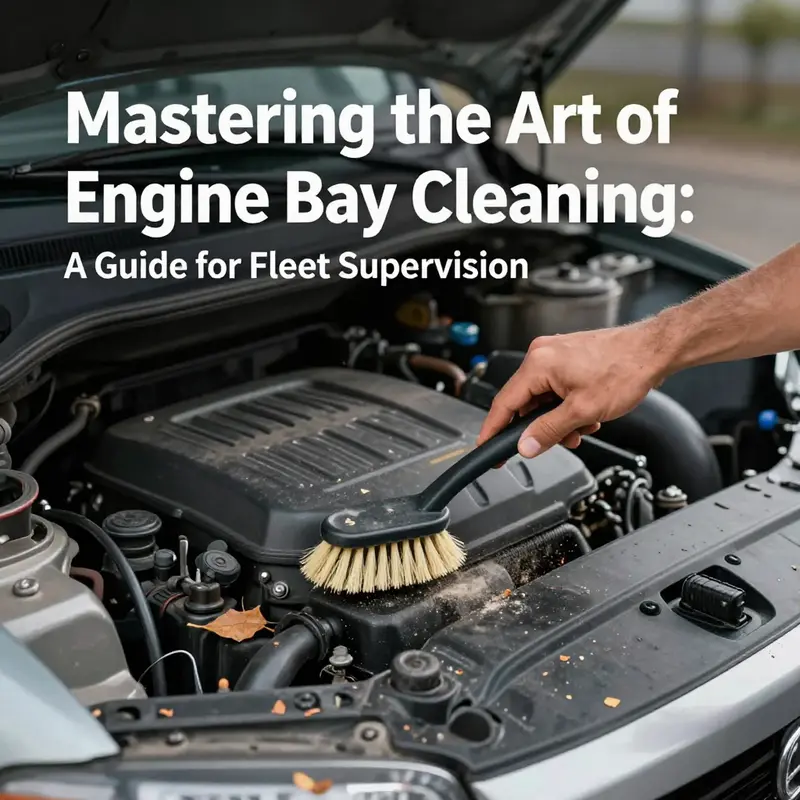
A dry microfiber cloth can capture surface dust and cling to loose fibers without leaving lint behind. This is your first line of defense against the kind of fine dust that hides in plain sight on the top surfaces of valve covers and the edges of the intake manifold. Wipe in long, even strokes, taking care to lift rather than drag, so you don’t grind grit into gaskets or coatings. For stubborn deposits, switch to a soft-bristled brush. An old toothbrush, with its gentle stiffness, is perfect for the small gaps around the oil filler cap, the seal between valve covers, and the crevices near the throttle body. Use the brush lightly; you’re seeking to loosen, not to abrade.
When loose debris resists the wipe, compressed air becomes your most effective ally. It’s the cleanest, most efficient means of dislodging dust, leaves, and small particles from hard-to-reach corners. The key is restraint and distance. Hold the nozzle away from the components–no closer than about 12 inches (30 cm)–to avoid creating an unintended windstorm under lines and connectors. Short bursts are critical; long, continuous blasts can whip dirt into seals, sensors, or into fabric gaskets that are not designed to tolerate such gusts. Move the air in a systematic sweep, working from the broad, exposed surfaces toward the more intricate regions. Start at the top of the engine bay, then progress downward, which helps gravity return the loosened debris away from electrical harnesses and seals rather than driving it deeper into the system. In practice, a measured sequence–radiator shrouds, valve covers, then the space behind hoses–often yields the most thorough clearing without overexerting any single area.
The strategic use of air is complemented by an eye for the vulnerable. Even with protective measures, certain zones require attention that diverges from the general debris removal path. The alternator, fuse box, and any exposed wiring connections deserve particular respect. If you’re unsure whether a given area can tolerate a quick puff of air, err on the side of caution and opt for gentle mechanical removal first. The aim is to avoid forcing moisture or grit into connectors, which could invite corrosion or electrical issues later on. If a connector or housing has visible seals or protective caps, keep them intact and undisturbed, or protect them with a temporary barrier such as plastic wrap or waterproof tape when appropriate.
As you progress, consider the long view: debris prevention. Once you’ve cleared the bay, you’re not finished. The best practice is to envision what the engine bay will look like after a wash and how much dirt tends to accumulate again. A simple preventative measure can dramatically cut future cleanup time. Engine bay dust covers, lightweight shields designed to reduce dust intrusion, can be installed in many trucks to act as a barrier against debris. While these covers may require a downtime moment during maintenance, they pay for themselves by shortening the frequency and intensity of future cleanings. This is the kind of foresight that separates quick, cosmetic cleaning from durable, repeatable maintenance.
If you encounter buildup that stubbornly resists air nudges and dry wiping, you may be tempted to switch directly to wet cleaning. Here again, caution governs. The moment you introduce moisture to a space filled with connectors and electronics, you’re no longer just removing debris—you’re potentially inviting moisture ingress where it can do harm. The technique you’ll apply next, after you’ve done your due diligence in debris removal, should be deliberate and conservative. The logic is to reduce, as much as possible, the amount of moisture that must later be evaporated or dried. In line with best practices, you want to ensure any residual water is easily evaporated by heat rather than trapped against sensitive components.
The narrative around debris removal also invites a practical reminder about documentation and maintenance mindset. A quick, visual inventory after the debris-clearing phase helps you identify where dust has a habit of collecting, such as behind the radiator or around the fan blades. This isn’t merely diagnostic; it’s a practical planning step for future sessions. If you spot recurring hotspots, it’s worth noting for a future wash plan or for the possible installation of shielding in those zones. The goal is to create a repeatable routine so the engine bay looks and feels cleaner after each service interval, not just once in a blue moon when a full wash is attempted.
For readers seeking a deeper, action-oriented reference that aligns with the debris-clearing stage, there are established guidance resources that consolidate safe, effective methods. One such resource highlights the cumulative value of using compressed air for debris removal, supplementing it with cautious application of cleaners and fabrics. It also underscores the importance of cooling and protection for the electronics and wiring that populate the bay. If you want to see a practical set of techniques and a narrative that echoes this approach, explore proven-strategies-for-cleaning-grease-and-tar-off-your-trucks-fast. This linked reference offers a concise, scenario-based view of how seasoned technicians approach stubborn grime and debris with an emphasis on safety and efficiency. Proven strategies for cleaning grease and tar off your trucks fast
As you bring the debris removal phase to a close, you’ll notice a tangible difference: a bay that feels lighter, with fewer particles clinging to hoses and sensors. Your subsequent cleaning step–engaging a neutral engine bay cleaner and applying a measured, non-saturating damp cloth–will be more effective, because the surface dirt now has less of a foothold and the risk of trapping grit during cleaning has diminished. The essence of this phase is discipline. It’s not the market’s flashiest moment, but it is the quiet, reliable footing upon which the rest of the wash rests. When done correctly, you’ll have a bay that’s not only visually tidier but structurally more resilient, ready to sustain the next wash, the next drive, and the miles ahead.
Strategic Application: Maximizing Engine Bay Cleaner Efficacy on a Heavy-Duty Truck

Washing the engine bay of a heavy-duty truck demands a careful balance between aggression and restraint. The bay sits at the crossroads of heat, oil, road grime, and a tangle of electronics. The goal is not to create a showroom shine but to remove stubborn buildup while preserving seals, sensors, and wiring. A practical approach starts with a mindset: cooling, protection, and precision form the triad that makes every subsequent step safer and more effective. If neglected, water can find a path into hoses, relays, and connectors, and greasy residue can migrate to places that are harder to inspect later. With that in mind, the preparation phase becomes the foundation of success. Park the truck in a shaded, well-ventilated area and allow the engine to cool completely. In hot conditions this can mean several hours. A hot engine suddenly exposed to cooler air and cleaning agents is prone to thermal shock, which can warp metal parts or crack gaskets. Once the engine is within a safe temperature range, the next move is to shield the sensitive anatomy. The negative battery terminal is removed first, then the positive, to prevent accidental short circuits as tools and rags move near exposed wires. Protective coverings are kept simple yet effective: plastic sheeting, large bags, or purpose-built engine covers shield the ECU, fuse box, alternator, and wiring harnesses. If gaps remain or connectors show signs of moisture ingress, seal them with waterproof tape or silicone sealant. The air intake is also protected with a cloth or bag to prevent water intrusion into the intake tract. This is not a step to be rushed; protecting these components is a non-negotiable investment in avoiding electrical and electronic failures that could outlast the cleaning itself. With the electronics shielded, the focus shifts to removing the debris that can trap cleaner and grind grit into surfaces. A dry microfiber cloth wipes away loose dust, leaves, and road grime. A soft-bristled brush reaches into crevices around hoses, brackets, and the radiator housing. For stubborn dust, a low-pressure burst from a compressed air canister helps dislodge particles from tight spaces. The pressure should be modest—think less than 0.3 MPa—to avoid dislodging any component or forcing moisture into seals. The car-care wisdom about air pressure is about restraint as much as effectiveness; high-pressure air can push water or dirt into seams that were previously sealed. Once the bay is cleared of loose soil, the cleaner comes into play. A neutral pH engine bay cleaner, designed for automotive use, is sprayed onto metal surfaces, avoiding direct attack on electrical components. A mindful distance—about 20 centimeters from the surface—keeps the cleaner from dripping into forbidden zones. The cleaner is allowed to dwell for 3 to 5 minutes, enough time to loosen a stubborn film of grease without giving the product a chance to dry out and bake onto hot surfaces. If the bay harbors heavy oil buildup, a pre-soak or a second application is appropriate, but it should never become a soaked nightmare. The next phase emphasizes gentleness and thoroughness. A soft-bristle brush works the tricky regions—the valve cover edges, around the oil filler cap, and along the radiator fins—without abrading paint or seals. Surfaces are wiped with a damp microfiber cloth, chosen to be only lightly moist. Soaking the engine or its vicinity is strictly avoided. If a particular stain resists, apply a touch more cleaner directly to the spot and work it with the brush, then wipe away with a fresh cloth. Abrasive tools have no place here; they can scar paint and loosen gaskets. When rinsing is even considered, it must be done with the utmost caution. High-pressure water is a temptation many owners face, yet it is almost always a risk. Water under high pressure can breach seals or infiltrate connectors. If rinsing is deemed necessary, opt for a low-pressure spray from a garden hose or a spray bottle, and apply the mist direction from bottom to top. The spray should land away from filters and electrical components, maintaining a generous distance—at least 30 centimeters. The goal is to introduce a controlled, light rinse that helps rinse away loosened grime rather than flood the engine bay. Drying is a critical, often overlooked step. A clean, dry microfiber towel removes surface moisture, while a compressor air gun can blow residual droplets from tight spaces, behind panels, and within connectors. The engine is then started and allowed to idle for 10 to 15 minutes. This gentle warm-up helps evaporate any lingering moisture as the engine warms, reducing the risk of condensation or water spots forming in hidden recesses. A thoughtful post-clean assessment follows. Reconnect the battery in the correct order—positive first, then negative—and recheck all areas that had cleaning attention. Look for leaks around the valve covers, fresh oil around the filler cap, and any signs of moisture near connectors or fuse boxes. If sealing or protection was applied to connectors or wiring, inspect those coatings for cracking or peeling. The aim throughout this process is not just cleanliness but a durable, moisture-resistant barrier that reduces future corrosion. Protective coatings can be helpful in high-heat, high-humidity environments. A silicone-based protectant or a line sealant can be used on exposed wiring harnesses and rubber gaskets to inhibit moisture intrusion and UV damage. The approach described here resonates with the idea that a deep-clean must be aligned with ongoing maintenance. The engine bay should not only look better; it should breathe easier in terms of cooling and inspection. For those facing extreme contamination, there is room for more advanced techniques. A notable option is dry ice cleaning, which some fleets use to achieve a deeper clean without water or solvents. Dry ice pellets are propelled at the bay’s surfaces, where they sublimate instantly. The mechanical impact dislodges grime, while the CO2 returns to a gaseous state, leaving no liquid residue behind. This method is particularly attractive for older trucks or bays with heavy oil contamination that resist traditional cleaners. An anti-explosion design in a dry ice system further enhances safety when oil vapors or ambient heat are present, reducing worry about accidental ignition or pressure build-up. If the bay is heavily caked, this approach can minimize the need for aggressive scrubbing or excessive chemical contact, and it eliminates the risk of water intrusion entirely in sensitive areas. As with any specialized method, it requires trained operators and proper safety protocols to manage cold exposure and the handling of CO2 pellets. If pursued, it should be done by professionals who understand how to protect wiring, sensors, and seals while exploiting the technique’s dry, non-liquid advantage. Throughout the entire process, purposefully choosing a method that respects both the engine’s thermal history and the electronics is essential. The sequence—from cooling and protection to dry pre-cleaning, careful chemical application, gentle mechanical action, and controlled drying—reflects a philosophy of deliberate progress rather than brute force. In the end, the engine bay looks better and runs cooler, and the risk of latent damage is kept to a minimum. For those seeking a quick reference that distills this approach, many practitioners lean on time-tested strategies that combine proven cleaning fundamentals with practical efficiency. See the discussion on proven strategies for cleaning grease and tar off your trucks fast for a concise, field-tested perspective that complements the detailed, methodical steps outlined here. Proven strategies for cleaning grease and tar off your trucks fast. As with any maintenance practice, it pays to stay informed and prepared. While water-free options like dry ice cleaning offer compelling advantages, the common-sense path—cooling, protection, controlled cleaning, and thorough drying—remains the backbone of a safe, effective engine bay wash. When in doubt, and especially in complex bays or in environments with stringent electrical protection requirements, professional detailers or fleet maintenance shops can provide the expertise and equipment to execute the plan with minimal risk. And for broader guidance on the topic, authoritative industry resources offer detailed recommendations that help frame a responsible, repeatable process. External reference: https://www.carcare.org/engine-bay-cleaning-tips
A Gentle, Thorough Clean: Mastering Safe Engine Bay Washing for Trucks
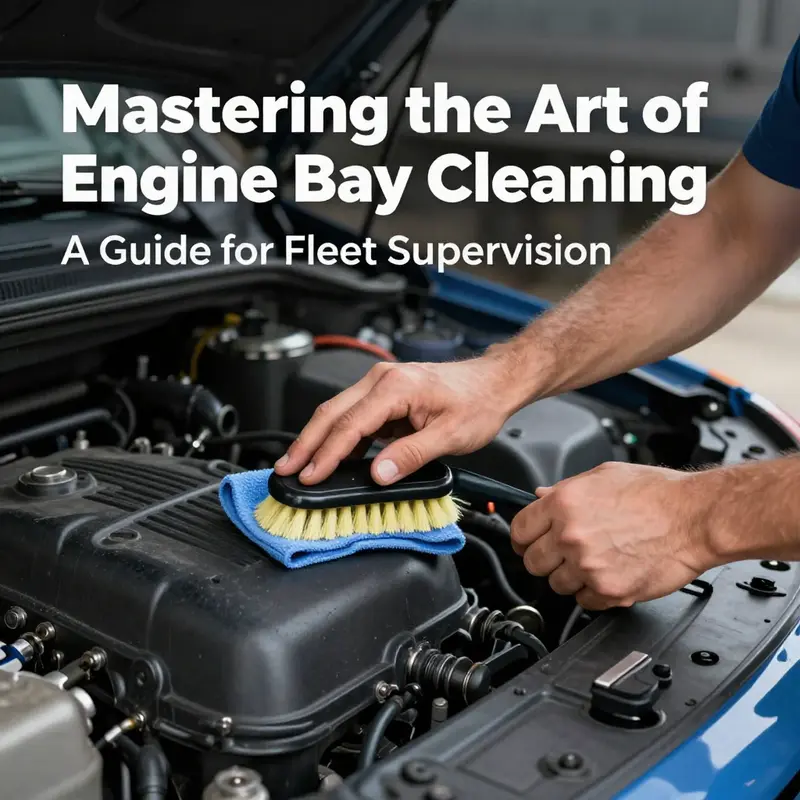
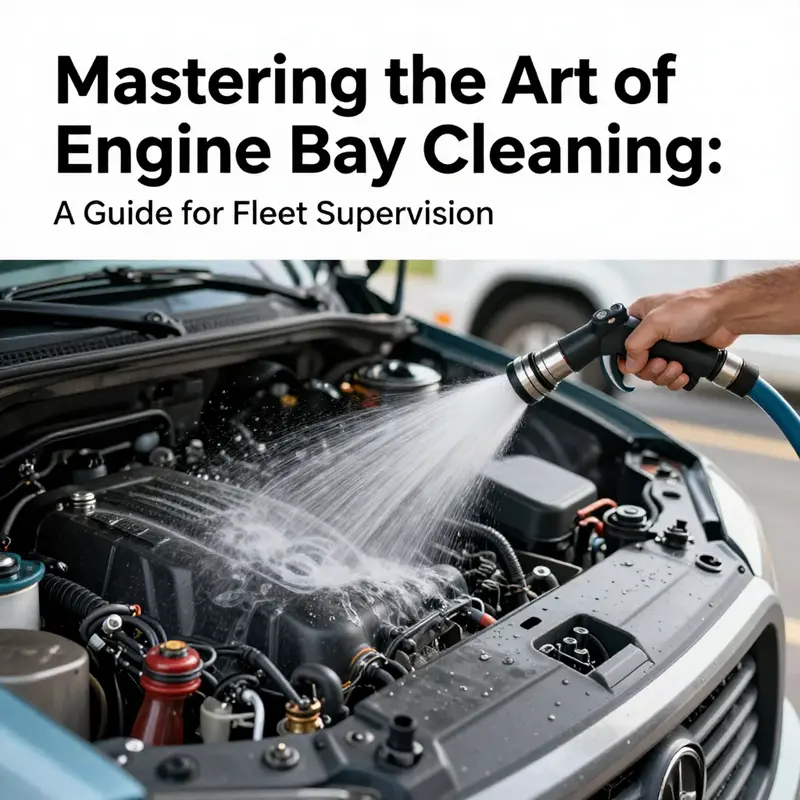
The engine bay is more than a collection of metal and hoses; it is the truck’s nervous system, a compact world where heat, fuel, air, and electronics converge. When you set out to wash this space, you are not merely removing grime but also honoring the conditions under which these components operate. Cleanliness aids heat dissipation, helps you spot leaks early, and makes routine maintenance easier. Yet the same space that looks like a straightforward target for soap and water hosts delicate sensors, sealed connections, and a labyrinth of wiring. The challenge, then, is to balance cleanliness with caution. The safest path starts long before you spray a single droplet: it begins with cooling, protection, and a plan that respects the bay’s complexity. Begin by ensuring the engine is completely cool, a precaution that prevents thermal shock as cold water hits warm metal. In hot weather, the wait can be lengthy—often 1 to 2 hours is prudent—so the mind can shift from “clean” to “protect.” After cooling, isolate the electrical heart of the operation by disconnecting the battery’s negative terminal first. This simple step lowers the risk of accidental short circuits when wash water and cleaner meet exposed connectors. With power isolated, you can shield the sensitive brains of the engine, laying plastic bags or waterproof covers over the ECU, fuse box, alternator, and any exposed wiring connectors. Seal wire harnesses with waterproof tape or silicone sealant if you have it on hand, and protect the air intake with a clean cloth or plastic bag to keep water from slipping into the heart of the intake system. These protective measures are not optional niceties; they are the first line of defense against a clean that becomes costly maintenance or, worse, a mural of corrosion and miscommunication between sensors. Once the bay is cooled and protected, the real work can begin. Removing loose debris is not glamorous, but it clears the path for the gentler cleaning that follows. A dry microfiber cloth, soft-bristled brush, or a gentle hand with a microfiber mitt can sweep away surface dust, leaves, and loose dirt. This is the time to clear the big stuff so that cleaning agents don’t have to fight through obstacles. For stubborn deposits or tight spaces, a light puff of compressed air from a canister, at low pressure, can be a lifesaver. The goal is to dislodge loose material without spraying force into tight corners, around sensors, or into fins of the radiator. The objective is a gradual, careful removal that preserves the integrity of seals and connectors. With debris loosened, prepare a neutral pH engine bay cleaner designed for automotive use. Harsh degreasers, while powerful, can degrade rubber seals or dull paint; a purpose-made, mild cleaner offers a safer, more predictable result. Keep the spray nozzle at roughly 20 centimeters from the surface to minimize direct moisture contact with electrical assemblies. Apply the cleaner evenly to surfaces that accumulate grime—valve covers, brackets, and the areas around the oil filler cap—while avoiding direct spray on electrical components, sensors, and wiring. Allow the cleaner to dwell for 3 to 5 minutes to break down oil and grease, a window long enough to loosen buildup but short enough to minimize moisture intrusion into pathways you have protected. The next phase is where technique matters as much as patience. Gentle cleaning requires the right tools and a careful touch. A soft-bristle brush, such as a clean old toothbrush or a small detail brush, is perfect for whisking away grime from stubborn seams, around the radiator, and along gasket lines. Work from top to bottom and from the outside toward the center to avoid dragging dirt into clean areas. Wipe surfaces with a damp microfiber cloth, ensuring the cloth is only lightly damp rather than soaking wet. The goal is to remove the cleaner and loosened grime without saturating the engine bay or saturating protected electrical connections. If you encounter an oily stain, apply a touch more cleaner directly to the spot and rub with the brush, but never use abrasive tools, which can scratch paint or rub through protective coatings. You want the clean to be gradual and controlled, not abrupt or aggressive. When it comes to rinsing, restraint is essential. The engine bay carries many sealed or shielded connections designed to resist water, but high-pressure washing can breach those defenses, forcing moisture into places where it can cause corrosion or short circuits. If rinsing is necessary, opt for a low-pressure approach. A garden hose with a wide spray nozzle, set to a gentle mist, can provide a light rinse that carries away soap and loosened grime without pressurizing sensitive joints. If you must rinse, move from bottom to top, directing water away from electrical components, filters, and exposed sensors. Maintain a safe distance—about 30 centimeters from the target surfaces—so water falls gently rather than blasting through gaps. After the rinse, the bay should begin to show its clean lines again, but moisture will linger in nooks and behind panels. Drying becomes the next vital step. Begin with a clean, dry microfiber towel and use it to blot and wipe accessible surfaces. For hard-to-reach pockets, corners, and behind components, a compressor-driven air stream can be incredibly effective, helping to dislodge moisture from tight spaces. If you don’t have a compressor, a few minutes of strategic air movement with a towel can still make a significant difference. The aim is to remove as much water as possible without turning the bay into a river of droplets. A final check helps ensure nothing has been left behind. Reconnect the battery, positive terminal first, then the negative, and start the engine. Let it idle for 10 to 15 minutes. This slight warmth in the bay encourages any remaining moisture to evaporate, while also letting the alternator and sensors wake up gradually in a controlled environment. During this phase, listen for any unusual sounds or vibrations and observe the gauge readings. If a sign of trouble appears—an unusual color indicates a brake line damp or a hose’s wobble—you can address it before the vehicle is fully reassembled into daily service. A careful inspection at this stage is not overkill; it is the practical insurance that your efforts won’t produce a leak or a warning light the next day. When the engine has cooled again, a final external wipe can reveal any still-visible smudges or oily streaks. If the surfaces show small drips or spots, a second pass with a light cleaning and brief re-rinse can be prudent, but avoid turning this into a full rinse cycle. Some enthusiasts choose to apply light protective measures to the exposed metal and connectors after cleaning. A thin layer of line protector spray or dielectric grease on connectors can slow future corrosion and help maintain a reliable seal against moisture and contaminants. This protective touch should be applied sparingly and only to appropriate joints where it is recommended by your vehicle’s service guidelines. Throughout the process, remember that the goal is a clean engine bay that delivers clarity rather than risk—clarity for inspection, maintenance, and future cleaning sessions. If the bay is exposed to harsh weather, road grime, or off-road mud, consider repeating the gentle cleaning cycle at longer intervals, such as every six to twelve months, and adjust the frequency based on driving conditions. Consistency matters: a regular, cautious approach makes it easier to notice subtle changes, from a small oil seep to the early signs of wear on a hose or clamp. For further guidance and a broader set of best practices, a well-regarded resource outlines strategies that align with these careful techniques: Proven strategies for cleaning grease and tar off your trucks fast. By aligning your approach with such strategies, you can maintain a bay that not only looks clean but remains a reliable, well-functioning heart of the truck. As you integrate these steps into your routine, keep your eye on the long game: cleanliness is a maintenance habit that supports safety, performance, and longevity. For readers who want a broader perspective or different techniques, this external reference provides deeper insight into the balancing act between thorough cleaning and protecting sensitive components. How to Clean Your Engine Bay
The Finishing Touch: Mastering Final Rinsing, Thorough Drying, and Protective Care in a Truck Engine Bay
The clean engine bay is more than just a brighter paint job or a peppy-looking hood ornament. It’s a measure of care that translates into reliability on the road. The final rinsing and drying steps are not afterthoughts but the critical linchpin that prevents moisture from seeping into tight spaces, ensures sensors stay accurate, and guards metal against future corrosion. In this phase you move from “clean” to “safe,” from splashes of soap to a moisture-free sanctuary where delicate electronics and precise tolerances can perform as intended. The goal is to rinse away every trace of cleaner and grime without inviting water into places that dislike moisture. The approach is deliberate, conservative, and informed by the same discipline you apply when you service an engine or replace a belt: patience pays, and precision matters more than speed.
As you begin the finishing rinse, treat the engine bay as a living space you want to protect. If your setup includes a dedicated engine bay rinse system, use it. If not, a low-pressure hose will do, but with strict discipline. The nozzle should stay at a comfortable distance—about 20 to 30 centimeters is typically advisable—and the water should move gently over the surfaces rather than blast with force. Direct contact with electrical components, sensors, and exposed wiring should be avoided whenever possible. Start at the top of the bay and work downward, letting gravity do part of the job by carrying loosened residue away from critical components rather than forcing it into tight corners. When you reach areas like the radiator fins, the oil filler cap area, and around valve covers, use a soft brush to lift grease without prying apart seals. A microfiber cloth can pick up what the brush frees, provided you avoid soaking the cloth and keep it damp rather than dripping.
A crucial principle underpins this phase: do not rush. If soapy residues linger, they will dry and attract new grime, defeating the purpose of the wash. A final, light rinse helps ensure that no slippery film shrouds the engine’s most sensitive zones. If you encounter stubborn pockets of grease, apply a touch more cleaner directly to the spot, then brush lightly and wipe away. The cleaner’s job is to break bonds, not to sit on rubber seals or metal surfaces for longer than necessary. After the rinse, inspect with a careful eye for any areas that still look dull or hazy because of cleaner residue or residual grime. The objective is uniform brightness and an even surface, with no films that could trap moisture or dust.
In this phase, a useful practice is to remember the caution about high-pressure water. High-pressure sprayers are tempting for a quick flush, but they are a risk to the electrical seals and sensitive connectors. If you do use water during the rinse, keep the spray at a low pressure and a longer distance, and consider achieving the rinsing effect with a deliberate, methodical spray pattern rather than a broad blast. For the small, recessed pockets around sensors and under hoses, a damp microfiber or a soft brush will often be more effective than a spray nozzle. The aim is a thorough washing without inflaming any vulnerability in the electrical or sensor network that makes the engine bay function.
The next phase—thorough drying—demands equal care. Air drying in a well-ventilated space is the simplest and safest method. It affords the opportunity for natural evaporation while reducing the chances of rust or corrosion in hidden corners. To accelerate the process without introducing new risk, you can use a compressor air gun on a low setting to dislodge droplets from crevices, behind panels, around belts, and in other tight spaces. This tool should be used with restraint because a powerful blast can shift hoses, dislodge small components, or drive water into seals that were designed to resist only modest exposure. The key is to direct airflow along the surfaces and out toward open spaces where moisture can escape, not inward where moisture can collect.
After the bulk drying, inspect the engine bay for remaining dampness. A lint-free microfiber cloth can be employed to wipe accessible surfaces gently. Pay particular attention to the edges of the valve cover gaskets, around the oil filler cap, and in the corners of the radiator shrouds where water tends to linger. Do not attempt to rush this step by using heat or strong solvents; heat can warp seals and dry surfaces unevenly, while aggressive chemicals can degrade rubber components. The emphasis is on patience and thoroughness. If you notice any moisture hiding behind panels or a low-lying area where water could accumulate, return to the airflow technique or the cloth until the area is visibly dry.
Once you are confident that the surfaces are dry, you face a decision about protection. Some technicians skip this, but many opt for a light protective coating on rubber gaskets, plastic trim, and exposed metal surfaces. A silicone-based protectant spray or dielectric grease on connectors after drying can help repel future moisture and contaminants, extending the life of seals and contacts. The critical caveat is to avoid overspray onto active electrical components before they are reconnected or powered. A targeted application with a small brush or a controlled wipe is usually more reliable than a broad spray that can migrate into places it should not reach.
The reassembly and testing phase is where finishing touches become functional checks. Reconnect the battery with care: positive terminal first, then negative. Double-check that all wires have been tucked away and that plastic covers remain secure. A quick visual sweep of the bay helps verify that nothing is loose or out of place. Before you attempt to start the engine, confirm that every surface is dry and that there is no standing water in grooves or hollows where it can leak into connectors as the engine begins to heat up. The directive from safety-minded practitioners is clear: never start the engine immediately after washing. Allow time for residual moisture to evaporate, particularly in tight spaces that may trap humidity. This pause reduces the risk of electrical shorts or hydrostatic issues once the system returns to operation.
If conditions permit, a controlled test run can be performed after a suitable waiting period. Let the engine idle for a brief interval while you monitor gauges and listen for unusual sounds. The idea is to confirm normal operation without introducing the risk of moisture-driven faults. You may notice a subtle misting of steam as temperature rises, a normal sign that the air and moisture are venting. If anything seems off—unusual hesitation, misfiring, or warning indicators—shut down and recheck the bay before proceeding. The practice of observing, then rechecking, embodies the meticulous care this stage requires and prevents minor issues from growing into service interruptions.
To bring the process full circle, consider a post-clean maintenance touch that aligns with long-term care rather than a one-off aesthetic. A quick, targeted application of a protective spray on rubber gaskets and plastic trim seals the bay against water intrusion during future washes and contributes to a more uniform, enduring appearance. This kind of proactive step helps preserve the bay’s resilience against road grime, salt, and humidity, reducing the frequency of big cleanings and extending the life of seals and connectors. As you reflect on the finishing sequence, you may recall a practical tip from experienced crews: small, consistent improvements compound into a noticeably more reliable engine bay—day after day, wash after wash.
The final checks and the care you invest in the finishing rinse and dry are what separate a cosmetic wash from a responsible, durable maintenance practice. In a truck, a clean engine bay that functions reliably under load is not merely about looks; it’s a sign that you respect the machine and your own time. If you want to explore a broader range of proven approaches to maintaining trucks in peak condition, consider the practical strategies published by seasoned professionals who emphasize efficiency and safety in grease and tar removal as part of regular upkeep. For instance, you can explore proven strategies for cleaning grease and tar off your trucks fast, which provides pragmatic, time-tested ideas that complement careful rinsing and drying without sacrificing the thoroughness required in sensitive areas. This kind of resource helps bridge the gap between routine maintenance and disciplined, performance-focused care. You can follow the discussion here: proven strategies for cleaning grease and tar off your trucks fast.
As you integrate these steps into your workflow, remember that the engine bay is a living space that deserves respect. The finishing rinse and drying steps are not just about removing soap and water; they are about protecting a complex ecosystem of metal, rubber, sensors, and wiring. When done with care, they ensure the truck remains dependable under heat, vibration, and the rigors of the road. The discipline you apply here will echo in performance, longevity, and peace of mind every time you tilt the hood and prepare to hit the next mile marker. External guidance from established safety and maintenance authorities further reinforces best practices, reminding us that a clean engine bay is most valuable when it is also a safeguarded one. For additional guidance from a trusted industry resource, see Car Care Council’s engine bay cleaning tips, which distill expert advice into practical steps you can apply as part of a routine maintenance habit: https://www.carcare.org/engine-bay-cleaning-tips.
Final thoughts
In conclusion, cleaning the engine bay of a truck is a critical task that requires careful consideration of various factors. By adhering to the steps outlined in this guide—preparing properly, using the right techniques for debris removal, applying cleaners effectively, and ensuring thorough rinsing and drying—fleet supervisors and trucking operators can maintain a clean, functional, and reliable vehicle. This not only enhances vehicle performance but also minimizes long-term maintenance costs by preventing potential issues. Regular engine bay cleaning should be considered an integral part of fleet management strategies.