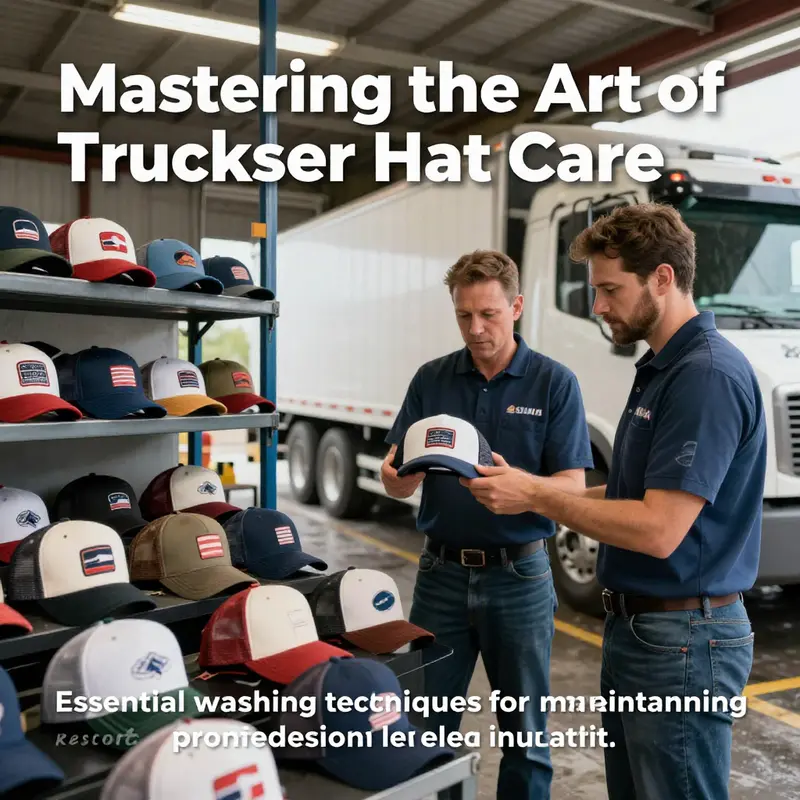
Maintaining a clean and professional appearance in the transportation and construction industries is imperative, particularly for those in leadership positions. Trucker hats, a staple in these sectors, serve not only a functional purpose but also represent the brand’s image. Proper care and cleaning of these hats ensure longevity and maintain their aesthetic appeal. This guide breaks down three crucial aspects: the essential steps and materials needed for washing trucker hats, best practices for stain removal, and considerations specific to various styles. Together, these chapters equip logistics fleet managers, trucking operators, and construction supervisors with the knowledge to uphold their team’s professionalism through well-maintained headwear.
From Brim to Mesh: A Practical Guide to Cleaning and Caring for Your Trucker Hat

The trucker hat is more than a casual fixture in a wardrobe; it is a compact wearable object that carries character, memory, and identity. Its construction mesh at the back front panel and a brim that anchors the silhouette demands a careful approach to cleaning. Unlike bulky outerwear or delicate knits, a trucker hat can suffer if washed with the wrong method, shrinking or warping the brim, loosening stitching, or fading the logo. With a thoughtful routine, the hat remains a faithful companion, ready to shade eyes and complete an outfit without losing its shape or personality. To honor this balance between care and use, approach washing as a precise almost ritual activity, not as a routine that treats the hat like any other textile. The difference lies in understanding the hat anatomy and applying a respectful deliberate sequence that preserves both fabric and form.
Before any water touches the fabric, assemble the right tools and materials. You will want a clean basin or sink, cool water, mild dish soap or a gentle laundry detergent, a soft bristled brush or a clean microfiber cloth, a towel for blotting, and a simple support for drying that helps hold the crown in its natural shape. The goal is to minimize agitation that can loosen seams or misalign the brim structure, and to avoid heat that can shrink fibers or degrade the plastics and cardboard often found in the front brim insert. Having the right tools at hand makes the process smoother and reduces the chance of accidental damage. The materials list mirrors the hat delicate balance of mesh fabric and embroidery. The mesh is lightweight and porous but shows dirt in quick stubborn spots. The cotton or polyester components of the front panel grab and hold stains differently, especially if there is a debossed or raised logo that sits above the weave. The plastic or cardboard inside the brim demands gentleness because heat and harsh manipulation can warp or soften the insert. Begin the cleaning journey.
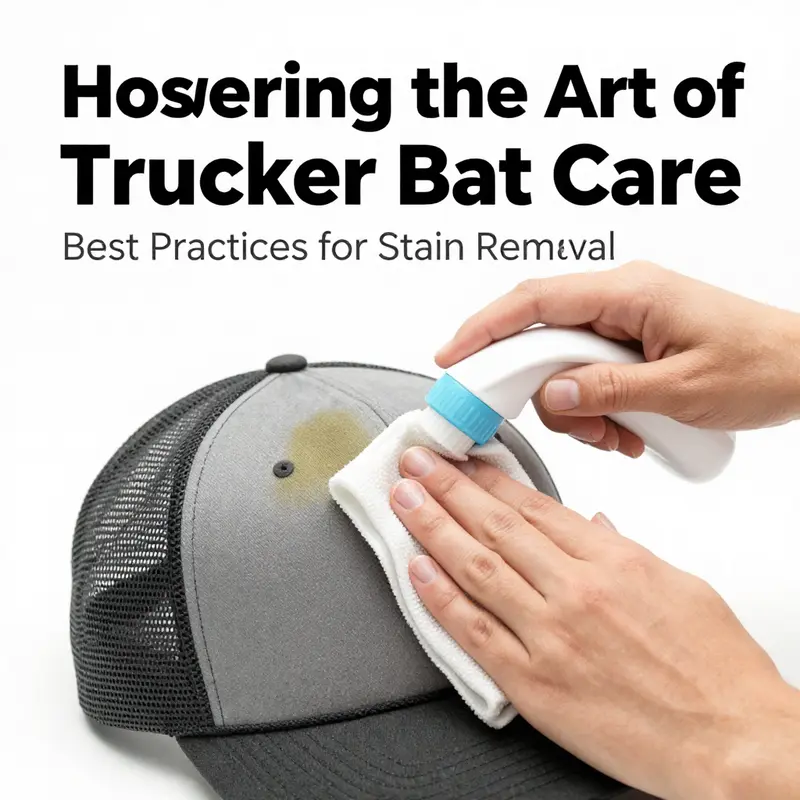
A manual approach begins with a careful pre treatment. Inspect the hat for visible stains around the sweatband the crown and any patches or embroidery where dirt tends to collect. Rather than soaking the entire hat apply a small amount of soapy solution directly to the affected area. Gently dab with a fingertip or soft cloth, and avoid saturating the whole cap. The intent is to break up grime in place and limit moisture exposure to sensitive areas. If the hat has a logo or patch with tight stitching, treat those zones with extra care, using a light touch to avoid lifting threads or distorting edges. The principle here is restraint, a little soap goes a long way, and patience yields a better clean than brute scrubbing.
When you proceed to the main wash, the emphasis turns to gentle immersion rather than aggressive cleansing. Fill the basin with cool water and add a few drops of mild detergent. The cool water matters because heat can shrink or warp the fibers, particularly on the front panel and brim. Submerge the hat slowly, keeping the brim supported to prevent it from bending into awkward shapes. Allow the hat to soak for five to ten minutes. During this time, you can gently move the water with your hands to loosen embedded grime. Avoid twisting or wringing, which can distort the crown or crease the brim. The duration is short enough to loosen dirt without saturating the materials for an extended period.
Spot cleaning the brim and the front panel receives particular attention. The brim, especially if it is plastic- or cardboard-reinforced, is the most vulnerable to distortion from stressed moisture. Use a soft brush or cloth dampened with soapy water to lightly cleanse the front panel and the edges of the brim. Work in small circular motions around the logo or embroidery, if present, taking care not to catch loose threads or pull on raised areas. Rinse the hat slowly under cool running water, ensuring that soap residue has fully dissolved and drained away. Soap left in the fabric invites new dirt to cling, turning a once clean hat into a magnet for dust and sweat residue later on. A thorough rinse is as essential as a gentle clean.
Rinsing becomes the pivotal moment of the ritual. Detach yourself from the impulse to hurry, and ensure that every trace of detergent is washed away. Leftover soap can attract additional dirt and expose fabrics to accelerated wear over time. Hold the crown upright as you rinse, letting the water wash through the mesh and the interior without forcing the brim to bear the weight of the hat. The goal is a clear, conditioner-free rinse that leaves the fabric, stitching, and embroidery fresh rather than slick or coated with soap film. After rinsing, gently press or blot the hat with a towel to remove excess water. Do not twist the crown or squeeze the brim to wring it dry. The shape deserves respect, even in the drying stage, because this is where the hat often reveals its resilience or vulnerability.
Drying is where a hat silhouette has the chance to recover and hold its form. The damp hat should be reshaped while it is still pliable. Gently adjust the crown, align any seams, and flatten the brim so that it dries in a natural, even curve. The method for drying matters as much as the washing. Set the hat on a dedicated hat stand, or invert a clean empty bottle that is slightly larger than your head, and place the hat over it. This technique creates a stable, supportive form that prevents the brim from warping and keeps the crown from collapsing inward as it dries. Place the setup in a well ventilated area away from direct sunlight or heat sources such as radiators or hairdryers. Direct heat can shrink or melt plastic inserts and distort stitching, leaving you with a hat that resembles a cautionary tale more than a personal staple. Natural air drying may take longer, but the result is steadier and more faithful to the hats original shape.
Closing note. External reading can supplement this practical guide by offering broader perspectives on material behavior and care across different hat types and finishes. For readers curious about related material science considerations and care principles drawn from laboratory style testing and applied knowledge a recent study provides additional context on how fabrics respond to moisture heat and mechanical stress. The resource may point to a reputable source or a study to explore further. The underlying principle remains simple treat items with knowledge of their materials and you protect their value through careful handling.
Preserving the Shape of a Statement: A Practical, Woven Guide to Washing a Trucker Hat
A trucker hat is more than a casual topperset for a sunlit drive or a quick shade shield during a long shift. It’s a piece of daily gear that travels with you through weather, street grime, and the small rituals of daily life. Because of that, washing one well is less about making it look pristine and more about preserving its structure, its embroidery, and the character that comes with every loose thread and frayed edge. The goal is not a showroom-clean cap but a living, comfortable hat that will keep its shape and its personality the next time you reach for it. To get there, you start with understanding the hat you’re holding in your hands. Trucker hats are typically built with a structured front panel, which can house a plastic or cardboard insert beneath the crown. The plastic or cardboard helps hold the front’s shape, especially when the hat is new and stiff. Behind the front, many trucker hats feature a mesh back that stands up to heat and breathes when the day grows warm. The embroidery on the front—that logo, wordmark, or emblem—often bears the most sensitive part of the design, because threads and threads of color meet the washing environment where water, agitation, and soap all contend. Each of these elements—panel, brim, embroidery, mesh—responds differently to moisture and movement, which is why a thoughtful washing approach matters more than a quick rinse or a tumble cycle. The care label inside the hat is your first compass. If the manufacturer provides specific instructions, those directions should guide you. Some tags might call for spot cleaning over dunking, or for line-drying in a particular position. When a care label exists, it is there to protect the material from the kinds of stress that can creep in during vigorous washing. If there is no care label or if the label is faded beyond legibility, you default to the gentlest approach that still removes the obvious grit and stains. In practice, that means treating the hat as a delicate piece of headwear rather than a casual shirt. The first step, even before you reach for a cloth, is to assess what is most likely to come off without harming the hat’s structure. The brim is often the most fragile component. It may be flat or curved, and in many structured hats it contains a stiff insert that resists bending. Excessive twisting or wringing can distort the brim or cause the insert to shift, creating a bend that becomes permanent. This is why the quick, heavy-handed rinse with a spin cycle is not a friend to a trucker hat. Instead, a calm, controlled approach ensures the brim retains its original contour. The back mesh, while more forgiving than the rigid front, can still sag or warp if it’s left to soak in a pool of water or if it’s subjected to high heat during drying. The embroidery is the most delicate element. Stains can cling to the stitches, and the colors can fade with repeated exposure to sunlight or harsh cleaning agents. The careful balance is clear: you want to remove the grime, but you don’t want to loosen stitching or fade the print. With those considerations in mind, you begin with a plan that goes from mild to more thorough, moving only as far as necessary to restore cleanliness without compromising the hat’s integrity. Spot cleaning is the most conservative starting point. If you can visibly see stains or dirt on the front panel or around the brim’s edge, a soft cloth or small sponge dampened with cool water and a touch of mild detergent can be rolled across the surface. The key is to dab, not rub. A gentle dab minimizes agitation that could loosen threads or push dirt deeper into the weave. For a deep set of stains or for a more general refresh when the hat is clearly dirty across several areas—around the brim edge, near the logo, or on the mesh back—a deeper cleaning is warranted. The transition from spot cleaning to a deeper clean should be gradual. Start by filling a clean basin with cool water and adding just a few drops of mild laundry soap. The water should feel cool and comfortable to the touch, not hot. Submerge the hat and let it rest momentarily while you prepare to work with it. Once you begin, use your hands to gently agitate the hat. Think of it as a very light hand wash rather than a full immersion that you would apply to a t shirt. The objective is to loosen dirt that has settled into fibers without distorting the hat’s shape. It’s crucial not to twist or wring, especially around the brim where the insert can warp. If you have a structured hat with a cardboard or plastic insert, keep the hat submerged only briefly and avoid squeezing or twisting that insert out of its intended form. A soak of five to ten minutes provides enough time for the water and detergent to loosen soil and sweat without turning the hat into a soggy, misshapen object. After soaking, a thorough rinse is essential. Run cool water over the hat, making sure to remove all soap suds from the crown, the brim, and the mesh. Soap residue can leave a streaked look or alter color, especially on high-detail prints or embroidery. The rinse should be patient and complete, with the water flowing in a clean, steady stream to wash away any remaining detergent. At this point the hat is still damp, and that dampness is crucial to how you finish the process. Reshaping the hat while it is damp helps secure its form before the fibers dry. If the brim has shown a bit of warp during washing, carefully adjust the curve with your hands to the shape you remember or that matches other hats you own. The hat should lay flat to dry or be supported on a clean towel. A drying rack, a wire grid, or even a clean, flat surface can work, provided the hat stays in its natural orientation and doesn’t lean on anything that could crease the crown. The method of drying matters as much as how you washed. Heat is the enemy of a trucker hat. Put simply, heat can shrink fabric, melt the brim’s edge, or pull at the embroidery threads. Drying the hat in a dryer is strongly discouraged. The high heat of a machine can irreversibly distort the hat’s profile, which is exactly what you want to avoid. Air drying is the preferred approach. Do not place the hat in direct sunlight for long periods; while sunlight can fade colors, it can also cause the fabric to become brittle. The best practice is to air-dry the hat in a shaded, well-ventilated area. If you are drying indoors, keep it away from radiators or other heat sources that could elevate the temperature unevenly. A damp hat on a towel can rest on a clean surface, and in some cases you can prop the hat on a warm, soft surface to maintain its curved brim shape while the moisture evaporates. As it dries, check the hat’s shape periodically and adjust it gently if needed. You want to preserve the raised front panel’s structure and any crown that contributes to how the hat sits on your head. There is more to consider than the immediate act of cleaning. Distressed or vintage trucker hats, for example, often rely on their weathered look as part of their appeal. Aggressive cleaning risks stripping away the character that makes these hats unique. In those cases, less is more. A light wipe over the surface to remove surface dust may be enough, followed by air drying. The same caution applies to hats with a snapback or adjustable strap. Moisture can encourage metal parts to rust or the strap’s stitching to loosen if exposed to water for too long. Here the emphasis is on controlled dampness rather than soaking. It’s worth noting that the approach may vary if the hat carries a high-detail print or brand-specific embroidery. Hand washing helps preserve the fine threads and color consistency that machine washing could disturb. If you are dealing with a printed logo or a complex emblem, err on the side of gentler handling. The small, precise movements of your fingers can protect the tight weave around the design while you clean. As you wash and dry, you begin to understand that hat care is a rhythm—one that mirrors how you approach other careful tasks, from cleaning heavy gear to maintaining the delicate finishes on equipment used in daily work. The experience becomes less about removing dirt and more about extending the hat’s usable life, so it remains comfortable and visually balanced. For readers who want to explore a broader, parallel set of maintenance practices—how professionals approach stubborn grime on large gear and machinery—you can explore proven-strategies-for-cleaning-grease-and-tar-off-your-trucks-fast. This reference demonstrates a measured, precise approach to cleansing tough surfaces without compromising their structural integrity. It serves as a reminder that the same patience and restraint that work on a mechanical system can also work on fabric and threads. To connect this mindset back to your hat, consider how you would treat a fragile badge, a stitched logo, or a delicate edge. You apply gentle pressure, you test a small area first, you rinse thoroughly, and you ensure the hat dries in a way that keeps its lines intact. The aim is not to chase a spotless surface so much as to preserve the hat’s form and texture while removing the grime that accumulates through daily wear. When you finish the process, you should feel a quiet confidence: the hat has been treated with care, not brute force. The front panel holds its stance, the brim retains its shape, and the mesh back remains breathable. You can wear the hat again on a bright morning or during a long shift with the same ease as before, knowing you did not compromise its lifespan in the pursuit of cleanliness. The method described here is adaptable. If you are faced with a stain you cannot lift with cool water and a mild soap, you can revisit the process with even lighter agitation in a fresh basin and a renewed rinse, always mindful of the hat’s delicate components. If the stain persists, you may opt to spot-clean only specific areas rather than re-dunking the entire crown. The overall principle is straightforward: gentle, measured steps first; more thorough cleaning only if necessary; and always with a careful eye toward the hat’s structural elements. In practice, this means you can tailor your approach to the hat’s construction and its condition, rather than forcing a one-size-fits-all solution. The result is a cap that looks cared-for and behaves like it should when it’s perched on your head. Finally, there is value in viewing hat care as part of a broader routine. If you wash your hat after particularly sweaty or muddy conditions, you may want to consider a quick wipe-down or a spot clean mid-shift to keep it in good shape until a more thorough wash can be performed later. This prevents buildup that would otherwise require a longer soak and a more aggressive scrub the next time. The continuity of care makes it easier to maintain, and the hat remains a reliable companion through upcoming seasons, road trips, and daily tasks. For readers who want a strong sense of how these principles translate to different contexts, the external resource listed below offers additional perspectives on careful cleaning practices that prioritize long-term durability without sacrificing appearance. External resource: https://www.theguardian.com/lifeandstyle/2023/jun/15/how-to-wash-a-trucker-hat-without-damaging-it
Careful Cleaning, Distinctive Styles: How to Wash a Trucker Hat Without Losing Its Shape
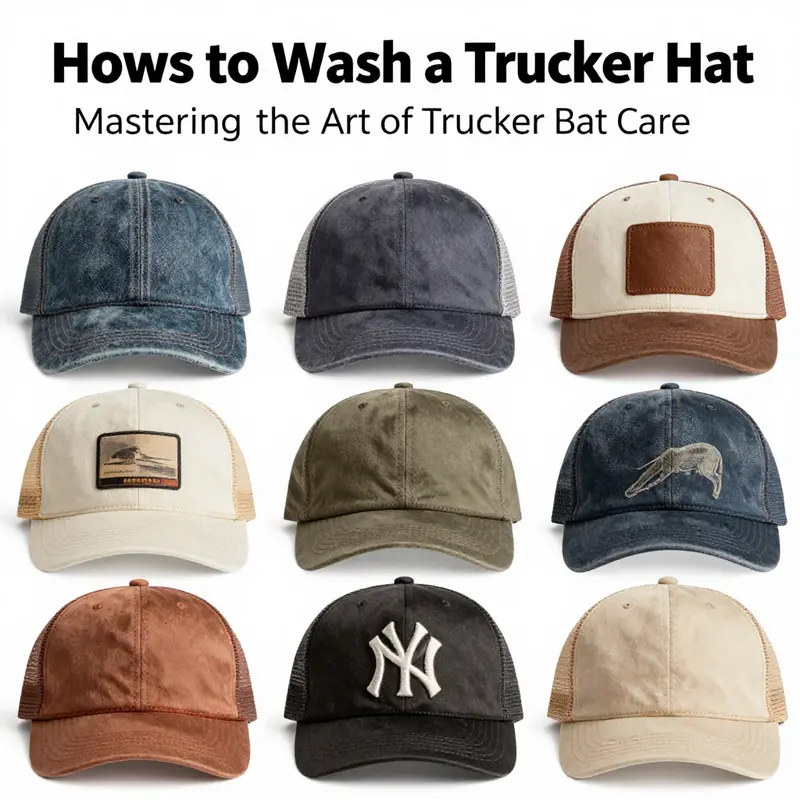
A trucker hat is more than a casual accessory; it’s a small, personal banner that carries logos, patches, and memories. The moment you decide to wash it, you enter a zone where materials, construction, and even the hat’s style collide. The goal isn’t just to remove stains or dirt; it’s to preserve the cap’s shape, the integrity of the brim, and the fidelity of any print or embroidery. This chapter walks you through a comprehensive, single-minded approach to cleaning trucker hats that respects their variety—from the classic snapback with a plastic or cardboard insert to the more delicate patchwork and branded designs. What follows blends practical steps with a broader awareness of style-specific caveats, so you can refresh your hat without sacrificing its character or fit. If you think about care as a form of maintenance rather than a quick fix, you’ll extend the hat’s life and keep the aesthetic you value intact.
The basic premise for washing any trucker hat starts with restraint. Most trucker hats rely on a structured front panel, a mesh back, and a brim that often includes a plastic or cardboard insert to hold its shape. Each component has a weak point: the stiff brim can warp under heat, the front panel’s embroidery can fray if treated roughly, and the mesh back can sag or stretch if it’s repeatedly exposed to excessive moisture or agitation. The care label is your first and best guide. If you’re fortunate enough to find explicit washing instructions, follow them to the letter. If not, treat the hat as a delicate item and proceed with gentle methods that minimize mechanical stress. In practice, this means avoiding the washing machine and dryer altogether, opting for hand washing, and ensuring the hat is reshaped while damp so it dries into its original silhouette. The rationale is straightforward. Heat distorts, agitation scrubs away threads and prints, and moisture stored in the wrong places can encourage mold or fading. The aim is a clean hat that looks as close as possible to the day you bought it, not a hat that survives a cycle only to shrink or warp out of recognition.
To translate this into action, begin with a careful assessment of the hat you’re about to clean. Distinguish between the standard trucker hat and the styles that often get misinterpreted as more forgiving because they look “rugged” or “distressed.” Your decisions about cleaning are driven not by instinct but by the hat’s construction and desired outcome. If the label or your knowledge of its construction guides you toward hand washing, you’re already on solid ground. If you’re dealing with a distressed or vintage piece, you’ll want to adjust your approach to preserve the character that gives it value. Distressed hats may feature frayed edges, faded patches, or bleached fabric that contributes to their appeal. The moment you tell yourself “I’ll just soak it to get this out,” you’ve started down a path that can erase those intentionally worn details. In such cases, gentler methods—spot-cleaning and air drying—become not just sensible but essential. The same logic applies to patchwork hats. A collage of fabrics, embroidery, and sewn-on patches can react differently to water and detergents. Some patches may bleed color, others may shrink, and some may detach from the base fabric if exposed to too much moisture. Here the plan is conservative: spot clean around the patches with a cotton swab dipped in mild soapy water, avoid soaking the entire hat, and consider professional cleaning if a full refresh is truly needed. A branded hat with high-detail prints demands another layer of care. The print is most vulnerable to rub, fade, or flake if harsh chemicals are used or if the front panel is scrubbed aggressively. A gentle hand-wash that keeps your fingers light and your motions soft around the printed area is the smart course. In all cases, after cleaning, the hat should air dry away from direct heat sources and sunlight to prevent color shifting or material fatigue.
The actual washing process can be broken down into a few core steps that apply across styles, with adjustments for particular features. Start with a spot-clean if the hat only has light stains on the crown or the logo. Use a soft cloth or a sponge dampened with cool water and a small amount of mild detergent. Lightly dab the stained area rather than rub. Rubbing concentrates friction in one spot and can push color out of the print or irritate the embroidery. If the stain lingers, move to a more thorough approach, but keep it gentle. Even in a hand-wash scenario, the goal is to contour around the problem rather than bombard the fabric with scrubbing motions.
When a deeper clean is necessary, the hand-wash method is the reliable option. Prepare a basin with cool water and add a few drops of gentle laundry soap. Soak the hat briefly and then lift it from the water to agitate it slowly with your hands. Avoid twisting or wringing the brim, especially if the insert is plastic or cardboard, which can warp or crack. If the brim is already compromised, treat it even more carefully. Let the hat soak for five to ten minutes, then rinse thoroughly under cool running water until all soap is gone. The emphasis remains on control rather than speed. You want the dirt to loosen, not the hat’s structural elements to surrender to the water’s force. After rinsing, avoid wringing any part of the hat. Instead, gently press the excess water from the crown and brim using a clean towel. The objective is moisture, not soaking saturation.
Reshaping while damp is a pivotal step. The hat should be returned to its intended form when it’s still damp, but not dripping. Gently position the crown upright, align the brim with its curvature, and ensure any embroidery lies flat rather than puckered. If you have a hat form or a clean, dry towel you can place inside, that can help this shaping process, but even a reasonable substitute—like stuffing the crown with a rolled towel—works in a pinch. The key is consistency: real, steady pressure to restore shape without forcing seams to stretch awkwardly. For many hats, air drying is all that’s needed. Lay the hat flat on a clean towel, preferably in a shaded area with good airflow, or hang it upside down to discourage water from pooling in any one area. The argument against a dryer is straightforward: heat can shrink the mesh, warp the brim, and weaken stitching over time. The heat can also distort the cardboard or plastic insert that gives the brim its signature shape. The goal is a natural dry, without forced acceleration that could do long-tail damage.
Understanding the particular style you own helps refine this approach further. A standard trucker hat with a plastic or cardboard brim insert requires the most caution. The insert is delicate to heat and pressure, and any warping is often permanent. You’ll want to avoid machine washing altogether with these hats, sticking to spot-cleaning for minor stains or a careful hand wash for deeper cleansing. The mesh back, while breathable, remains vulnerable to aggressive agitation. A soft brush can be used in a spot-cleaning scenario to lift grime from the interior headband and the mesh, but do so with minimal pressure and in a direction that won’t snag threads.
Distressed or vintage trucker hats deserve a different type of respect. The frayed edges, the faded patches, and the overall weathered look are why people buy and wear these pieces. Aggressive cleaning can strip away the character that defines them, so the strategy is minimal intervention: spot-clean only if necessary, avoid soaking, and allow it to air dry away from heat. If the fabric has already begun to feel stiff from age or wear, you may want to rely on gentle airing to refresh the item rather than water-based cleaning. For these items, fluffing the exterior with a soft brush after air-drying can help maintain texture and the intended aesthetic without erasing its history. Patchwork hats present another layer of complexity. The patches might be different fabrics with distinct weaves and finishes. Some fabrics are tolerant of water; others are not. The safe path is spot cleaning around each patch instead of full immersion. A cotton swab with a small amount of diluted detergent can clean the area and prevent color bleed. If a more thorough refinement is necessary, professional cleaning becomes a viable option to avoid patch detachment or color migration.
Branded trucker hats, such as those with high-detail prints or reinforced stitching, require even more care around the front panel. The print area should be shielded from aggressive scrubbing. Detergents that contain bleach alternatives or strong solvents can cause colors to fade or peel, and the stitching around the print may loosen if exposed to excessive moisture. The recommended method remains a gentle hand wash, with exceptional care near the printed surface. A minimal amount of soap and a soft touch can preserve the sharpness of the print and the crisp lines of any embroidery. If your hat features a plastic or cardboard insert in the brim, keep the wash away from this element to avoid distortion that could ruin the silhouette.
In short, the washing process for a trucker hat should be thought of as a ritual of restraint and respect. The steps are simple, but their consequences are meaningful. Begin with a careful assessment, choose the method that aligns with the hat’s construction, perform the process with gentle efficiency, and finish with an air-dry regime that supports the hat’s original geometry. The aim is not only cleanliness but also longevity, ensuring that the hat remains a reliable, faithful accessory. Pair that mindset with the practical steps outlined, and you’ll turn what could be a delicate maintenance task into a routine that preserves both form and function.
To integrate broader perspectives on cleaning in related contexts, you can explore how professionals approach cleaning in other heavy-use environments. For example, there is a body of guidance on removing tough residues from gear and equipment, emphasizing the balance between effective cleansing and material preservation. This broader lens can be particularly instructive when dealing with hats that have prints or patches, because it underscores the principle that gentleness is often the most powerful cleaning tactic. The same ethos—that care and restraint yield longer-lasting results—applies whether you are tending a fabric cap or a work-ready piece that faces harsher conditions.
As you apply these guidelines to your own collection, remember that your hat’s personality matters as much as its material composition. A standard trucker hat earns a straightforward approach: gentle cleaning, shape restoration while damp, and complete air drying. A distressed item asks for a lighter touch, with an emphasis on preserving the worn look. Patchwork designs demand circumspect attention to each segment, and branded hats require particular care to protect the print. For every hat, the thread that binds these practices is a simple rule: never rush the process, never subject the hat to heat, and never lose sight of the hat’s original shape. If you keep that rule in mind, you’ll find that the act of washing a trucker hat becomes less a maintenance headache and more a careful ritual that honors the design and the memory carried by the cap.
For readers who want to explore additional guidance that situates hat care within broader cleaning principles used in other contexts, the following resource offers a comprehensive, detailed look at maintaining fabric integrity across different types of hats. It discusses why hand washing preserves prints better than machine washing and why air drying is essential to maintain shape and material properties. This external resource provides depth for anyone who wants to go beyond the basics and understand the why behind the steps described here. How To Properly Wash Different Types Of Hats Without Damaging Them.
If you’re looking for a concise, practitioner-focused take tied to real-world maintenance tasks in a related field, you can also consider industry-focused cleaning insights that emphasize careful handling and procedure over brute force. In translating those ideas to hat care, the message remains consistent: care yields consistency, and consistency preserves form—and that is exactly what you want when you’re trying to keep a trucker hat looking sharp for seasons to come. And if you want a practical example of how disciplined cleaning principles translate into broader operational success, a related case study on fleet maintenance highlights the same fundamental idea—consistency in care leads to longer-lasting equipment and better overall performance. To explore a narrative like that in a broader context, you might read about proven strategies for cleaning grease and tar off your trucks fast, which demonstrates how careful, methodical cleaning thinking translates across domains. Proven strategies for cleaning grease and tar off trucks fast.
Final thoughts
Proper maintenance of trucker hats is a crucial step for fleet management within the logistics and construction sectors. By adhering to the cleaning methods outlined in this guide, you can enhance the longevity and appearance of these important uniforms. A clean hat not only supports the brand image but also fosters a sense of professionalism among employees. For fleet managers and supervisors, this attention to detail can reflect positively on overall team morale and brand representation. Whether your hats are distressed and vintage or structured and adjustable, understanding how to care for them will ensure you maintain a polished and professional appearance across your fleet.