
Transporting washing machines securely is crucial for logistics professionals tasked with protecting valuable appliances against potential damage during transit. As a Fleet Manager or Trucking Operator, understanding the nuances involved in preparing, securing, and transporting these appliances can significantly enhance operational efficiency and customer satisfaction. This article unfolds in five detailed chapters. Step 1 focuses on the essential preparatory work required before moving the washing machine; Step 2 dives into stabilizing internal components to avoid damage; Step 3 outlines protective measures to safeguard the exterior; Step 4 highlights best loading techniques for optimal stability; and finally, Step 5 addresses safety considerations during transportation. Together, these chapters form a comprehensive framework for ensuring washers arrive at their intended destinations without incident.
Step One: Preparing a Washing Machine for Secure Transport—Power Down, Protect, and Position for a Smooth Move
A washing machine is a complex, heavy object that behaves very differently when it is fully loaded with water, oil, and inertia versus when it is empty and ready to travel. Preparing it for transport is not a single task but a sequence that protects the appliance and the truck alike. The goal is to eliminate leaks, secure moving parts, and minimize the opportunity for damage from shifting weight, vibration, or careless handling. In practice, this means starting with power down and drainage, moving through careful inspection and thorough cleaning, and ending with deliberate internal stabilization and exterior protection. When done well, the first step sets a reliable tone for the rest of the move and makes what follows—loading, securing, and driving—perform as intended rather than as a gamble against the unknown.
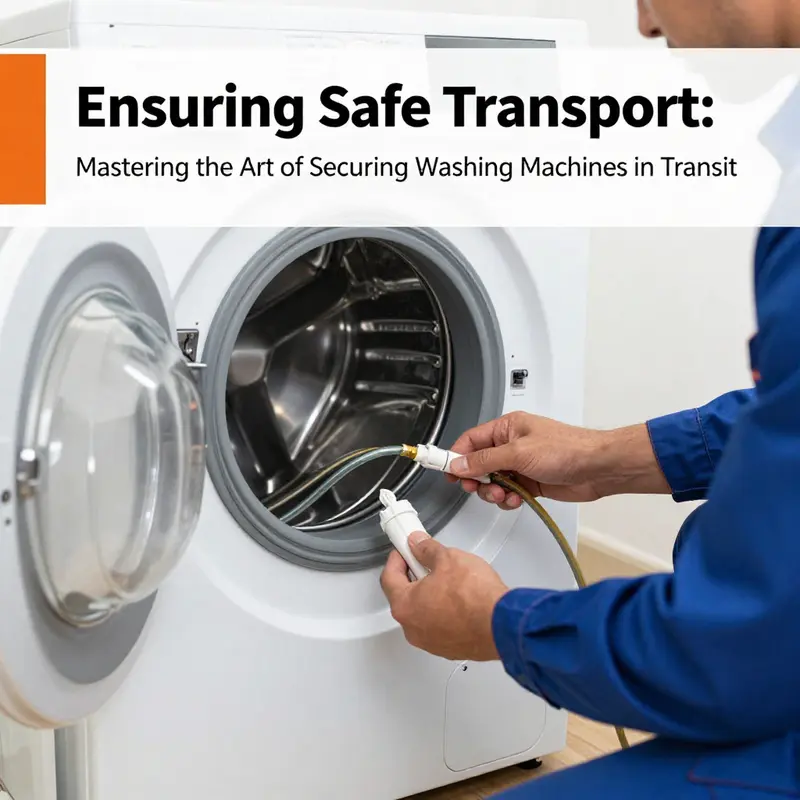
Begin with power down and drainage. The most immediate risk during transit is fluid escaping from hoses, the drum, or the pump. Detach the machine from the electrical supply and shut off the water source. If possible, run a brief rinse cycle to coax out the last stubborn droplets; otherwise, manually drain the drain hose and any residual water through the normal outlet. The aim is a bone-dry interior to deter mold and to prevent water from sloshing inside during turns and jolts. A dry interior also reduces the chance of corrosion or lubricant contamination if the machine shifts unexpectedly while in motion. Once drained, wipe the drum, door seal, and any exposed interior surfaces with a dry cloth or towel, paying close attention to the door seal where dampness can hide and breed mildew during a long move. This preparatory moisture control is small in effort but disproportionately large in payoff for odor-free operation once the machine is reconnected in the new home.
Next, perform a thoughtful pre-move inspection. A quick test cycle can reveal whether the unit remains mechanically sound and free from obvious defects before it is boxed and strapped for travel. Listen for unusual grinding, rattling, or squealing noises that might indicate a loose belt, a misaligned drum, or a failing suspension. Inspect the exterior for cracks, chips, or compromised door glass—front-loaders are particularly vulnerable to glass damage during handling. Take clear, timestamped photos of the machine in its current condition. The visual record can be invaluable if a claim for damage arises later; it proves the state of the appliance before loading began and can guide a fair assessment if concerns emerge during unpacking.
Cleaning the interior and allowing it to dry completely is a small but crucial detail that helps prevent mildew and lingering odors. For front-loading washers, engage a cleaning cycle with a dedicated cleaner designed for mold and odor control; this helps purge residue that thrives in damp seals and crevices. After the cleaning cycle finishes, wipe down the drum again and leave the door ajar for a while to ensure complete evaporation. For top-loading models, remove the agitator when possible and scrub the interior to remove soap scum and residue, then let the tub air-dry. In both cases, the interior must be fully dry before you proceed to stabilization and packaging. The effort pays off later by keeping the interior clean and by preventing the formation of mold when the machine sits upright in the truck or in your new space.
With the interior prepared, the most critical technical step arrives: securing internal components. Front-loading washers rely on transport bolts to stabilize the drum during movement. Locate these bolts, typically found on the back panel near the bottom, and reinstall them if they were removed during installation. Replacing transport bolts locks the drum in place and minimizes the risk of violent drum shift that could damage the drum, the motor, or the outer casing. If the model you are moving did not ship with transport bolts, consult the manual for acceptable alternatives or seek a professional’s guidance before packing. Failure to secure the drum in a tumbling washer can translate a routine bump into an expensive repair. For top-loading and agitator-equipped machines, the strategy shifts. While there are no transport bolts to reinstall, you can still reduce internal movement by packing soft towels or foam padding around the space between the drum and the outer tub. This cushioning dampens vibration and discourages the drum from banging against the tub during transit. Some movers also tape the lid shut to prevent it from opening accidentally when the vehicle is in motion. In all cases, the objective is stability: the more firmly the inner assembly is contained, the less risk there is of misalignment and wear as you drive.
Protecting the exterior and keeping the unit intact during loading are the next phases. Wrap the entire machine in protective material—stretch wrap, bubble wrap, or thick moving blankets—to shield corners and edges from scuffs, dents, and dust. The corners are particularly vulnerable because a single sharp impact can transfer stress through the frame and into the internal mechanism. If you still have the original packaging, that remains the best option for cushioning; the original inserts are designed specifically for your model’s geometry and weight distribution. Where original packaging is not available, use high-quality protective materials and box up the unit with sturdy cardboard to add rigidity. While protecting the exterior, remember that the physical orientation matters: keep the washer upright throughout the move. Tilting beyond 45 degrees can allow oil and coolant from the pump area to migrate toward sensitive parts, creating gasket leaks and potential pump failures once in service. A straight, upright stance also simplifies loading and securing in the truck, reducing the risk of a topple or shift during transit.
Proper loading techniques are a natural extension of the prior steps. Lift, do not drag; this avoids scratching floors, displacing protective wraps, or causing the lower frame to skid across a hard surface. Two people provide the safest method, each supporting the base evenly so the load remains balanced. The machine should be kept in an upright position as you move it into the truck. Once inside, position it against a wall or in a corner of the truck bed. This spot is safer because the wall acts as a natural barrier against sideways movement. Use sturdy straps or ropes to anchor the washer firmly to anchor points in the bed, crisscrossing or tying down near the top and bottom to prevent shift in any direction. Avoid stacking other heavy items directly on top of it; excessive weight compression on the top of a washer can cause denting and misalignment over time, and vibration can be magnified if the unit is not properly supported.
From a safety and efficiency standpoint, driving dynamics matter as well. Even with excellent preparation, rough handling can defeat the purpose of all the prior work. Drive smoothly, anticipate stops, and minimize abrupt accelerations, decelerations, and sudden turns. The goal is to maintain a low but steady lateral and vertical load. A well-secured washer can withstand ordinary road irregularities, but it is not a free-floating object. Gentle driving translates into fewer dislodgments and a more predictable unloading process at the destination. If you are moving long distances or across regions where regulatory expectations differ, it is prudent to consider professional logistics support that offers unpacking, inspection, functional testing, and secure delivery services. This can ensure the appliance arrives ready to use and with the initial condition intact, mirroring the careful preparation you have invested in step one. Internal links to industry guidance emphasize how transport integrity aligns with broader fleet and safety standards, such as the link below: truck wash industry compliance and emissions regulations.
Finally, after the move, give the machine time to settle before reconnecting power. Upright placement after transport is essential because lubricants and fluids can shift during the journey. Allow the unit to rest for at least four hours before attempting to power it on. This waiting period helps prevent immediate startup mishaps caused by migrated fluids and ensures the unit has regained its equilibrium. If the move has been part of a larger, multi-item relocation, consider performing a quick post-move diagnostic: once you plug it in, run a short cycle to verify that no unusual noises, vibrations, or leakage have appeared during the transport. If anything seems off, stop the cycle and recheck the mounting and protective wraps, or seek professional service before continuing.
The logic of step one is simple but powerful: a disciplined sequence of power down, drainage, inspection, cleaning, stabilization, and protection creates a foundation that reduces risk and saves time later. It also aligns with broader best practices for moving sensitive household appliances, which emphasize documentation, protective packaging, and careful handling. For readers who will embark on cross-border or regional moves, the lesson is unmistakable: invest in the right materials, secure the internal components with the appropriate hardware or padding, and partner with a logistics provider that prioritizes unpacking, inspection, and functional testing on delivery. These steps ensure the appliance is not just transported but delivered in a state that makes it immediately usable, with minimal post-move surprises. If you want a broader context on how this preparation fits into an entire moving workflow, consult industry resources that discuss compliance, safety, and best practices for truck operations and equipment handling. For more real-time guidance and best practices from established moving resources, you can consult the detailed guide on how to move a washing machine: https://www.moving.com/guides/how-to-move-a-washing-machine
Step 2: Stabilizing Internal Components During Transit
Stabilizing internal components during transit is more than simply tightening a strap around a bulky appliance. It is the quiet, neural work that keeps a washing machine from turning a fragile interior into a rattling mess on the back of a truck. After you have prepared the machine and protected its exterior, the focus shifts inward, toward the drum, the suspension, the valve assemblies, and the myriad tiny parts that keep the machine running. The aim is to create a single, rigid unit that can ride out the road’s roughness without the contents shifting, rubbing, or separating. Think of it as building a compact fortress inside the truck where every component has a fixed place and a controlled motion. When done well, this internal stabilization reduces vibration, lowers the risk of leaks, and preserves the washer’s hydraulic and mechanical alignment so it can be plugged in and used again upon arrival without surprises.
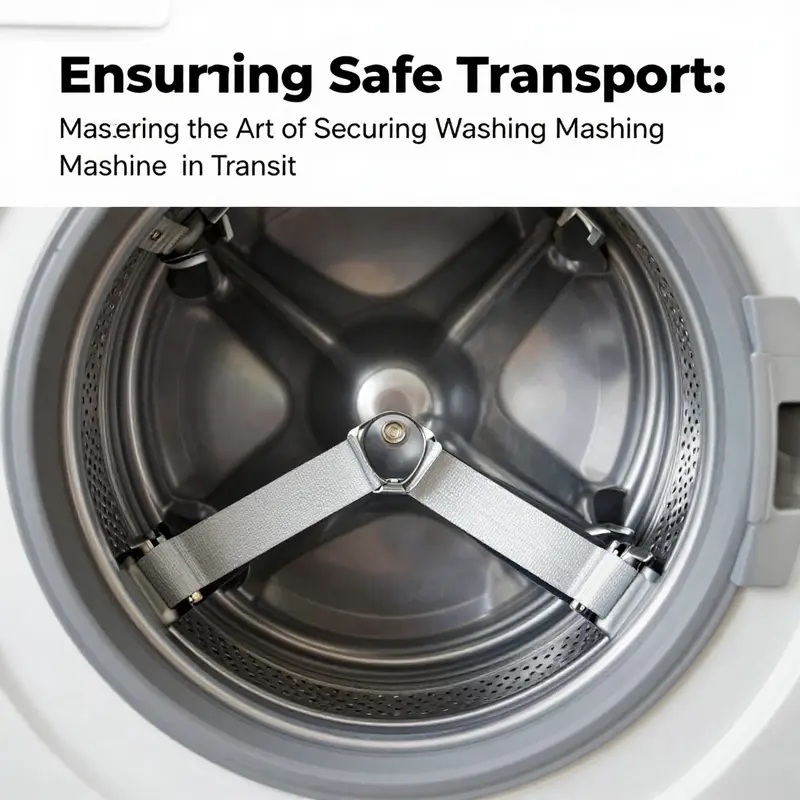
The core idea is simple in principle, yet demanding in practice: immobilize the drum and hold the surrounding structures steady so they cannot migrate toward the walls, the frame, or the motor. A professional drum retention strap is the most reliable tool for this purpose, providing a dedicated anchor point that yields a robust hold without allowing slip. If a retention strap is unavailable, a combination of heavy-duty rope or heavy-gauge bungee cords can substitute, but you must use them with care—padding and even distribution matter as much as the strength of the ties. The risk with improvised ties is that they can cut into delicate surfaces or create uneven forces that transfer vibrations into the drum and suspension system. Whatever method you choose, the objective remains constant: prevent movement.
To translate the theory into practical steps, begin with the drum itself. Remove nothing essential that would affect performance, but ensure nothing can shift on its own. If the manufacturer’s shipping bolts are not in place for transport, you should rely on the drum strap to secure the tub to the chassis with the same certainty a beekeeper uses to secure a hive for a winter move. In beekeeping, a hive is bound into a rigid unit to survive the road; the analogy holds for a washing machine as well. Inside the beehive, the bottom board, brood box, and top cover must stay aligned and locked together so their collective mass doesn’t vibrate apart. The core lesson from that practice—mechanical fixation that minimizes relative movement—applies directly to an appliance: fix the parts so they behave as one assembly under motion. This is not about locking every screw; it is about choosing anchor points that distribute forces evenly and keep the drum square to the chassis.
Supplemental reinforcement can extend the life of the stabilizing effort. Adhesive tape or mesh bags can be used alongside the primary fasteners to dampen vibration and prevent minor shifts from propagating into larger movements. The tape should be applied sparingly and never over the seals or moving interfaces where it could impede operation or leave adhesive residue. The mesh bags, meanwhile, can cradle smaller parts that might rattle, such as hoses, clamps, or small brackets, without crowding the drum. The extra layer of restraint acts as a secondary line of defense against leg-shaking bumps or a sudden stop that would otherwise let a component, however slight, begin to wander inside the cabinet.
The method of securing an internal assembly must be tailored to the truck’s geometry. Position the washer upright, with the drum axis vertical and aligned as close as possible to its operating orientation. Do not tilt more than forty-five degrees, because tilting can cause oil or coolant to migrate toward seals and bearings, potentially loosening seals or misaligning the sump. Place the unit against a wall or corner of the truck bed, where its back and sides can be braced. Use multiple straps anchored to solid points on the vehicle. A single strap is rarely enough to restrain a heavy load on rough pavement; the goal is a web of interlocking restraints that cancel the momentum of any single jolt. The straps should crisscross in a way that distributes force across the base and around the drum, ensuring no edge bears a disproportionate load that could chip a corner or dent a panel.
The process of tightening should be deliberate and incremental. Begin with the major restraint at the base, then add side straps to pull the washer gently into a snug, non-wobbling posture. After the straps are tight, test the unit by applying a gentle push and pull in different directions. If there is any visible shift, tighten again or reposition a strap to remove the slack. Weight shifts during braking or evasive maneuvers often come from the most innocuous places—an unpadded corner, a small gap, or a strap that has worked a little loose. In such moments, the difference between a quiet ride and a damaged appliance is the difference between a bound unit and a bundle of rattling parts.
Inside this stabilization philosophy lies another practical rule: never leave discretionary space around the machine for movement. Fill gaps with protective padding such as foam, sacks of clothing, or rolled towels to dampen vibrations and reduce the chance that a strut or hose will strike a hard surface. This careful packing performs two functions at once. First, it lowers the amplitude of vibrations that travel through the washer’s frame. Second, it prevents small components from shifting and eventually rubbing against the drum or the motor assembly. The result is a package that behaves as a single, quiet block rather than a loose collection of pieces.
As a carful reminder, the exterior protection still matters. Before you consider the darned inner cage of the machine, ensure the exterior is fully wrapped and immobilized so nothing external pushes into the interior. A snug, foam-backed wrap helps prevent scratches and dents on the cabinet as the vehicle navigates uneven surfaces. The beehive analogy returns here as well: when a hive is transported, the outer shell plus interior binding create a body that resists external pressure while resisting internal movement. In both cases, the craft lies in harmonizing exterior protection with interior stability so the entire load behaves as one unit through every mile.
If you are transporting multiple loads or moving through particularly rough terrain, a second layer of control may be warranted. Use edge guards or corner protectors on the washer to guard against sharp contact with the bed or other objects. While it is tempting to stack or compress slightly to save space, avoid stacking heavy items atop the washer, and never place weight on top of the drum or control panel. The weight and pressure should be distributed evenly across the bed and against the anchoring points so that the unit does not tilt or pivot during a sudden stop.
After you have secured the internal components and confirmed no movement, it helps to conduct a test-drive check. With the vehicle stationary, give a careful, controlled nudge in each direction, watching for any shift. Then, as the journey begins, drive smoothly. Avoid abrupt starts, hard braking, and sharp turns. A well-stabilized unit will reveal its success not through a loud crash but through a calm, steady ride. Once you reach the destination, do not immediately power the washer. Let the unit rest upright for a few hours. This pause gives any displaced lubricants or fluids time to settle back into place and minimises the risk of startup leakage or pressure surges when power is applied.
For longer hauls that cross regional boundaries or require professional handling, consider engaging a mover who can provide unpacking, inspection, and functional testing at delivery. The best movers treat appliances like fragile, precisely calibrated equipment, offering careful placement, controlled unloading, and a quick readiness check. They know that internal stabilization pays dividends in reducing damage and downtime. If you encounter a situation where you must rely on commercial services, ask for a service plan that includes post-delivery checks and a short test cycle to confirm operation before the customer signs off.
A practical, everyday reference for reinforcing the principle of mechanical fixation comes from an adjacent field that deals with delicate, portable loads. Beekeeping transportation tips emphasize binding components into a single unit to prevent movement on the road. The same logic—bind the parts, cushion the joints, and anchor them so the whole assembly travels straight and true—applies to the washing machine. For a broader look at these principles and how they translate across different kinds of loads, see the resource linked here: https://www.beesource.com/beekeeping-transportation-tips/.
As you complete the cycle of stabilization, you may wish to revisit an internal link that reinforces good practice for future moves. The principle of maintaining a well-kept transport infrastructure, including regular trailer maintenance, supports safer, more reliable loading and securing. A quick reference to that guidance can be found at this practical resource: Importance of regular trailer maintenance. Returning to the fundamentals—secure attachment points, careful interior binding, and uniform weight distribution—will help you repeat these gains on subsequent moves and protect other sensitive cargo in your care.
In sum, Step 2 is about turning a heavy, potentially capricious appliance into a predictable load. It requires thoughtful restraint, a steady hand, and a disciplined approach to packing and fastening. When you combine a reliable drum retention strategy with supplementary padding, careful strap placement, and a careful restraint plan that respects the upright orientation and the truck’s geometry, you create a resilient unit that travels with confidence. The result is not only protection for the washer but a smoother workflow for the entire moving process, reducing downtime and the risk of costly repairs after a long journey. The inner order you establish—immediately stabilizing the drum, securing adjacent components, and maintaining a compact, cushioned profile—lays the groundwork for a successful, damage-free arrival and a ready-to-use machine on the other end.
Exterior Armor for Transit: Protecting the Washing Machine’s Outer Shell During Truck Hauls

A moving washer faces more than gravity and jolts during a truck haul; it endures the streak of sun, dust, moisture, and careless bumps that can dent, fade, or corrosion-settle its exterior. The outer shell—whether steel, ABS plastic, or a hybrid finish—needs a deliberate shield, not merely a cosmetic veil. Protecting the exterior is a practical, proactive act that preserves appearance and value, while reducing the chance of stray moisture finding its way to seams and electronics after a long ride. When you plan the transport with an eye toward exterior protection, you create a buffer that pays off in fewer repairs, fewer complaints, and less time spent on the back end of a move.
A core truth guides this stage: exterior protection is about minimizing contact with damage, keeping surfaces clean, and preventing environmental factors from accelerating wear. Start with the simple principle of avoiding sharp or abrasive contact. The path to a pristine surface begins long before the truck doors close. Move any sharp tools, loose screws, or metal objects away from the washer and its immediate surroundings. A single misplaced tool can scratch a panel or nick a corner, and those micro-damages can become focal points for rust or cracking over time. Likewise, avoid abrasive cleaners or aggressive scrubbers. They may seem effective for a quick shine, but they leave fine scratches that catch dust and moisture, turning the exterior into a magnet for grime.
If the washer’s exterior is steel, moisture is the traitor to be feared. Steel surfaces drink up humidity and puddles like a sponge and then bake in sunbeams, which can hasten rust and discoloration. The antidote is simple discipline: wipe down after handling or minor exposure, using a dry or just-damp cloth. Do not rinse the body with water, especially around the control panel and any exposed wiring. Water can seep into gaps and seams, inviting rust and electrical issues long after the shipment arrives. In environments with high humidity or on balconies where weather exposure is common, take extra steps. A protective cloth or tarp over the unit shields it from direct sunlight and sudden rain, two culprits that accelerate fading and material fatigue.
For plastic exteriors, the risk is less about rust and more about UV-induced degradation. Prolonged sun exposure can cause plastic casings to fade, crack, or become brittle. Here, shade is a quiet ally. Position the machine away from direct sun when feasible, especially in outdoor loading areas or temporary staging zones. If shade isn’t available, you can use a light, breathable cover that blocks UV rays while allowing airflow to prevent condensation. The cover should be clean and free of grit that could rub against the surface during movement.
The maintenance of the exterior also requires a clean, gentle touch. Regularly wipe the exterior with a soft, lint-free cloth to remove dust, fingerprints, and grime. Dirt buildup can trap moisture and promote corrosion in susceptible areas. When facing stubborn stains, a mild detergent solution applied with a soft cloth is acceptable, but always rinse the cloth and wipe away any soap residue. Harsh solvents or corrosive cleaners have a way of dulling finishes and causing micro-damage that may not be immediately obvious but can accelerate wear during transit.
Protection during loading and securing adds another layer of defense. Wrapping the entire washer with stretch wrap or bubble wrap creates a continuous shield against scuffs, dust, and minor impact. Start with the corners, which are the most vulnerable to strikes from pallets or dock equipment. Use corner protectors or soft padding to absorb any contact with walls of the truck or other objects. If you still have the original packaging, reinserting the washer in its box with foam inserts provides maximum protection for the exterior, though this is more common in long-distance or professional moves.
In practice, a few disciplined steps form a reliable exterior protection routine. First, clear the area around the washer of any loose debris or tools that could scratch or poke the surface. Second, wipe down the machine and dry it, paying attention to joints and door seams where moisture can linger. Third, apply a light coat of protective wrap, ensuring the wrap is snug but not squeezing the panels so tightly that it distorts edges or disturbs the drum alignment. Fourth, add a thin layer of bubble wrap at the most exposed corners and along the top edge if available. Fifth, if the original packing is present, place the unit back into its box with the foam and stabilized inserts. This creates a rigid boundary that helps resist shifting during the ride.
Once wrapped, think through how you’ll secure the washer inside the truck. Keeping the appliance upright is essential. Do not tilt beyond a safe angle, as oils and lubricants inside can migrate toward seals and the pump. Place the unit against a wall or corner of the truck bed where it can back against a solid surface, then employ strong straps or ratchet tie-downs to anchor it securely. The goal is to prevent any movement that could cause the exterior wrap to rub or peel, or worse, push the washer into other objects during sudden stops or turns. Avoid stacking heavy items on top of the washer; the exterior protection only works if the load beneath and above stay balanced and stable. A smooth, well-planned drive helps reduce vibration, which is especially important for both exterior finishing and the integrity of internal components.
There is a practical cadence to this protection that aligns well with broader truck-move best practices. After the vehicle arrives at its destination, and once the washer is offloaded, it is a good habit to inspect the exterior for any damage that may have occurred in transit. Small scratches can be touched up or carefully buffed if needed, and any moisture trapped under wrap should be thoroughly dried before plugging in or running a test cycle. The emphasis is on seeing the exterior as a first line of defense that, if maintained, reduces the risk of internal damage caused by moisture intrusion, dust ingress, or date-of-move corrosion.
The value of exterior protection also reinforces a larger framework of transport logistics and reliability. When you are coordinating a move, the exterior is the visible indicator of care. A well-protected washer signals that the entire load has been treated with consideration, which often correlates with smoother unloading, fewer delays, and better outcomes for both the customer and the moving team. The practice scales into a culture of protection: use stretch wrap for coverage, seal vulnerable edges, and insist on upright transport and restrained securing. It may seem procedural, but the payoff—fewer dents, fewer scratches, and less maintenance after the move—is measurable in dollars and downtime saved.
For readers who want to connect exterior care with broader trailer and fleet practices, one practical touchpoint is the emphasis on maintenance discipline. Regular trailer maintenance, for instance, becomes part of a continuum that starts with the exterior of large appliances and extends to the health of the chassis, tires, and securing equipment. A concise reminder from industry practice is to consider the long arc of care, including ongoing inspections, routine cleaning, and proactive protection of all items carried. For a deeper dive into these broader practices, you can explore the resource on trailer care and maintenance: Importance of Regular Trailer Maintenance.
In addition to these considerations, it helps to keep a simple, repeatable checklist handy. Before loading, verify that the exterior is clean and dry, wrap is intact, corners are cushioned, and any protective coverings are secured. During transit, monitor the wrap and straps for movement or loosening and adjust as necessary. After unloading, conduct a final exterior inspection and store or discard protective materials properly. This habit reduces the chance of post-move surprises and keeps the exterior looking as good as the day it left the origin.
The habit of exterior protection ties back to the broader, practical aim of securing a washing machine on a truck. The exterior is not merely a canvas for aesthetic appeal; it is the first shield against damage, and it plays a direct role in preserving the machine’s function and longevity during and after transit. By honoring the exterior as a line of defense—through careful handling, appropriate materials, and mindful transport—you sustain performance and value long after the last mile is completed.
External reference for broader context on maintenance and best practices can be found in additional upkeep guidance, which complements the steps outlined here and helps align exterior protection with overall appliance care: https://www.applianceaid.com.au/blog/washing-machine-maintenance-tips/.
Step 4: Mastering Loading Techniques to Secure a Washing Machine in Transit

Step 4 builds on careful preparation and stabilization discussed previously, focusing on how the machine behaves on the truck. It is a deliberate choreography where balance, restraint, and protection converge to keep both the appliance and the vehicle intact. When done well, loading provides a quiet confidence that the journey will not alter the machine’s internal integrity or the truck’s structure. When done poorly, vibrations translate into rattling, misalignment, and wear that can ripple across the move. The goal is to secure a washer so that it behaves like a fixed, though well cushioned, part of the truck rather than a loose object subject to every bump in the road. This requires a patient, methodical approach that respects the machine’s weight, geometry, and the physics of motion.
A central principle is to keep the unit upright throughout the process and during transit. The drum, suspension components, and motor are designed to function within specific tolerances, and tilting beyond a modest angle invites the risk of oil or coolant migration, which may alter lubrication patterns or place pressure on seals. In practical terms, this means choosing a stable corner of the truck bed where the washer can sit against a wall or bulkhead, away from the vehicle’s turning radius and potential contact with other items. The right orientation also simplifies the task of securing the appliance, because gravity helps retain the drum’s position rather than fighting it. If it is necessary to tilt for fitting, limits such as a 45-degree maximum can help minimize the chance of lubricant migration and component stress. Throughout this step, the emphasis remains on keeping the unit as a single, solid entity as it travels, not a collection of loose parts.
Protection begins with the packaging philosophy that carried the unit to the loading zone. If the machine still sits in its original packaging, the cushioning materials play a critical role in absorbing micro-vibrations and tiny shifts that occur even on smooth highways. If original packaging is not available, a custom crate or a dense, purpose-built combination of anti-static foam and corner protectors becomes essential. It is surprising how much edge contact can magnify the effect of a minor jolt; corner protectors are not decoration but an investment in maintaining the finish and internal fit. The exterior should be wrapped with materials that resist dust, scuffs, and dampness, particularly around edges and control panels. Stretch wrap or bubble wrap is commonly used, but the emphasis should be on thorough coverage that prevents secondary movement inside the packaging. A clear cue from seasoned operators is to label the package with Fragile and This Side Up so that the unloading crew treats the unit with due care, reducing the chance of accidental damage during handling.
Even with a well-wrapped exterior, the internal restraint of the drum remains paramount, especially for front-loading models where the drum can rotate and create damaging motion if left unsecured. A purpose-made drum retention strap, or a sturdy tie-down arrangement, helps lock the drum in place. This is not a cosmetic precaution; it is a functional necessity that protects the machine’s suspension system and seals from the moment movement begins. If the manufacturer provides shipping brackets or locks, these should be installed or re-engaged according to the model’s guidance. A cautious operator understands that the risk of a shift is the risk of a costly repair, so restraint is treated as a primary line of defense rather than a last resort.
The loading sequence should consider the vehicle as a heaving, moving platform that rewards a balance-focused approach. Heavier items should go in first to establish weight distribution and to anchor the organization of the cargo. The washer should be positioned toward the center of the truck bed to minimize the effect of a sharp braking maneuver or a sudden turn on weight transfer. Once in place, anchor points on the truck floor become critical: attach ratchet straps or load binders to these points rather than to any components of the appliance that could be damaged by clamping pressure. Straps should be taut but not over-tensioned, and they must avoid crossing over sensitive surfaces such as the control panel or door seals. The goal is to create a fixed position that resists both forward and lateral movement without distorting the appliance’s shape or stressing its mounting surfaces.
When multiple units are loaded, spacing is not an afterthought but a rule. Adequate clearance between machines prevents the second unit from crushing the first or creating a chain reaction in the event of a shift. Non-slip mats or wooden blocks can be used beneath and between units to preserve their position and reduce sliding. The overall plan is to create a stable micro-environment inside the truck that behaves like a reinforced shelf rather than a rolling deck. Even with a secure system, there should be a general awareness of how the cargo will respond to a quick stop, a sudden lane change, or a pothole that the highway department might have missed. A quick, practical test can be done under supervision: gently try to push the washer in its secured position. If movement is detected, re-check the straps and add additional blocking or bracing before departure.
A crucial nuance becomes apparent when considering the drum’s behavior. For front-loaders, the drum confinement is one of the few dynamic elements that can shift with movement; securing this motion to prevent rotation is as important as anchoring the whole unit. If the model relies on a manufacturer-provided shipping bracket or strap, ensure it is engaged correctly. Some units have built-in transport devices that must be managed according to the model’s instructions. In all cases, the principle remains consistent: limit any internal motion that could translate into wear on bearings, seals, and belts. This is the kind of preventive care that pays dividends in the late stages of a move when a truck’s suspension has to absorb a wider range of motion than a static test might allow.
As the loading comes together, the vehicle preparation and loading sequence extend beyond the boxy confines of the washer. The truck bed itself should be clear of sharp edges, debris, and protrusions that could either cut through a wrap or nick a corner protector. The loading crew should systematically place the washer away from heavy items placed later, ensuring that there is no crowding that could squeeze or tilt the unit. The distribution of weight across the bed matters, not only to the washer’s safety but to the vehicle’s handling. An unbalanced load can exaggerate the risk of rollover on a curved highway or at high speeds; a balanced arrangement, by contrast, reduces the likelihood of fatigue across vehicle components and makes the drive safer for everyone.
The pre-departure checklist is not a perfunctory step but a practical roadmap for confidence. Straps should be tested with a modest tug to confirm they hold firm under expected tolerances; the washer’s restraint should not yield to a single careless bump. A quick photo record of the secured cargo helps with insurance or compliance needs and, more importantly, serves as a personal reminder that the job was done correctly. On a longer move, especially when crossing regions with variable road conditions, consider the value of professional services that include unpacking, inspection, and functional testing upon delivery. This aligns with a broader industry pattern that prioritizes not just arrival but readiness and safe operation after the move. It is a philosophy that resonates with the experience shared by seasoned operators who emphasize people and process alongside the equipment itself. For instance, an operator who has built a reputation on dependable fleet performance highlights the importance of disciplined loading practices and meticulous securing. That perspective mirrors the emphasis of professionals who understand that a great move blends technique with foresight and a culture of care. See ISTA standards for industry tested practices and validation processes, which translate hands-on experience into codified procedures for appliance transport and serve as a reliable reference when the job scales beyond routine moves.
Upright and Secure: Mastering the Final Rule for Transporting a Washing Machine by Truck

When the journey of a washing machine from one site to another finally lands on a truck bed, the last and perhaps most decisive rule emerges with crystal clarity: keep it upright, secure it, and minimize movement. Step 5 is not merely a precaution; it is the hinge on which the entire transport plan turns. The machine’s interior is built around a delicate balance. In many models, a heavy counterweight anchors the drum and stabilizes the entire assembly while it runs. Ship it on its side or tilt it aggressively, and that mass can shift in ways even a seasoned driver cannot anticipate. The result is not just cosmetic damage—dinged panels or scratched finishes—but real mechanical harm. A drum or motor can be jarred out of alignment, seals can tear, and lubrication can migrate to places it should not be. In short, upright transport is insurance against a cascade of failures that are expensive, inconvenient, and entirely avoidable. The emphasis here is on discipline: a simple act of staying vertical cascades into a safer, smoother move through every mile of road and into every doorway at the destination.
The practical rule that governs this step is deceptively straightforward: never lay a washing machine on its side or upside down for transit. The interior balance system is designed to operate with gravity assisting rather than opposing. When the appliance is vertical, the drum’s weight sits where engineers intended, and the motor and suspension ride within designed tolerances. If a machine is laid flat, that same weight can swing or slide during transport, stressing the housing and potentially bending the drum shaft or misaligning the drive belt. The stakes rise on rough highways, where a short jolt can set off a chain reaction of internal disturbances. This is why every seasoned mover prioritizes a sturdy stand or frame that keeps the washer rock solid during loading, unloading, and every bump along the way.
Beyond the upright stance, the packaging and securing of the unit play equally critical roles. The approach begins long before the washer ever touches the truck. Protective materials—corrugated cardboard, foam inserts, and bubble wrap—should envelope the exterior, with extra attention paid to corners and edges where impact is most likely to manifest as a dent or to expose vulnerable panels or seals. For those who still possess original box inserts, returning the unit to its factory-packaged form offers the best protection against road dust, vibration, and incidental moisture. Inside, the drum and any accessible hoses should be dry and free of residual water; a damp interior invites mold and can complicate start-up after a long ride. The exterior wrap works as a second line of defense, absorbing blistering vibrations and shielding the surface from scuffs that accumulate during sliding, turning, or minor collisions with nearby items.
As robust as the outer wrapping is, the interior still requires restraint. A professional drum retention strap, or a sturdy tie with rope or bungee cords, keeps the drum from shifting during transit. This is more than a convenience; it protects the very components most vulnerable to misalignment, including the suspension system, drive system, and electronics connected to the drum. For drum-type washers, tightening or locking any transit bolts that may still exist to secure the drum is essential. Those bolts are specifically intended to hold the drum in place and should be installed and tightened before any movement. If transit bolts are missing, substitute with appropriate padded supports that prevent the drum from moving horizontally yet avoid over-constraining the system, which could also cause damage if the weight is not evenly distributed.
The loading technique matters almost as much as the securing method. Never drag the machine across the floor; it invites scratches on both the appliance and the truck bed. Two people, lifting with the base supported evenly, is the safer approach. The washer should be kept as vertical as possible during transfer from the curb to the truck floor. A carefully chosen position—against a wall or in a corner of the bed—reduces the risk of accidental tipping during unloading and creates a natural barrier against shifting objects that might otherwise press the unit sideways. When the time comes to anchor, the straps or ropes should be tightened to a degree that eliminates almost all movement, without compressing any housing or deforming panels. A loosely secured washer is a ticking clock; a properly strapped unit stays put even as the vehicle negotiates a bend or a road irregularity.
Environmental exposure presents another subtle but real threat. Unprotected washers in an open truck bed are vulnerable to rain, dew, and sudden changes in temperature. Water ingress can lead to condensation on metal surfaces and corrosion over the long term, while heat can affect lubricants stored in the pump or seals around the door. By ensuring the cargo area is covered or sealed, and by using a protective outer layer for the washer itself, you reduce the chance that external conditions will penetrate the enclosure. This becomes particularly important on longer hauls or routes with variable climates. In the same vein, avoid overloading the vehicle with other heavy items on top of or against the washer. Extra weight can create a compounding risk, forcing the washer to bear more than its own mass and increasing the likelihood of micro-movements that lead to misalignment or scratches.
A key nuance in this step is to control tilt angles if tilting is unavoidable. The maximum tilt should not exceed 45 degrees. This guardrail protects both the internal lubricants and the seals that could otherwise shift and leak when gravity is working against the machine’s design. If the truck’s layout makes a perfect vertical stance impractical, tilt should be minimized, and the securing strategy adjusted accordingly. The goal is to maintain a calm, consistent plane for the entire unit, reducing the possibility that any internal component experiences a jolt incongruent with its engineering. In this context, the human factor plays a significant role: steady driving, smooth throttle inputs, and avoiding sudden braking or abrupt turns can dramatically reduce the vibrations transmitted to the washer. It is not only the hardware but the driver’s finesse that matters.
The transit experience for a drum-type washer adds another layer of precaution. If you can access the back of the machine, locate and fasten any available transit bolts or blocked guides that keep the drum in place. If those are absent, create a temporary but secure set of restraints that mimic the function of the original hardware—padding around the drum’s exterior and tying it to fixed points within the truck bed. The idea is to create a micro-environment around the washer that resists movement and absorption of shock. Even the choice of truck bed—rigid, with a flat, grippy surface—can influence the outcome. A bed that offers consistent contact without slippage provides a more stable platform. As the anchor points are chosen, verify that none of the straps interfere with the door, the control panel, or any vents or filters that could overheat when the machine is powered later.
The process culminates in a simple discipline: before you set the washer in motion, walk away with the same careful attention you brought to its packaging. Confirm that all restraints are tight, the machine remains upright, and nothing external can press against the control panel or the hose connections. If the route requires a longer drive, consider a follow-up check at mid-journey stops to ensure no loosening has occurred. This habit becomes part of a broader, systematic approach to cargo safety. It aligns with the kind of fleet-standardization and emergency-response practices that emphasize consistent loading protocols, meticulous securing, and clear handoffs between teams. For more on this integrated approach, you can explore related guidance through a dedicated resource on fleet practices that ties together loading, securing, and post-delivery checks. fleet-standardization-emergency-response.
Once the journey completes, and the truck has reached its destination, there is a final, almost ceremonial step. Do not power up the machine immediately. Let it rest in the upright position for at least four hours. This rest period allows any displaced lubricants or fluids—those that might have shifted during transit—to settle back into their intended places. It is a small courtesy to the machine, a quiet acknowledgment that the journey has ended and its internals deserve time to reestablish equilibrium before the first cycle. In this moment of quiet, you also reflect on the broader logistics chain: the restraint system, the protective wrap, the transport bolts, the tilt controls, and the careful planning that prevented damage. Each element contributed to a single objective: an appliance that arrives ready to operate as if it had never left the showroom floor.
In a longer-term view, Step 5 serves as a reminder that the moving of heavy, delicate equipment requires more than brute strength or quick improvisation. It demands a systems mindset—an awareness of how each component interacts with gravity, vibration, and road conditions. When you integrate upright transport, proper packaging, robust securing, tilt management, environmental protection, and a disciplined rest period, you are implementing a transportation protocol that honors the machine’s design and the integrity of the truck’s cargo space. This mindset is transferable to much larger moves within fleets: the same principles—keep weight aligned, distribute loads evenly, protect from the elements, and verify securement at intervals—are the signals that separate a routine move from a costly misstep. For those planning across longer distances or multiple handoffs, the value of a professional logistics partner becomes clear. They can provide unpacking, inspection, and functional testing as part of a secure delivery, reducing the chance of surprises on arrival and ensuring the appliance is immediately ready for use when the keys are handed over. External references offer additional technical depth for readers seeking a broader, cross-border or multi-regional perspective on safe transport practices in this domain. External reference: https://www.appliance.org.uk/repair-and-maintenance/washing-machine-moving-tips
Final thoughts
Securing washing machines for transport is imperative to avoid damage and maintain service quality. By following the steps outlined—from preparation and stabilization to protective wrapping, effective loading techniques, and ensuring transport safety—logistics professionals can significantly reduce the risks associated with moving these valuable appliances. Implementing these practices not only protects the equipment but also enhances customer satisfaction and trust in your service. The overall efficiency of transportation operations may greatly improve, building a reliable brand within the logistics sector.