
Maintaining the cleanliness of trucks, cars, and other fleet vehicles is crucial for operational efficiency and longevity. Pressure washing emerges as a highly effective method to uphold the integrity of vehicle frames, especially for those in logistics, trucking, or construction sectors. This guide will detail key aspects of pressure washing vehicles, focusing on preparation and protection of sensitive components, advanced cleaning equipment and techniques, and routine maintenance and inspections necessary for sustaining vehicle health. Whether you’re managing a freight company fleet or supervising a construction team, understanding and applying these techniques will enhance your fleet’s performance and longevity.
Guarding the Frame: Preparation and Protective Strategy for Safe Vehicle Pressure Washing
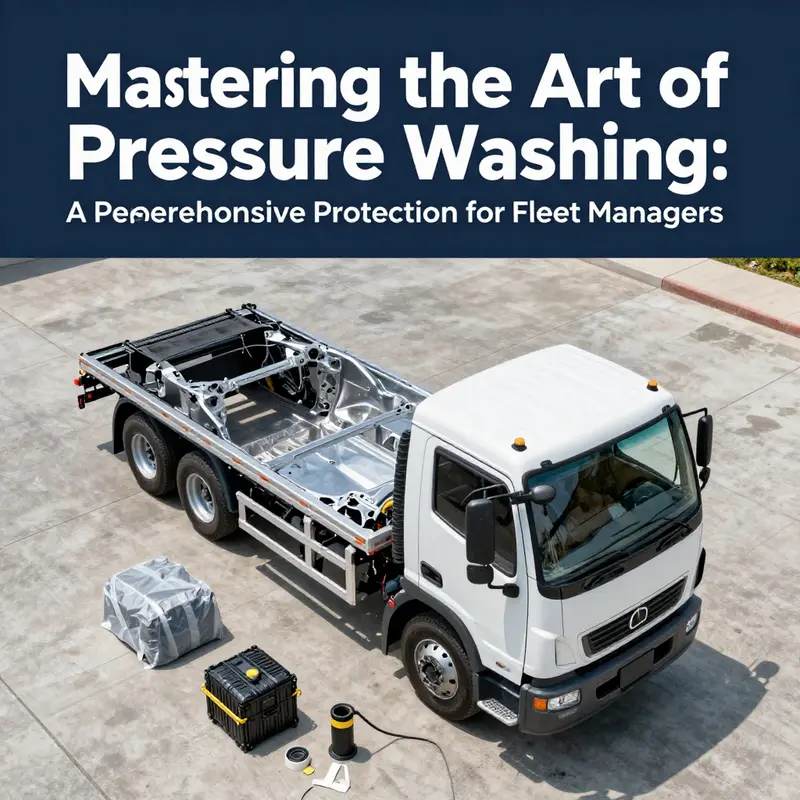
A clean truck or car frame begins long before the water hits paint. It begins with a deliberate, methodical approach that treats the frame as the backbone of a complex machine, not merely a surface to rinse. When done correctly, preparation protects the very systems that keep a vehicle reliable and safe, while still delivering the deep cleanliness that undercarriages, crossmembers, and rails require after miles of road use. The frame may bear grease, salt, dirt, and grime, but without thoughtful protection, the same water that frees it can also loosen seals, saturate fragile electronics, and drive rust from small crevices into critical joints. The moment you lift the nozzle, you are choosing between a routine wash and a repair bill. The distinction is preparation—careful, anticipatory steps that shield sensors, wiring, and rubber components while you coax mud and oil from hard-to-reach corners. This is not a ritual of brute force; it is a choreography of protection and precision that makes the frame shine without inviting trouble. The guidance that follows threads together what the best technicians and fleets have learned about safe pressure washing. It balances the need for effective grime removal with a respect for the vehicle’s more vulnerable parts, the very elements that weather harsh conditions and distance traveled demand we preserve.
Begin with a calm assessment. A quick walk around your vehicle reveals the layout you will navigate with the spray wand. Leaves and loose debris may seem inconsequential, yet they can become projectiles or embed themselves in paint when the pressure runs high. A visual scan helps you decide where to place protective covers, what parts to mask, and if any components require temporary removal or relocation. If you drive in areas with heavy sand, salt, or road grime, plan for extra attention to the undercarriage and wheel wells. The goal is not to blast away every speck of dirt in one pass but to prevent hard particles from scratching sensitive surfaces during a deeper clean. The inspection also sets the stage for the right sequence. You will treat the most exposed, dirtiest sections later in the process, and you will work from the top down to minimize drag of dirty water onto still-clean areas.
Next, protect the sensitive components. The engine bay, air intake, exhaust, brake calipers, suspension joints, electrical connectors, and visible light assemblies should all be shielded from direct spray. This protection is not just about keeping water from shorting circuits; it’s about preventing jet pressure from displacing seals or forcing moisture into gaps where it can lead to corrosion or mechanical wear. For electronics and sensors, consult the owner’s manual for any water exposure cautions; many modern vehicles rely on sealed modules, but repeated or aggressive washing can still lead to degradation if joints or gaskets are compromised. The typical approach involves masking with waterproof plastic and using protective caps or bags designed to resist spray. Where masking isn’t practical, a cautious approach with coverage plus a modest spray angle reduces risk. The principle remains the same: limit direct contact with zones that contain rubber seals, gaskets, or joints that are sensitive to pressure and heat. Within the protective layer, you still maintain access to the areas you need to rinse, so your work remains efficient rather than a game of hide-and-seek with hidden corners.
The decision about whether to remove certain items becomes part of the protective strategy. Floor mats, trim pieces, or loose interior components that could trap water or bloat during the wash deserve removal or elevation where possible. A dry, clear work area makes it easier to manage hoses, connectors, and the path of the wand. If you opt to remove wheels or heavy trim, you reduce the chance of water exclusion behind panels and you gain a more predictable area to scrub and rinse. The goal is to create a controlled environment where water flow can do its job without finding new routes into sensitive zones. Even with protection, you should plan for a controlled dry-down after washing, so moisture trapped in seams or brackets does not linger and promote rust or corrosion.
With the area prepared, establish the water and equipment foundation. A reliable water source is essential because inconsistent flow invites fluctuation in pressure, which can lead to variable cleaning results or unnecessary stress on seals. Ensure your pressure washer is suitable for automotive work, with a rating that keeps you in a safe, moderate range rather than a brute-force blast. automotive guidance often points to a general range that cleanly removes grease and road grime without marring finishes. The numbers you will work with lie in a space where substance meets caution: a practical bracket around 1,200–1,900 psi is widely recommended for vehicle cleaning, while higher pressures, especially above 2,000 psi, can damage paint, seals, and rubber components. If you encounter guidance articulated in different units, you can translate the intent: for general body cleaning, the apparatus should operate in a mid-range to avoid harm, with the flexibility to step down if a particular area shows sensitivity. A hot-water option can significantly boost cleaning power, especially for grease and oil, without forcing you into harsher chemical cleaners. The temperature helps emulsify fats and residue that cold water can struggle to lift. The chemistry of cleaning becomes more forgiving when heat is involved, and the risk of aggressive detergents containing harsh chemicals is reduced when hot water does the heavy lifting.
Once the protective layers and equipment are arranged, you begin the wash with a careful primer: the pre-rinse. This is not a hurried water spray but a gentle, top-to-bottom rinse that clears loose debris and dust so it won’t scratch the finish during the deeper clean. Start at the roof and work downward—roof, hood, fenders, doors, trunk, and bumper. A wide-angle spray helps remove the surface grit without concentrating force on any one point. It also helps you see where stubborn grime persists, which informs where to apply cleaner and how long to let it dwell on particularly dirty areas. The pre-rinse is short, but its purpose is crucial: it reduces friction, which means the deeper cleaning won’t grind dirt into the frame and undercarriage when you begin to agitate with cleaner.
If you decide to apply a cleaning solution, use a vehicle-safe degreaser or all-purpose cleaner diluted according to the manufacturer’s directions. Apply with a soft brush, sponge, or foam cannon, targeting high-dirt zones such as undercarriage corners, wheel wells, suspension components, and chassis rails. Give the cleaner time to dwell, usually three to five minutes, to break down oil, salt, and embedded grime. This dwell time is not a pause to relax; it is a critical window in which the solvent penetrates grime and loosens bonds that water alone cannot sever. During this phase, you must remain mindful of not saturating areas that have been shielded—keep the spray gentle around protected zones while still coating the exposed surfaces. A careful, measured dwell improves both cleanliness and the integrity of protective coverings, ensuring no solvent leaks undermine the masking strategy.
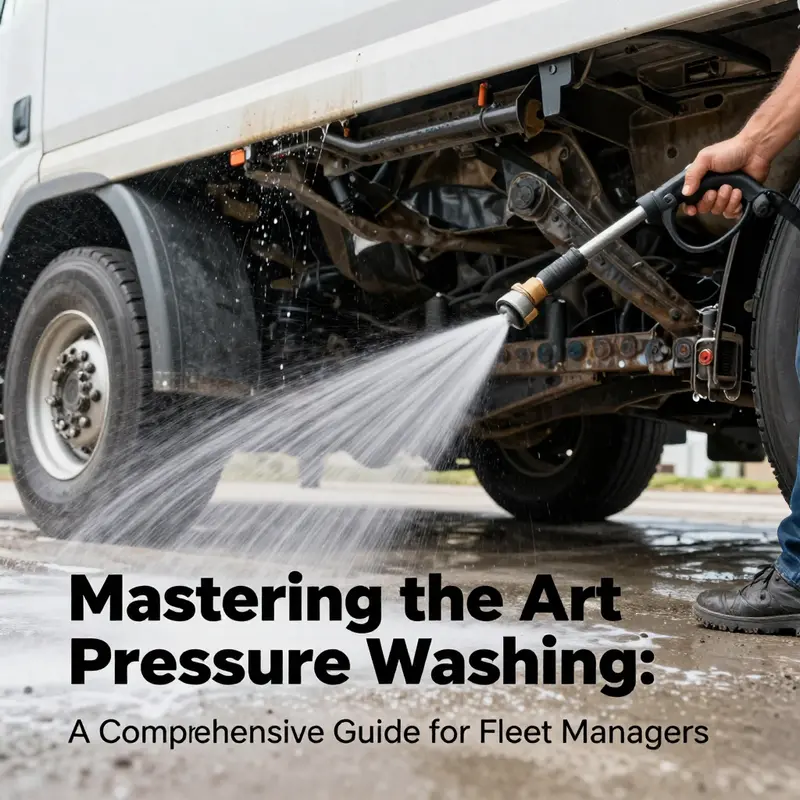
Then comes the most decisive phase: pressure washing the frame and undercarriage. The approach here centers on reach, angle, and distance. Use a flexible, long hose to access hard-to-reach areas like the underside of the chassis, around suspension arms, near axle housings, and along drive shafts. When you do encounter tight spots, switch to a narrow or flexible spray wand that can reduce the spread of water into joints while still delivering enough force to lift grime. A practical rule is to maintain a distance of roughly 20–30 centimeters (8–12 inches) from the surface and to spray at a 45-degree angle upward. This orientation helps prevent water from forcing its way into seals or into spaces where heat and vibration create a vulnerability. It also encourages the wash to lift debris away rather than push it deeper into crevices.
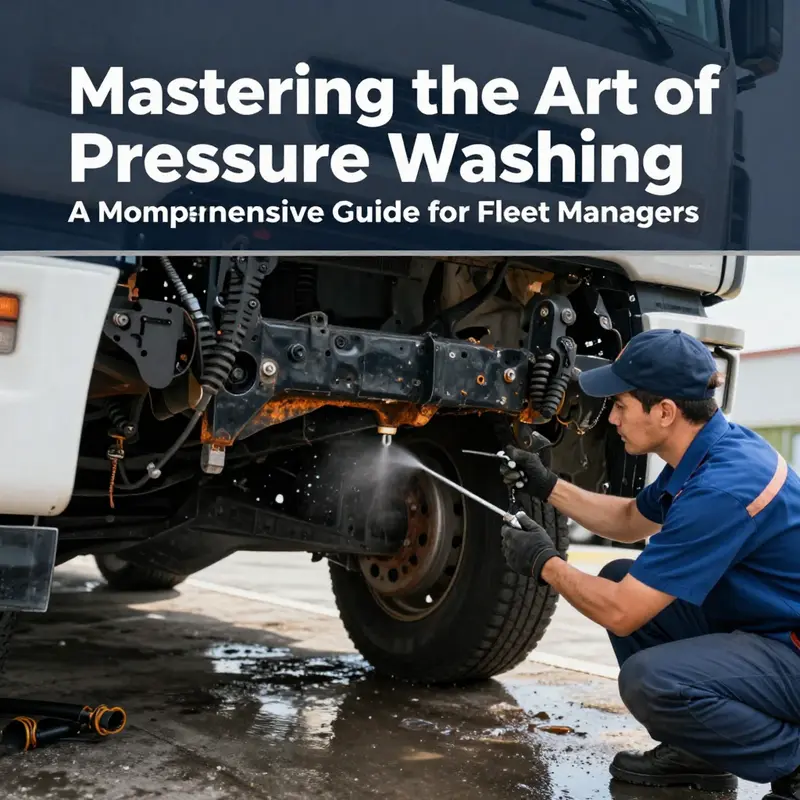
In this phase, the undercarriage benefits most from targeted attention. Wheel arches, drivetrain components, frame rails, and suspension areas accumulate mud, salt, and oily residues that threaten corrosion and component wear. When you hit the tougher buildup, you may switch to hotter water if your unit supports it. The heat aids grease removal and reduces the need for harsh detergents, which aligns with a more conservative chemical approach while preserving rubber and metal interfaces. The guidance you follow should prioritize mechanical health over raw cleanliness. If a particular patch resists, avoid brute force and instead increase dwell time with a light, broad spray to lift the deposit gradually. A measured, patient approach preserves seals and gaskets and reduces the chance of forcing water into seams.
Rinsing thoroughly after detergent is non-negotiable. A complete rinse eliminates soap residue that can trap dirt and invite spotting, and it also prevents chemical residue from drying in seams where it can cause corrosion or cling to surfaces as the frame dries. Runoff should follow gravity’s path toward drainage so that soap does not pool in sensitive recesses. The goal is to leave the frame looking clean and dry in a way that signals the chemical and mechanical work are done, not just moved from one place to another. When you finish rinsing, do a final sweep of the most vulnerable areas, such as the lower rails and any seams near the welds, to ensure there are no soap pockets or sticky residues left behind.
Drying and post-wash inspection are the final acts of this careful performance. Dry the frame and undercarriage with clean microfiber towels or employ compressed air to remove moisture from hard-to-dry crevices. The objective is to prevent water from lingering in joints, brackets, or connectors, where it can promote rust or freeze-thaw damage in colder climates. While you dry, perform a careful sweep of the components you protected earlier. Look for moisture around seals and try to identify signs of wear—rubber bushings, o-rings, or gaskets that show cracking or separation can be more likely to fail under repeated exposure to water and temperature fluctuations. The post-wash check is not a trivial step; it’s a maintenance habit that can catch issues before they become leaks or rust. If you notice any staining or dampness where it should be dry, you have a chance to address it before it becomes a problem.
The cadence of maintenance you adopt matters as much as the wash itself. For commercial fleets and heavy-use vehicles, cleaning intervals are anchored to the terrain and climate. In muddy or snowy environments, a wash every two to four weeks is common for trucks and commercial fleets, while passenger cars typically do every three to six weeks. In winter, the goal shifts toward removing road salt and preventive rust control, making the undercarriage a high-priority area in the routine. A disciplined schedule protects frame integrity and the longevity of critical components, which translates into lower maintenance costs and higher uptime. Beyond the practical, there is a mindset here: treating the frame with respect through deliberate preparation can extend the life of seals, hoses, and fasteners that keep the vehicle reliable year after year.
The broader value of preparation and protection unfolds in how you communicate this discipline to others who rely on the vehicle. If you work with a crew or manage a fleet, documenting protective procedures and protective cover kits, masking strategies, and the sequence of steps helps ensure consistency. The documented approach becomes a standard against which future washes are measured, and it supports training new operators who join the team. When the job is done, you have not simply removed grime; you have created a lean, repeatable process that keeps the frame clean while lowering the risk of damage from improper spray, misplaced water, or neglected seals. The best practice embodied here is not merely about cleanliness—it is about preserving the frame’s structural and functional integrity for the long haul.
As you close the chapter on protective preparation, there is one more thread to consider. If you want to explore tactical techniques for removing stubborn grease and tar from trucks quickly, there is a resource that gathers practical insights from experienced operators. It emphasizes efficient methods that complement protective washing and can be referenced as a companion guide during your setup and rinse phases. Proven strategies for cleaning grease and tar off your trucks fast. This internal link helps connect protective routines to real-world cleaning outcomes, reinforcing the idea that smart prep and strategic action together create better results.
Finally, for those who want additional corroboration on best practices for protecting automotive components during pressure washing, an authoritative overview is available. The official guidance from the automotive service community emphasizes careful water exposure management, appropriate pressure guidelines, and protective masking around sensitive areas. See ASE’s Pressure Washing Tips for detailed recommendations rooted in industry standards and service expertise: https://www.ase.com/vehicle-care/pressure-washing-tips. This external resource provides a framework that complements the chapter’s emphasis on safeguarding the frame and its sensitive interfaces while achieving a thorough, corrosion-conscious cleaning.
Under the Frame: Mastering Equipment and Techniques for Thorough, Safe Pressure Washing of a Truck or Car Frame
A clean frame is more than just a tidy undercarriage. It’s a line of defense against rust and hidden wear, a clear view into the chassis where salt, mud, and grease tend to congregate, and a fundamental part of maintaining long-term structural integrity. When a truck or car sits for weeks in damp grime, moisture finds every seam, every joint, every bracket it can. Regular, well-executed pressure washing lifts that fog of grime, reveals the truth about suspension mounts and frame rails, and reduces the chance that salt residue will begin to corrode metalwork from the inside out. The approach is not about blasting dirt away with brute force; it’s about a measured combination of the right equipment, disciplined technique, and an awareness of what must be protected. The goal is a frame that looks clean and, more importantly, stays sound for miles and seasons to come.
Equipment selection is the first pillar of success. The modern fleet and hobbyist alike benefit from a pressure washer that offers sufficient power without risking the very surface you want to preserve. In professional practice, a minimum threshold of about 2,000 psi with a generous flow rate—around 1.5 gallons per minute—provides the mass and velocity needed to dislodge sticky oil and road grime from stubborn crevices along the frame, wheel wells, and undercarriage without turning the frame into a scorched landscape. The intent is control rather than carnage: enough force to break the bond between doubled-over grease and metal yet a conservative approach near sensitive areas. Adjustable nozzles are essential here. A wide-angle nozzle—often in the 25- or 40-degree family—offers a forgiving spray pattern that broadens the cleaning envelope and reduces the risk of denting or gouging components. Narrow, pinpoint nozzles, while tempting for stubborn patches, should be reserved for focused spot work and never aimed at seals, bearings, or electrical connections.
Temperature plays a pivotal role, too. Hot water has a special place in frame cleaning. It helps dissolve and loosen grease more aggressively than cold water with the same chemical assistance, often reducing the need for aggressive solvents. If your unit supports hot water, using it for the undercarriage and frame areas where oil and salt residues accumulate can noticeably shorten dwell times and improve the overall cleanliness. But heat is not a free pass. It magnifies the risk of damage to vulnerable rubber components, gaskets, and certain plastics, so the operator must maintain distance, angle, and consistent motion. The safest stance is to start with moderate temperatures and adjust based on the grime you encounter and the response of the surface.
With power and temperature chosen, nozzle selection becomes the next priority. A 40-degree fan helps sweep broad swaths of the underframe, reach into wheel wells, and rinse away salt without the risk of concentrating force on a single point. The less is more philosophy applies here; the goal is coverage and consistency rather than a razor-like edge of spray. While a 25-degree nozzle can be useful for more stubborn patches, it should be used with restraint and at a slightly greater distance to prevent damage. In practice, the operator moves the wand in smooth, deliberate arcs, never pausing the spray on one spot for longer than a few seconds. The idea is to emulsify grime, flush it away with the cleaning solution, and then rinse with a clean, broad-sweep pass that leaves no ghosted streaks or trapped pockets of residue.
Protection and preparation begin long before the first spray. The frame sits on a flat, well-drained surface, ideally concrete, where standing water and runoff won’t pool around critical components. Electrical harnesses, sensors, brake lines, and exposed wiring deserve attention. Cover them with protective tape or shielding where feasible, and remove loose items such as floor mats or trim pieces if possible. This isn’t about making the frame look pristine in a showroom sense; it’s about turning the undercarriage into a clean, well-ventilated space where moisture is less likely to cling and corrosion is less likely to set in. In practical terms, this means the vehicle is stabilized and secure, with cords and hoses arranged to avoid snagging or accidental pull during the wash. A well-prepared workspace—indoor wash bays or shaded, well-drained outdoor zones—also matters: drainage should be clear, ensuring used wash water and runoff don’t create slick patches or environmental hazards.
The cleaning sequence itself reads like a careful choreography. Begin with an initial rinse at low pressure to loosen loose dirt without forcing it deeper into seams. Work from the top down—roof, hood, fenders, doors, trunk, then the undercarriage. This approach minimizes recontamination of surfaces that have just been washed. A pre-rinse establishes a baseline, softens the worst grime, and reduces the chance that grit will scratch fresh areas later in the process. The next movement is the application of a cleaning solution. A vehicle-safe degreaser or dedicated undercarriage cleaner is typically used, diluted in accordance with the product’s instructions. Apply with a soft brush, sponge, or foam cannon to the hardest-hit zones—underneath the chassis, wheel wells, suspension components, and along the frame rails where oil, salt, and road grime accumulate. Allow a dwell time of several minutes—typically five to ten—so the cleaner can break the chemical bonds that hold grease to metal. Do not let the cleaner dry on the surface; keep it damp by rewetting if necessary.
Pressure washing the frame and undercarriage follows. A long, flexible hose helps reach around curves and through narrow gaps, while a nozzle with a broad spray pattern covers more area with less risk of creating micro-gouges. Maintain a conservative distance, often around 12 inches from the surface for a clean sweep, and still keep the spray angled upward at roughly 45 degrees. The intent is to use gravity in your favor, directing runoff away from seals and joints rather than forcing water into places you don’t want it. Areas that demand particular attention include the wheel arches, drivetrain components, and the exposed frame rails where salt, mud, and oil tend to trap. In stubborn spots, a second pass with the spray adjusted to a slightly narrower angle can improve results, but the wand should never be held in one place long enough to risk heat buildup or surface damage.
The literature and practice converge on a practical rule: hot water can be a powerful ally for grease, but it must be wielded with care. If available, switching to hot water mode for those oil-and-grime hot zones can boost cleaning efficiency and reduce the need for harsh detergents. Yet even with hot water, the operator remains vigilant for signs of potential harm. Electrical connectors, sealed joints, or bearings accessed through the wheel wells require the highest degree of caution. When in doubt, choose a gentler setting and focus on consistent motion rather than brute force. This disciplined approach prevents the frame from becoming a target for over-cleaning damage while still delivering a robust removal of contaminants that contribute to corrosion.
Rinsing thoroughly is the companion act to cleaning. After the cleaner has spent its time, the frame demands a complete rinse to remove soap residues that could cling to seams and crevices. Soap left in joints can trap moisture and future dirt, which defeats the purpose of the wash. A thorough rinse continues until clear water runs free and every nook has seen the spray. The drying phase follows almost immediately, because moisture trapped in seams and brackets is a perfect breeding ground for rust. Clean microfiber towels, air blowers, or a combination of both can be used to dry the frame completely. The goal is to leave the metal dry and exposed so a quick inspection can occur.
Inspection is the final, crucial step of the process. Dry conditions reveal leaks, worn rubber bushings, or damaged components that might otherwise be hidden by a thin film of grime. The inspector should pay close attention to seals near joints, the integrity of frame rails, and the condition of suspension mounts. It is common to discover areas where water has collected in crevices or where salty residues persist after cleaning. A second, careful pass may be required in those areas, followed by a quick re-dry to confirm moisture-free surfaces. This is not simply about aesthetics; it is about preventing moisture entrapment that accelerates rust and corrosion. If protective coatings or rust inhibitors are part of the vehicle’s maintenance plan, they should be applied only after a full dry-out and inspection. The frame then stands ready for the next step in maintenance or for protective treatment as part of a broader corrosion-control strategy.
The practical rhythm of frame cleaning extends beyond a single wash. Maintenance schedules—frequency, seasonal considerations, and region-specific challenges—shape how and when a frame is cleaned. For trucks and commercial vehicles exposed to harsh climates, a clean frame every two to four weeks can be appropriate, with more frequent attention in muddy or snowy conditions where buildup is rapid. Passenger cars, by contrast, may be well served by a three-to-six-week cadence, adjusted for local environments. In winter, the emphasis shifts to salt-removal after snow events to slow corrosion processes. The discipline of regular cleaning reduces the long-term maintenance burden by preventing deep-set grime and salt residues from becoming chronic problems.
Within this workflow, a subtle but meaningful benefit arises: the act of visually inspecting the frame during and after cleaning reinforces a care mindset. Rust indicators that may be invisible when grime is present suddenly become clear. Leaks around hoses, subtle wear on rubber bushings, or early signs of stress around mounting points emerge more readily in a dry, clean environment. This heightened awareness is not a luxury; it is a practical safeguard that protects the vehicle’s structural integrity across thousands of miles and across many seasons. The cumulative effect of disciplined cleaning and meticulous inspection is a frame that remains visually and mechanically sound, a frame that tells a full story of miles driven and maintenance performed rather than one of neglect and rust.
To deepen the conversation around broader operations, consider how frame cleaning fits into the lifecycle of a fleet. The frictionless, well-run operation of a fleet wash, the scheduling of washing windows, the management of wash bays, and the training of staff all contribute to the longevity of vehicles. For a broader perspective on managing such a facility, you can explore resources dedicated to fleet-focused facility management. This broader orientation helps ensure the right spaces, the right workflows, and the right safety protocols are in place so the frame cleaning not only looks good but serves as a reliable component of a well-maintained, efficient fleet.
In the spirit of continuous improvement, a single, practical takeaway remains central: use the best possible combination of pressure, nozzle, temperature, and technique to protect the frame while removing the grime that invites rust. The numbers themselves—2,000 psi, 1.5 GPM, a 25- or 40-degree nozzle, a controlled 12-inch distance, and a 45-degree upward spray—are a disciplined starting point. They are not hard rules carved in stone, but a framework that adapts to the details of each vehicle, the conditions of the environment, and the operator’s experience. A well-executed wash is not an act of aggression against the frame; it is a careful, measured process designed to preserve the frame’s integrity and extend its life.
As you integrate these practices into your routine, you may find value in connecting with broader industry insights as you refine your approach. For those managing a fleet operation or seeking to align washing practices with facility standards, there is a wealth of information that can complement the hands-on work described here. A particular resource on the topic of facility management for truck wash businesses can provide practical guidance on layout, safety, and workflow optimization. This kind of guidance helps ensure cleanliness and maintenance are part of a professional, repeatable system rather than an ad hoc effort.
External resource for further technique and equipment guidance: https://www.fleetmaintenancetoday.com/truck-chassis-cleaning-tips
Additionally, for readers seeking a broader understanding of how to pair equipment choices with best cleaning practices in fleet settings, internal insights about facility management for truck wash businesses can be valuable. To learn more about that angle within this site, you can explore the topic of facility management for truck wash businesses.
Internal link for broader operational context: facility management for truck wash businesses. This resource offers a perspective on the physical and procedural environment that supports consistent, safe, and effective frame cleaning as part of daily fleet maintenance.
null
null
Final thoughts
Incorporating rigorous pressure washing protocols is vital for fleet managers and operators to ensure the longevity and reliability of their vehicles. By diligently preparing vehicles and performing thorough cleaning, while also adhering to post-wash maintenance inspections, it becomes possible to uphold vehicle integrity significantly. These practices not only enhance the appearance of fleet vehicles but also contribute to reducing long-term maintenance costs, maximizing fleet performance, and ensuring compliance with industry standards.