
Trucker hats serve as a popular accessory among fleet operators and construction personnel, providing both functionality and a professional appearance. However, maintaining their quality requires a thorough understanding of proper hand washing techniques. This guide will offer insight into the essential steps involved in cleaning these hats, ensuring they remain in excellent condition while reflecting the professionalism of your fleet. Each chapter will cover a specific aspect of the washing process—from gathering the right materials to intricate care for distressed styles—ultimately allowing you to extend the life of your trucker hats and keep your team looking sharp.
Ready, Rinse, Respect: Preparing What You Need to Hand Wash a Trucker Hat

Before a single drop of water touches the brim, preparation sets the tone for a safe, effective wash. Start by gathering the essentials: a basin or sink large enough to hold the hat without crumpling it, cool to lukewarm water, a small amount of mild detergent or gentle laundry soap, a soft-bristled brush such as a toothbrush, and a clean towel for drying and blotting. These items form a simple kit that protects the shape, fabric, and finish of the trucker hat while removing sweat, oils, and grime.
Think about the basin first. A shallow basin or a sink works best because it supports the hat in a natural position. Fill it with cool to lukewarm water—never hot. Hot water can shrink the cotton or warp the brim. It also speeds color loss and can loosen glue used in some hat brims. If you’re unsure of the water temperature, test with your wrist; warm but not hot is the goal.
Choose your detergent carefully. A tablespoon of mild liquid detergent is usually enough for a single hat. Avoid bleach, strong stain removers, and fabric softeners. These can damage fabric fibers, strip color from printed logos, and fray embroidery. If your hat’s care label allows, a gentle dish soap can work for greasy sweat stains. For moisture-sensitive materials, consider a detergent formulated for delicates. Mix the soap into the water until it is evenly dispersed; the solution should be sudsy but not overly so.
Stain treatment deserves attention before the hat goes fully underwater. Sweat bands and front panels often carry the most visible marks. For stubborn spots, lightly dampen the cloth or toothbrush with the cleaning solution and dab. Avoid aggressive scrubbing. For embroidered logos and high-detail prints, excessive friction can pull threads or fade ink. Use gentle, repeated dabbing and soft circular motions. For persistent discoloration on the sweatband, pre-treat with a small drop of detergent applied directly, then let it sit for five to ten minutes. If you prefer spot-treat sprays, use sparingly and test on a hidden area first.
A soft-bristled brush is invaluable for controlled cleaning. The bristles allow you to lift dirt from textured surfaces and seams. When using the brush, work along the grain of the fabric and avoid harsh back-and-forth scrubbing. For mesh backs, run the brush gently across the surface; the goal is to dislodge trapped debris without enlarging holes. For fixed brims, never bend or flex aggressively; the internal structure can crack or warp if stressed.
Pay close attention to the hat’s care label. Manufacturers often provide specific instructions that reflect materials and adhesives used in construction. If the label warns against water or indicates dry-clean only, follow that guidance. Many modern trucker hats are fine for hand washing, but some vintage or specialty hats use materials that react poorly to water or soap.
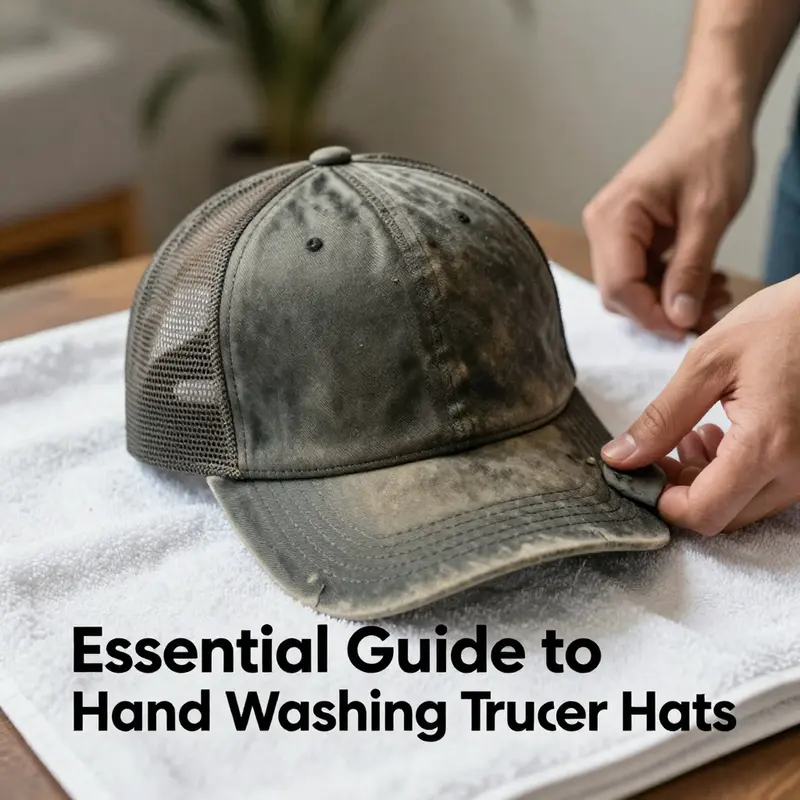
Consider how the hat’s design affects cleaning. Distressed hats need gentler handling to preserve their aesthetic. Avoid strong chemicals and heavy agitation. Embroidered fronts and high-detail prints require careful spot treatment to prevent fraying and fading. Snapback closures are water-resistant but should still be rinsed gently. For hats with glued brims, minimize soaking time and avoid hot water that can dissolve adhesives.
Protecting the brim is a key concern during preparation. If you have a hat form or an empty container that approximates the crown, use it to maintain shape during drying. When you remove dirt from the underside of the brim, support the brim with your free hand to avoid bending. If a hat cage or form is not available, a rolled towel placed inside the crown will help the hat hold its structure as it dries.
Decide on your drying set-up before you start washing. A clean towel placed on a flat surface creates a controlled area for reshaping and drying. Place the hat on the towel and pat away excess water after the rinse. Avoid clotheslines or hanging by the snap, as this can stretch the band and distort the crown. Dry the hat in shade and at room temperature. Direct sunlight accelerates fading and can stiffen fabric unevenly.
Plan the workflow to minimize handling and repeated wet-dry cycles. Keep two basins or bowls on hand if possible—one with soapy water and one with clean rinse water. This reduces the need to refill and ensures you can move smoothly from soaking to rinsing. If you store several hats, consider a rotation to let one dry completely before starting the next. This prevents mildew and helps maintain consistent shape across your collection.
Small extras can make a big difference. A soft cloth for blotting removes surface soap without roughing fabric. A hat stand or upside-down bowl helps the brim keep its curve while drying. If you’re dealing with salt stains from sweat, a dilute solution of white vinegar mixed into the rinse water can help dissolve residue; use sparingly and only after testing a small hidden area. For very delicate trims, protect them with plastic wrap while washing the rest of the hat.
Finally, respect time. Soaking for too long increases the risk of fading and weakens certain adhesives. Ten to fifteen minutes in the cleaning solution is typically adequate for most hats. Agitate gently during the soak to loosen dirt, but avoid twisting or wringing. After soaking, rinse thoroughly with cool water until no soap remains. Excess detergent left in the fabric will attract dirt quickly and stiffen materials during drying.
Preparing your supplies thoughtfully shortens cleaning time and protects the hat’s construction. If you manage a larger kit of garments or run a small facility, consider reading about facility management for truck wash businesses to adapt best practices and maintain reliable workflows. With the right basin, a measured amount of gentle detergent, a soft brush, and a drying plan, you control the outcome: a clean trucker hat that keeps its shape and style.
For a practical, step-by-step reference that complements these preparation tips, see this external guide for hand-washing a trucker hat: https://www.wikihow.com/Hand-Wash-a-Trucker-Hat
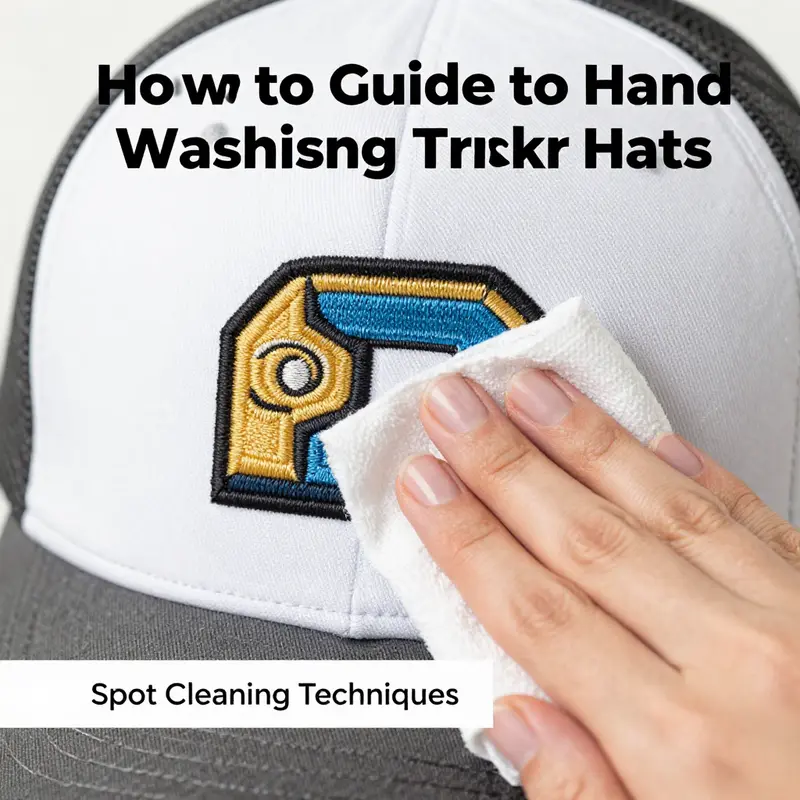
Spot Cleaning for Trucker Hats: Gentle, Shape-Preserving Care in Practice
A trucker hat earns its keep by soaking up sun, sweat, and miles of road. Its front panel may be foam or cotton, its mesh back breathes as you roll down windows, and the brim carries the memory of every curbside stop. With a hat that accompanies long hauls, the goal is to lift grime without warping the structure or dulling logos. The method that follows centers on spot cleaning—targeted, careful treatment rather than a full soak—because many trucker hats demand a lighter touch to preserve their shape, texture, and any embroidery or prints. When you approach cleaning with respect for the hat’s construction, you protect the form that makes it useful and, frankly, keeps it looking like new as the miles accumulate. This is more than a rinse; it is a deliberate, small-scale maintenance routine that respects fabric zones, stitching, and the delicate line between fresh and worn-in style.
Begin by taking stock of what you’re dealing with. Identify stains on the front panel, where sweat and sunscreen tend to concentrate, and note any ink, food smudges, or stubborn marks along the brim. Each stain has its own story and its own treatment. Sweat rings, for instance, often respond to a lighter hand because they sit on the fabric rather than the stitching. Ink or dye marks, on the other hand, may require a gentler, more precise dab rather than a broad wipe. The back mesh, though more forgiving, can still snag if subjected to rough scrubbing, so awareness of where the dye sits matters. Understanding these zones helps you map a plan that focuses on problem areas while leaving the rest of the hat untouched. If the hat is a cherished piece with a vintage or distressed look, you may choose to preserve that character by limiting any cleaning to specific spots and avoiding heavy agitation that could dull the intentional wear.
The second step is to prepare a cleaning solution that is kind to the fibers. Fill a basin or sink with cool water. For most trucker hats, a small amount of mild detergent is plenty. The wand of a harsh detergent or a hot wash can shrink cottons, distort foam fronts, or warp mesh. The emphasis here is on low impact—enough detergent to lift oils and residues but not enough to oversaturate the fabric. If you have a detergent designed for delicates, even better. A few gentle swirls of the water and a modest level of suds set the stage for precise work. As you mix, consider the nature of the stains you identified. Grease-heavy marks may respond more to a touch of mild soap than to brute scrubbing, so let the soap do the work rather than your elbow. This is the moment to breathe, slow the motion, and remind yourself that the hat’s life is about balance between cleaning and preserving.
With the solution ready, move to the staining treatment. Dabbing remains your primary tactic. Use a soft cloth or a gentle toothbrush—the bristles should be soft enough to avoid abrading the fabric or loosening stitches. Gently dab the stained areas with the cleaning solution. The goal is to lift rather than soak. Avoid soaking the entire hat, which invites distortion of the front panel and warping of the brim. If the stain responds to a dab, you can repeat with minimal pressure, allowing the fibers to release the grime gradually. For front-panel logos or printed designs, take extra care. A light touch prevents colors from bleeding or fading, and circular motions with a very light touch can be more effective than a harsh rub. If you’re unsure about a particular mark, test a small hidden corner first. This step is the quiet, methodical phase: patience yields better results and preserves the hat’s future cleaning flexibility.
After the targeted treatment, the protocol calls for gentle agitation, but only in the immediate vicinity of the stained zones. Submergeing the hat briefly is usually unnecessary and risks changing its shape. Instead, you can lightly agitate the soapy solution around the treated areas by moving the hat through the water with your hands. Do not twist, wring, or vigorously scrub; the aim is to loosen residues without stressing the seams or the fabric edges. Mesh panels, in particular, tolerate mild agitation when handled delicately. The moment you feel resistance or see loose threads, stop and reassess. If you need a second pass, reapply a tiny amount of solution to the stained patch and work with even more restraint. This slow, careful movement helps maintain the hat’s structure while the cleaner does the heavier lifting.
Rinsing follows as a crucial, almost delicate, final step for the staining phase. Drain the soapy water and refill the basin with clean, cool water. Submerge or rinse the affected areas with this fresh bath to remove all detergent traces. Soap residue can attract more dirt if left on the fabric, so thorough rinsing matters. If you’re unsure whether you’ve removed all soap, a second rinse is wise. You want the touch of clean water on every spot you treated, but you still want to keep the hat’s shape intact. A practical cue is to run your fingers along the outer fabric after rinsing; if you feel slickness, rinse again. The goal is clarity without over-wetting, a nimble balance that respects the hat’s structural materials.
Once the stains are addressed and the soap is rinsed away, you move into the gentle drying and reshaping phase. Gently squeeze out excess water—do not wring. The squeeze should remove bulk while preserving the panel lines and brim curve. Lay the hat flat on a clean towel or set it on a hat stand to air dry. The position matters: avoiding direct sunlight and heat sources curbs the risk of shrinking or warping. This is where patience becomes practical. A hat dried too quickly in sun or heat can lose its shape, and mesh panels can kink or collapse if subjected to heat while damp. If you’re in a bright workshop or garage, consider a shaded, well-ventilated corner. Let the hat rest in its damp, natural shape so the fibers can settle into their intended geometry without external pressure.
As the hat dries, you’re not simply waiting; you’re actively guiding its restoration. The brim should be reshaped while still slightly damp to encourage it to return to its original contour. If the brim feels soft or pliant, gently mold it with clean hands to the angle and curvature you expect from a well-worn favorite. In many cases, the echo of the hat’s original form reappears as the fabric dries, especially if you avoided heavy soaking and aggressive manipulation. When several hours have passed and the hat is mostly dry, a final light touch on the edges can help snap back any minor deviations in shape. If you own a hat stand, it can help maintain balance during the last phase of drying, though a flat surface with a towel can work just as well when used with care.
A common question arises for those who want to maintain the exact look of a distressed or vintage hat. Extra care during washing is essential to preserve the wear and tear that defines the style. Harsh detergents and aggressive agitation can accelerate fading and fraying, thinning the fabric where the wearer would prefer character. For these pieces, the focus remains on spot cleaning and restraint, treating only the stained areas and avoiding full immersion. This approach respects the aesthetic while keeping the item functional for future adventures. In practice, a measured, patient routine yields the best balance between cleanliness and character. You’ll find that the hat does not need frequent full submersion to stay fresh; spot cleaning extended over time can manage the look without sacrificing integrity.
To connect this care routine to broader practices, consider that care protocols for headwear often echo best practices in facility management for truck wash businesses. A measured approach to cleaning—treat the stained areas first, minimize exposure of sensitive components, and avoid aggressive handling—translates well from individual hats to larger fleets and equipment. For a more comprehensive perspective on care strategies in professional settings, you can explore resources like facility management for truck wash businesses. This broader view reinforces the idea that thoughtful, targeted cleaning protects value across multiple layers of operation. facility management for truck wash businesses.
If after spot cleaning you still notice stubborn stains or if the hat features intricate embroidery, you may consider repeating the process with an even lighter touch or seeking professional care for textiles that demand specialized handling. The emphasis remains on minimal water exposure, gentle agitation, and careful drying. In all cases, the objective is to preserve the hat’s structure, logo integrity, and overall appearance while extending its functional life on the road. A well-kept hat not only looks better; it reinforces the sense of care that accompanies a well-run truck and crew. Keeping these small maintenance habits consistent adds up over time, contributing to a quieter, cleaner habit that travels with the vehicle and its crew.
External resource: for a broader, science-informed perspective on washing different hat types without damaging them, see the detailed analysis in the external research linked here: https://www.sciencedirect.com/science/article/pii/S0014483523001679
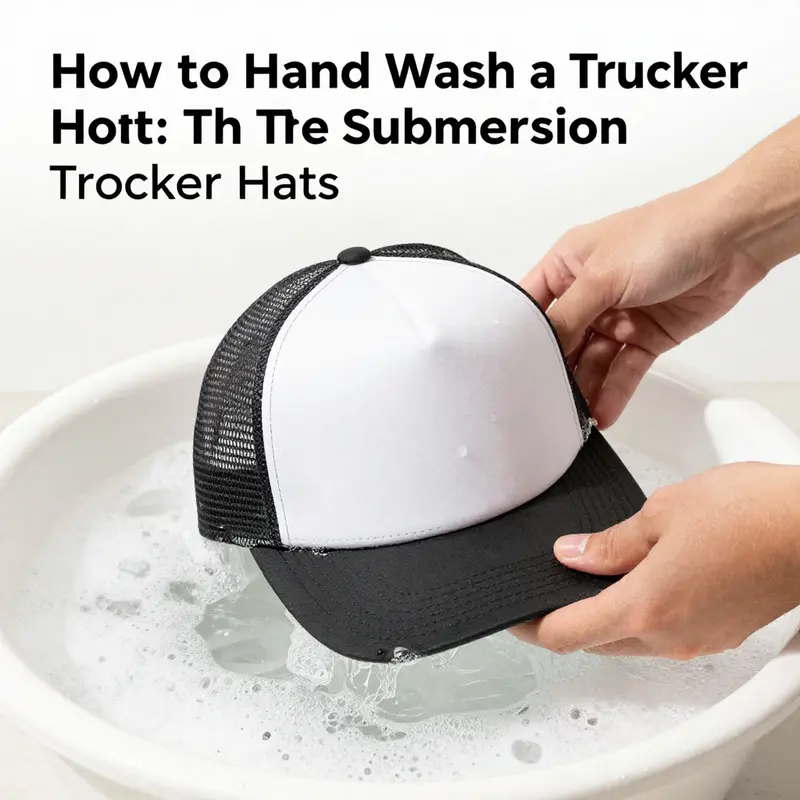
Submerged Care: Mastering the Submersion Method to Clean a Trucker Hat Without Warping
A trucker hat is more than a casual accessory; it’s a compact piece of gear that carries sweat, sun, and stories. Its front panel may carry embroidery or a bold print, while the back mesh keeps air moving against the crown. The wrong wash can shrink, distort, or fade what you wear for hours on the road. The submersion method offers a controlled, thorough cleanse that respects fabric and form. Rather than brute scrubbing, this approach treats the hat as a delicate item that benefits from a measured soak, a soft brush, and patient drying. When done with care, you return a hat that looks sharper, feels lighter, and keeps its shape for miles to come.
Preparation is everything. Gather a clean sink or basin, lukewarm water, a small amount of mild detergent without bleach, a soft-bristled brush, and several clean, dry towels. The goal is to create a gentle cleansing environment in which the hat can float through a quiet, uniform bath rather than endure abrasive agitation. Lukewarm water invites dirt to loosen without shocking fibers. A mild detergent reduces the risk of fading or stiffness. A soft brush helps lift grime from the brim and inside band without tearing stitches. And the towels serve as quiet anchors for shaping during and after the wash. As you assemble these supplies, picture the hat’s silhouette briefly in your mind—the crown round, the brim flat or slightly curved, the mesh back breathing. You want to preserve that look as much as possible, even as you remove sweat and dust.
The first practical step is a colorfastness test. This is not a test for color alone, but a test for the hat’s willingness to stay put under liquid care. Dip a small, inconspicuous area of the interior lining—usually the back of the crown—into your soapy water for about thirty seconds. If the water takes on color, or if you notice the fabric bleeding onto the cloth, you should not submerge the entire hat in this method. This test protects the fabric and embroidery from irreversible changes. If the test passes, you’re ready to proceed with confidence, knowing you have a reliable baseline for how the materials respond to moisture and soap.
Submersion is a measured rite, not a reckless plunge. Fill the basin with enough lukewarm water to submerge the hat completely. Sprinkle in a small amount of detergent and stir gently to create a light foam. Place the hat into the water with care, ensuring the front panel and the mesh back are fully submerged. Allow it to soak for at least thirty minutes. For hats with heavy staining or pronounced sweat marks, a longer soak might seem tempting, even overnight. Yet prolonged immersion can weaken fibers and alter the hat’s structure, particularly the mesh. If you choose an extended soak, monitor the fabric for any signs of distress and keep the duration as short as possible while still targeting the grime. This balance—soaking long enough to lift filth, short enough to protect fabric—defines the submersion method’s strength.
After the soak, a gentle scrub follows. Remove the hat from the bath and, with the hat still damp, use a soft-bristled brush to address stubborn spots. Focus on the front brim, the sides of the crown, and the inner band where sweat accumulates. Lift dirt with delicate strokes rather than aggressive scrubbing. Avoid rubbing logos, labels, or stitching, which are the hat’s most fragile features. The brush should glide across the fabric and mesh, releasing dirt without distorting the crown’s shape or loosening embroidery. If you notice any stubborn grime near a seam, address it with a light touch rather than forceful agitation. The goal is to lift grime without making the hat wobble in its own form.
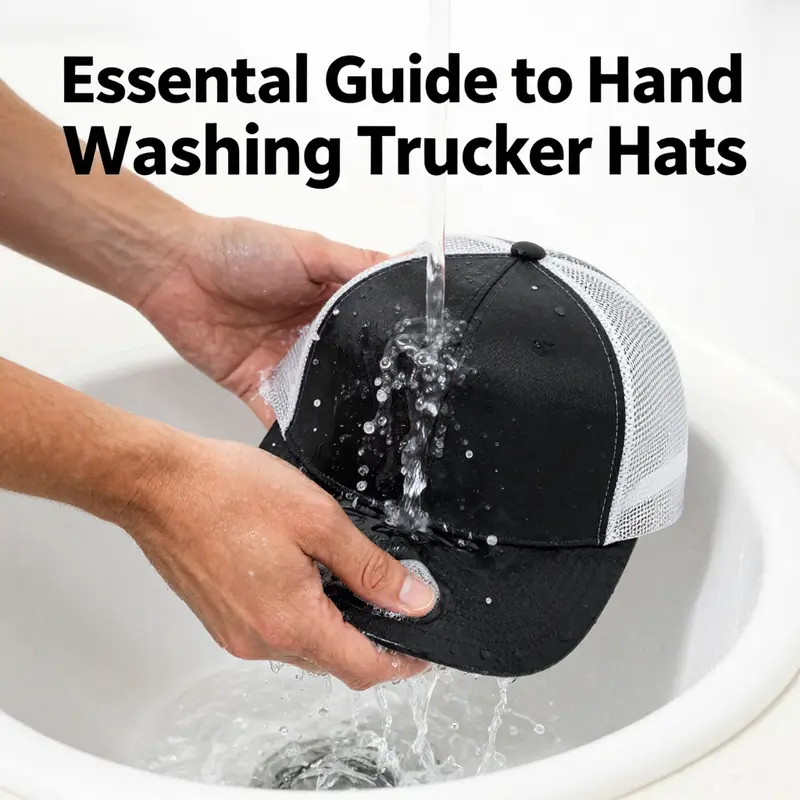
Rinsing is the next crucial phase. Drain the soapy water and refill the basin with clean, cool water. Submerge the hat again briefly to rinse the surface, then remove it and gently run cool water over the exterior and interior. You want to flush out every trace of detergent, which means guiding the water across the brim, down the crown, and through the mesh back. Keep the hat submerged or held under cool streams until the water runs clear and no suds remain. If you still feel soap on the fabric after the initial rinse, repeat the rinse step. Thorough rinsing is essential because residue can stiffen the fabric or hollow out the structure over time.
Excess water must be managed with care. Gently press the hat to remove moisture. Do not wring, twist, or squeeze hard, as these actions can distort the crown and crease the brim. Instead, press the hat against a clean, dry towel and roll the towel lightly to absorb moisture. Reshape the brim to its original form while the hat remains damp. If you have a hat stand or a rolled towel set inside the crown, use it to help the interior keep its shape as air circulates around the hat. Place the hat in a well-ventilated area away from direct sunlight, radiators, or hairdryers. Direct heat can shrink fabrics, warp the brim, and sap the hat’s structural integrity. The objective is a slow, natural dry, letting fibers and mesh settle back into their intended geometry.
To sustain the hat’s form during the drying phase, consider an inside support, such as a clean, dry towel folded into a small cylinder or a rolled piece of paper that mimics the crown’s shape. This simple trick can prevent the crown from flattening or the mesh from puckering as moisture leaves the fibers. The drying environment matters as much as the washing itself. A shaded, breezy corner yields the best results—warmth and sun can do more harm than good by encouraging uneven drying or fading. In this quiet period, the hat learns to hold its lines again, revealing the finished balance between clean and preserved.
For hats with special finishes or details—such as distressed textures that give that vintage look—the care approach remains similar but with heightened gentleness. Distressed finishes can fade if treated roughly, so you’ll want to avoid harsh detergents and aggressive scrubbing. The submersion method is flexible enough to adapt to these features, but gentleness becomes the rule rather than the exception. When you’re ready to hang or lay the hat out to dry, keep an eye on the edges of the brim and the stitching around any patches or embroidery. A steady, patient return to form is more valuable than a quick, aggressive cleanup.
As you refine this routine, you can weave in broader care practices that support clean gear across a fleet or team. Think of maintenance protocols that align with a larger operation, where proper handling of apparel mirrors disciplined asset care. For broader care strategies that complement hand washing, consider the guidance on facility management for truck wash businesses, which outlines how teams can sustain performance and appearance across multiple items and environments. Facility management for truck wash businesses.
Of course, care labels and fabric calls remain the final authority. Always check the hat’s care label before any washing ritual. If a label advises against soaking or suggests dry cleaning, respect that instruction. Some hats use materials that tolerate moisture only in specific ways, and a misstep can shorten the hat’s life. The submersion method outlined here is built on careful testing and mindful execution, not on bravado. It acknowledges that each hat is a small ecosystem of threads, foam, and mesh that deserves respect. The practice becomes a rhythm: test, submerge, scrub gently, rinse thoroughly, remove excess water, and dry in a controlled, shape-preserving way. When done with patience, the result is not merely clean but restored—in a way that carries you through countless miles and seasons with confidence.
External resource for further reading: https://www.menstrends.com/how-to-wash-trucker-hat.html
Rinsing, Reshaping, and Quiet Drying: Mastering the Hand Wash of a Trucker Hat
The care of a trucker hat sits at a quiet crossroads between practicality and respect for the materials. The front panel often carries the logo and the foam or cloth surface that forms the face of the hat, while the mesh back stands as a fragile counterpoint of structure and breathability. The goal of a hand wash is not to erase every mark of wear but to restore the cap’s integrity while preserving its character. Rinsing, reshaping, and drying are not mere afterthoughts; they are the three acts that keep a hat from losing its shape or fading its colors. If you have ever watched a cap shrink, warp, or lose its proud stance after a careless wash, you know why this method emphasizes cool water, a gentle touch, and patience. It is not about speed; it is about stewardship of fabric and form. And the more you commit to this careful routine, the longer your hat will hold its presence on the head or on the hook in your locker, ready to be pulled into a day’s work or a moment of leisure with the same confidence it carries when new.
Begin with the wash basin as a calm stage for transformation. Fill a clean basin or sink with cool water. The temperature matters here. Hot water invites shrinkage and can deform the mesh, while cool water respects the hat’s materials and helps keep the structure intact. To this cool bath, add a small amount of mild detergent or a gentle laundry soap. Choose a formula designed for delicate fabrics, one that dissolves without aggressive sudsing and won’t harshly affect the embroidered logos or printed designs on the front panel. The goal is a clean, not a chemical strike. As you measure, consider the size of the hat and the amount of dirt. If the surface is lightly soiled, a small amount of soap is enough; for stubborn marks, a touch more soap is permissible, but never so much that you end up with a frothy, overpowering rinse.
Spot-cleaning is the prelude to the main wash. Before you commit to submersion, inspect the front panel for stains—the places where sweat and environmental grime tend to accumulate. Use a soft cloth or sponge dipped in the soapy solution to dab at those spots. The work should be gentle, almost feather-light, because aggressive rubbing can fray fabric threads, fade dye, or damage embroidery. If the hat carries a Velcro patch or a high-detail print, treat those areas with extra care, avoiding any abrasive action that might lift threads or crack ink. The goal here is to loosen, not to scrub away. The same principle applies to the mesh back: it deserves a light touch so you don’t distort its honeycomb texture or weaken the stitching that anchors it to the edge of the cap.
With stains approached and the solution ready, the hat safely meets the basin’s cool water. Submerging the hat should be a controlled, calm moment rather than a dunk. Gently lower it, ensuring the entire front panel and the mesh back are fully submerged. At this phase, you want the water to reach all fibers evenly so dirt and sweat can break free without concentrated scrubbing in one area. Hold the hat in place with your hands and let the water circulate around it. Do not twist, scrub, or wring. Twisting is the enemy of shape; scrubbing introduces uneven wear; wringing squeezes the hat in a way that can tilt the crown and bow the brim. The act of submersion itself is a form of restraint—an acknowledgment that the hat’s form is a parameter to be preserved, not a battle to be won.
Gently agitate the water around the hat. Your hands become the machine in this moment, moving the water through the fabric without forceful friction. Light, circular motions help to loosen dirt embedded in the fabric and around the embroidery. If a stubborn spot persists, switch to a more targeted approach using your fingertips rather than nails or a rough cloth. This subtle movement—soft, patient, and consistent—helps you avoid creating new wear patterns while allowing the detergent to lift grime from both the face fabric and the mesh sides.
When the washing feels complete, the rinse follows as a straightforward necessity. Drain the soapy water and refill the basin with clean, cool water. Rinse the hat thoroughly until all soap residues are gone. It is not enough to see a few bubbles disappear; you want a clean rinse that reaches every corner of the fabric and every thread of the mesh. Residual soap can affect fabric feel, cause color to appear duller, or invite new dirt to cling when the hat dries. If needed, repeat the rinse once more to ensure every speck of detergent has left the scene. The ritual of rinsing is a final verification that the hat is ready for air and not waiting to be misted with residue that might mar its finish.
Extracting water is the next careful step. Gently squeeze out excess moisture from the hat; do not wring. The crown should remain round, and the brim should retain its curve rather than flaring in a way that looks unnatural. If you notice pockets of water in the crown, encourage them out with gentle pressure, always mindful of the hat’s shape. The goal here is to reduce weight without collapsing the structure. The mesh back, in particular, can be fragile when saturated and overly manipulated. A patient hand here saves you from a misshapen silhouette that would otherwise require reshaping during drying.
Reshaping the brim while the hat is still damp helps preserve the original silhouette. If the brim has a natural contour or a specific stiffness, set it back into that form as you guide the damp fabric with your fingers. A brim that has lost its bevel or has started to curl will take its shape again if left to dry in that intended form. After this gentle shaping, prepare the drying environment. Lay the hat flat on a clean towel to air dry, or use a hat stand to promote a steady, upright drying process. The air should circulate freely around the hat; place it in a well-ventilated area away from direct sunlight, which can fade colors or weaken fabrics over time. Heat sources, including sunny windows or space heaters, should be avoided because they can warp the brim or shrink components of the mesh. The goal is natural drying: slow, even, and respectful of the hat’s geometry.
A note for those who own distressed or vintage-look trucker hats. The very wear that gives them character can be destabilized by rough handling in the wash. If you prefer that worn-in aesthetic, opt for gentler treatment, lighter soaps, and shorter agitation. This approach helps preserve the intentional fading rather than accelerating it. The care routine still follows the same sequence—wash, rinse, dry—but with a kinder touch that protects the hat’s unique fabric interactions and seam integrity. Such nuances underscore a broader idea: care is not a one-size-fits-all ritual but a tailored practice that honors the hat’s design history while offering longevity.
In thinking about hat care as part of a broader habit of equipment maintenance, it helps to anchor the practice in a broader mindset. In the spirit of cohesive gear care, you can think of it as a microcosm of how professionals manage their tools and uniforms. For instance, the discipline of keeping hats in good condition mirrors how teams attend to the more complex needs of a fleet or a facility. This connection isn’t merely metaphorical. It reflects an approach to care that integrates attention to detail with a gentle hand and patient equipment management. For readers who want to see this philosophy extended into a broader operation, one resource that touches on the systematic side of facility care in truck-related settings is facility management for truck wash businesses. You can explore that perspective here: facility management for truck wash businesses.
As you move toward completion of the drying phase, consider the final moments of this routine as a quiet ritual rather than a hurried chore. Once the hat has dried completely in its natural position, you can give it a final check for any residual damp spots or minor distortions. If the brim’s curve looks uneven after drying, you can very lightly reshape it again while the fabric is still a touch pliable. A soft pat with your fingertips is often enough, followed by another few hours of air drying if needed. This final polish helps to ensure the hat maintains its intended form without requiring a reshaping session the next time you wear it. The entire process—from cool water to a sunless, airy finish—embeds a discipline and pace that respects both the craft of hat-making and the wear patterns that each hat accrues over time.
For those seeking further nuance on the topic, broader guidance on washing different hat types without damage can offer a wider lens on how different fabrics respond to moisture, heat, and agitation. A reputable external reference covers a range of hats and provides practical tips that align with the careful approach outlined here. You can consult that resource for a deeper dive into cross-fabric care and best practices: https://www.sweatband.com/blog/how-to-properly-wash-different-types-of-hats-without-damaging-them. This external guidance complements the specifics of trucker hat care and reinforces the principle that thoughtful, gentle handling yields lasting results.
null
null
Final thoughts
Understanding how to properly hand wash trucker hats is crucial for fleet managers and operators who prioritize not only practicality but also the appearance of their team. Following these outlined chapters will equip you with the necessary skills to effectively care for your hats, prolonging their life and aesthetic appeal. By maintaining cleanliness and professionalism, you ensure your fleet presents itself well, enhancing the overall image of your company. Regular attention to detail in hat maintenance reflects your commitment to quality and excellence.