
A truck’s visibility is paramount for safety, especially in logistics and construction where every detail counts. Clogged windshield washer systems can significantly reduce visibility, leading to potential safety hazards. This guide offers a systematic approach for fleet managers, trucking company owners, and construction supervisors to effectively dissolve clogs and maintain their vehicles’ washer systems. Each chapter is designed to equip you with practical steps, essential tools, preventive measures, and troubleshooting solutions to ensure the reliability and functionality of your windshield washer system, ultimately leading to enhanced operational efficiency.
Clear Path to Clarity: Restoring a Truck’s Windshield Washer System and Keeping It Clear in Harsh Conditions
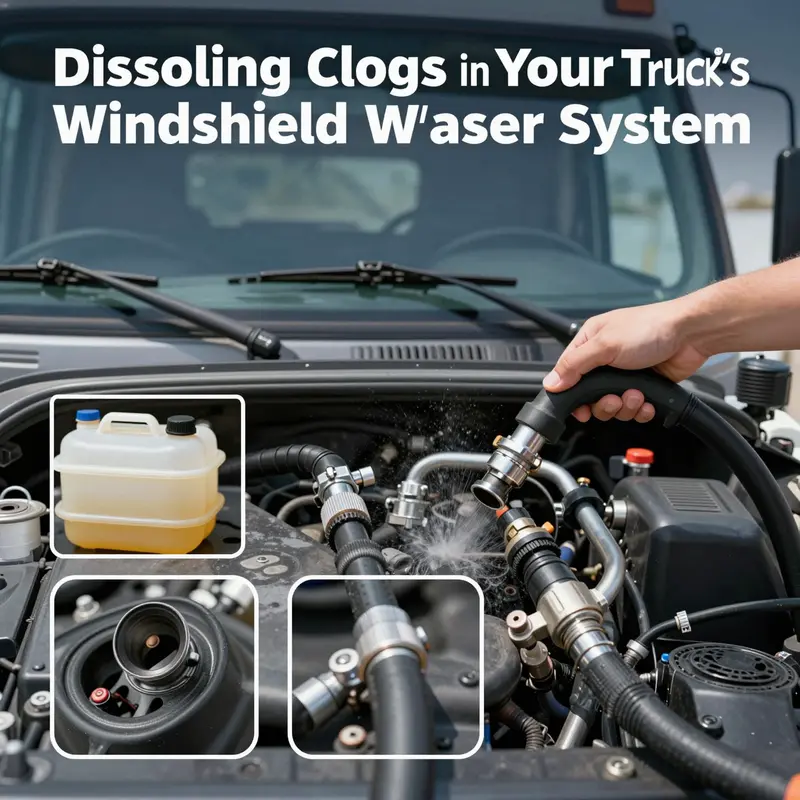
A windshield that stays clear is more than a convenience; in heavy traffic, on winding mountain passes, or during sudden winter squalls, a clogged washer can become a safety liability. In a fleet operation, where time is money and split-second visibility matters, the difference between a sprayed arc and a stalled wiper can affect routes, deliveries, and driver confidence. The windshield washer system is deceptively simple in appearance, but it lives in a compact network of a reservoir, hoses, a pump, and tiny nozzle outlets. When any one part fouls or freezes, the entire system can appear stubbornly uncooperative. The goal of this chapter is not just to unclog a nozzle, but to understand the logic of the blockage, respond with the right remedy, and establish habits that prevent similar headaches in the future. Approached calmly, the process becomes a routine part of fleet maintenance, something that keeps drivers safe and operations efficient, even when weather and water quality conspire against you.
First, identify the type of clog. This step sets the course for a clean, successful rescue operation. Clogs do not always look the same, and the remedy that works for one kind may be ineffective or even harmful for another. The most common culprits fall into a few broad categories: light debris or dirt, mineral deposits from hard water, frozen fluid in cold weather, and, less frequently, a severe blockage or pump failure. Each has its own telltale signs and a tailored course of action. When a driver reports weak spray or a scattered pattern, the system is often dealing with a light debris clog. If the spray is absent despite the pump running, mineral scale or mineral buildup has likely taken hold, or a frozen block might be snarling the line. If there’s no motor sound at all, the problem could be electrical or mechanical failure that requires deeper inspection. The driving crew benefits from clear thresholds like these, because they translate into faster triage and less time spent on the side of the road.
The practical plan then unfolds in a sequence that begins with the simplest checks and moves toward targeted interventions. Before you begin any hands-on work, park the truck in a warm, dry spot if possible. If you’re on a fleet route, ensure the ignition is off and the electrical system is demobilized from the washer circuit. This reduces the risk of accidental sprays or electrical shocks while you work. A little mental discipline at the front end pays off later, especially when you are dealing with delicate nozzle tips and tiny passages that can be damaged by careless probing. With the engine warmed and components at a slightly pliable temperature, you can begin the careful work that follows. The aim is to restore a clean, reliable spray pattern that evenly coats the windshield and keeps the wipers working with minimal drag and noise.
When the spray is feeble or erratic, the first line of defense is a light mechanical clean. The nozzle openings are small, typically just fractions of a millimeter, and they are precisely bored to deliver a fine, even spray. A gentle approach is essential. You’ll need sterilized tools—an 0.8 to 1.0 millimeter diameter sewing needle is a good standard—and, if available, a small syringe to back-flush the passage after dislodging the obstruction. Begin by locating the nozzles, usually tucked along the base of the windshield where the wipers sweep. The aim is not to pry or force; it is to coax the obstruction free from the tiny orifice. Insert the sterilized needle into each nozzle’s spray hole and rotate it slowly, never pushing more than a few millimeters. The mass of the clog is usually just a pinch of dirt, dust, or dried fluid residue compressed by space and time. Withdraw the needle and attempt a light back-flush with clean water drawn through a syringe. The backward flow helps pull dislodged material away from the exit and toward the reservoir where it can be rinsed away. After this careful mechanical clean, test the system by activating the washer to observe whether the spray has regained its proper arc and pressure. If the pattern remains off, you’ve not yet exhausted the simple fixes; you may need to adjust nozzle alignment with the needle’s tip to bring the spray back to its intended target.
For many trucks, mineral deposits are the second stage of trouble. Mineral scale forms when tap water or low-quality washer fluid leaves behind salts and lime that gradually coat the interior passages. The effect can be dramatic: the nozzle may refuse to spray or emit a pale, spotty pattern. A vinegar-and-water soak is a time-tested, practical remedy that respects the plastics and rubbers around the washer system. To execute this, you must remove the nozzle assembly and submerge the nozzle in a equal parts white vinegar and warm water solution for a half-hour. The warmth helps accelerate the dissolution of mineral scale, while vinegar’s acidity dissolves lime and mineral accretions that are otherwise stubborn. After soaking, rinse thoroughly with clean water and reinstall the nozzle. If the clog persists deeper in the tubing, a syringe can be used to inject the vinegar solution into the hose line, letting it sit for 15 to 20 minutes before a thorough flush. Throughout this process, you should avoid any aggressive chemical cleaners that might react with plastics or rubber seals; ordinary white vinegar is gentle enough for most washer components when used in moderation. This is a crucial moment for fleet maintenance: the acceptance that mineral buildup is common and manageable with simple, repeatable steps, rather than a signal to replace parts prematurely.
Winter brings another set of challenges. Frozen fluid can create a total block that prevents even the sound of the pump from betraying its presence. When you encounter a frozen system, the instinct to pour hot water can be dangerous. Thermal shock is a real risk for plastic and glass components, and hot liquids can crack fittings or nozzle tips. The safe thawing technique centers on gradual thermal relaxation. A dampened towel warmed to around 50°C (122°F) and placed over the frozen nozzle is a controlled way to loosen ice while protecting the plastic. This method avoids rapid temperature swings and minimizes the risk of damage. If sunlight or a heated garage is available, letting the vehicle absorb natural warmth can achieve the same result without direct intervention. Once the ice dissolves and the system is free again, immediately refill the reservoir with a high-performance, freeze-resistant washer fluid designed for subfreezing temperatures. The rule of thumb here is straightforward: do not press the washer switch while there is still ice in the lines. A moment of patience saves the pump from burnout and the driver from a stranded moment on the highway.
A less frequent but critical scenario is severe blockage or pump failure. If the reservoir empties with no spray and there is no audible pump operation when the switch is engaged, you are likely facing an electrical issue or a failed pump. The first diagnostic step is to inspect the fuse for the washer system—found in the interior fuse box—and replace if blown. If the fuse is intact but there is no activity, the pump itself may be defective. In that case, the repair may exceed a simple field fix, and professional diagnosis becomes prudent. Replacing a washer pump typically requires some basic mechanical skill and a few standard tools; it is not inherently dangerous, but it is more complex than cleaning nozzles or flushing hoses. A cautious approach is warranted here: if you lack experience, consult a technician who can confirm whether the pump, the wiring, or a related relay is at fault. The goal in these cases is to restore the system to working order without introducing new leaks or electrical hazards, which could create more serious consequences for the vehicle’s electronics and battery systems.
Amid these diagnostic and repair steps, it is worth pausing to reflect on habits that prevent recurring trouble. Preventative maintenance is the quiet backbone of reliability. Always use high-quality, winter-rated washer fluid, particularly when the temperature dips below freezing. Tap water is a poor long-term choice because it fosters mineral buildup, which invites future clogs. Periodic flushing of the entire system with distilled water or a dedicated cleaning solution helps remove residues and keeps the nozzle passages clear. Clean nozzles monthly during winter months, using either a needle or compressed air, to keep spray patterns crisp and predictable. A simple practice—keeping the reservoir topped with fluid and ensuring nozzles are free of obstructions—yields dividends in safety and performance. When possible, you should also perform a quick system check during routine maintenance cycles and before long trips. A few minutes saved at the shop or during a pre-trip inspection can translate into hours of safer driving on the road.
The navigation through these steps is not merely a mechanical exercise; it is a philosophy of proactive care. The washer system is a small but essential part of a truck’s safety ecosystem. It shares its fate with the engine, the electrical system, and the quality of the driving environment. A disciplined maintenance routine—regular use of winter-grade fluids, careful inspection of hoses and nozzle tips, and timely attention to any spray irregularities—creates a resilient system that supports clear vision through changing weather and road conditions. This is especially true for fleets where drivers repeatedly face rural routes, dusty substrates, or saline winters, all of which can accelerate deposit buildup or speed the onset of freeze-thaw cycles. The message is simple but powerful: treat the washer system as part of the vehicle’s safety core, not as a cosmetic afterthought. In doing so, you reinforce a culture of proactive upkeep that protects drivers, preserves routes, and upholds the fleet’s reliability metrics.
For those managing fleets or working within a maintenance team, there is value in connecting these practical steps to broader operational standards. While the day-to-day repair of a clogged nozzle may seem like a small duty, it interacts with broader topics such as vehicle compliance, emissions considerations, and the overall risk management framework that fleets rely upon. In many operations, you’ll find that maintenance routines are most effective when they are codified—checklists that align with manufacturer guidance and fleet-specific performance data. This is why, in addition to the hands-on skills described above, it can be helpful to consult with manufacturer resources for model-specific guidance and to stay aligned with official care documentation. For a broader perspective on maintenance standards within the truck wash ecosystem and the regulatory context that governs fleet upkeep, see resources focused on truck-wash industry compliance and emissions regulations.
truck-wash-industry-compliance-emissions-regulations
External references also offer valuable, model-agnostic guidance. When you need a deeper, more technical walkthrough that complements hands-on practice, professional manuals and manufacturer-maintenance notes remain the most reliable sources. For example, official vehicle care documentation and service manuals provide specifications for nozzle spacing, recommended fluid types, and temperature thresholds that help prevent damage during maintenance work. In parallel with these sources, practical, field-tested methods—such as the vinegar soak for mineral deposits and the gradual thaw technique for frozen lines—offer a robust toolkit for technicians working in the real world, where conditions vary and time pressure is common. As you apply these techniques, remember that documentation matters. Keeping a maintenance log of washer-system checks, fluid types used, and outcomes of nozzle cleanings creates a trail that supports audits, standardization, and continuous improvement across the fleet.
To close this chapter with a sense of practical confidence, imagine a typical maintenance window before a long-haul trip. A technician or a competent driver would check the reservoir level and the fluid type, observe the spray pattern at a low speed setting, and examine each nozzle for obstructions. They would then proceed through the light debris cleaning, the mineral deposit treatment if needed, and the cautious thaw in cold weather. Throughout, they would maintain a careful tempo, avoiding rushed improvisation that might lead to damaged nozzles or leaks. The fragrance of success here is not only a clear windshield but also the quiet assurance that the rest of the vehicle’s safety systems will function as intended on the road ahead. The module of knowledge you have just traversed aims at two outcomes: a dependable spray when you need it and a durable system that endures through winter, heat, and miles of demanding use. By embedding these practices into routine maintenance, you reduce the probability of sudden, situation-crippling failures and create a smoother operational flow for the fleet, from the terminal to the highway.
For drivers and technicians who desire a broader grounding in vehicle care, the following practical takeaway can guide daily practice. Treat the washer system as a microcosm of preventive maintenance: it rewards steady attention, consistent fluid quality, and careful handling. When something blocks the spray, don’t default to a single remedy. Instead, follow a small diagnostic arc: assess the spray pattern and pump sound to categorize the clog, choose a targeted method grounded in the clog type, perform the solution with gentle, controlled actions, and verify results with a test spray. If the initial remedy does not yield a full restoration, re-check hose connections and nozzle alignment, revisit the reservoir fluid, and consider a professional assessment if the issue extends beyond a simple clog. This disciplined approach preserves not only the washer’s function but also the integrity of the windshields, the wipers, and the driver’s overall safety.
In summary, a clogged windshield washer system on a truck is a solvable problem when approached with clarity and method. Start with diagnosis: light debris, mineral deposits, frozen fluid, or pump/electrical failure. Then apply the simplest solution first, escalating only as necessary—careful needle cleaning for minor blockages, vinegar soaks for mineral buildup, a controlled thaw for icy lines, and fuse or pump checks for more stubborn failures. Combine these technical steps with preventative habits: use winter-grade fluid, flush regularly, and keep nozzles clean. With these practices, your fleet can maintain reliable visibility through all four seasons and all kinds of weather, turning a potential disruption into a routine maintenance win. And as you embed these practices into your standard operating procedures, you’ll find that the windshield washer system becomes not a fragile expendable component but a dependable, well-supported part of the vehicle’s safety framework. This is the quiet payoff of disciplined maintenance: fewer roadside interruptions, happier drivers, and ultimately safer roads for everyone who shares the journey.
For further reading and model-specific guidance, consider consulting official manufacturer resources and service manuals that outline fluid recommendations, nozzle tolerances, and electrical connections. These sources provide precise specifications that help maintenance staff stay aligned with the vehicle’s intended design and performance characteristics, ensuring that the solutions you apply are durable and appropriate for the exact make and model you operate.
External resource: Toyota Service Manual – Windshield Washer System Maintenance (2026) https://www.toyota.com/owners/manuals/windshield-washer-maintenance-2026
From Freeze to Flow: Mastering Tools and Materials to Dissolve Clogs in Truck Windshield Washer Systems
From Freeze to Flow: Mastering Tools and Materials to Dissolve Clogs in Truck Windshield Washer Systems
In the world of heavy trucking, visibility is as vital as horsepower. A windshield washer system that fails at the wrong moment can turn a clear road into a whiteout, increasing risk for the driver and delaying deliveries. Yet the problem is rarely a single, dramatic blockage. More often it is a slow accumulation: mineral residues from hard water, wax and polish remnants from maintenance cycles, and the inevitable ice that forms when cold weather meets a busy fleet. Addressing this requires more than a quick spray or a pump-house flush; it demands a considered blend of chemistry and careful mechanical work, applied in the order that respects the system’s design and the fleet’s operating tempo. The goal is not just to dissolve a clog, but to create conditions in which spray remains reliable across a broad range of temperatures and driving scenarios. A practical approach treats the washer network as a connected circuit—from the reservoir to the hose, through the nozzle, and back again as the fluid cycles through the system. This perspective guides the selection of fluids, the use of tools, and the cadence of maintenance that keeps the flow steady when you need it most.
The first decision in addressing clogs is choosing the fluids that will do the heavy lifting without harming the system. De-icing fluids or washer fluid additives are designed to break ice and lower the freezing point of the solution, which can be a decisive advantage when temperatures drop and the system sits idle overnight. In practice, these additives must be compatible with the rubber hoses and plastic components common to heavy-duty washer systems. They should also avoid leaving sticky residues that attract dust and grime, because residual films can become new anchors for debris over time. The chemistry matters as much as the technique; a well-chosen de-icer not only dissolves the earliest ice bonds but also creates a safer baseline for subsequent flushing by keeping the fluid moving freely rather than forming brittle sheets of crust that cling to the nozzle holes.
But freezing is only one face of the problem. A robust strategy calls for a dedicated washer system flush solution designed to emulsify and wash away mineral deposits, waxy films, and road grime that accumulate where the fluid travels. Over months and miles, the reservoir can harbor a film that reduces cleanliness efficiency, while piping and nozzles can collect a crust that resists simple spraying. A purpose-built flush product helps dissolve these deposits and is gentler on seals and hoses than a brute-force chemical dump. By enabling multiple flushing cycles in a row, this approach ensures debris is carried away with each pass and that the interior passages stay open for the next cycle. The intent is not to stage a dramatic cleaning event but to deliver consistent, repeatable improvements through careful, repeated action. When done correctly, the system emerges from the flush with a spray pattern that remains uniform across cycles and weather conditions.
In some scenarios, a straightforward flush may still fall short if stubborn crusts have formed or if hard water mineral scale has anchored itself to the jet orifice. This is where a practical, cost-effective option enters: isopropyl alcohol at 70 percent or higher. Used judiciously, isopropyl alcohol can dissolve organic residues and soften mineral crusting that water or a basic flush cannot penetrate. The mechanics are simple: introduce a measured amount into the reservoir, ensure the engine is off, and allow the solution to traverse the lines and nozzles as you run several short washing cycles. The emphasis, again, is on controlled use. Alcohol is flammable, and its vapors need ventilation. A cautious approach—small pours, short activation bursts, and immediate flushing with clean fluid—helps avoid exposing seals to aggressive solvents longer than necessary. In older or more worn systems, this measured method can restore spray behavior that has deteriorated over months of use.
All of these fluid strategies come alive only when you have the right mechanical tools ready to work in concert with them. A precision needle or pin remains the classic instrument for clearing tiny nozzle obstructions. The nozzle tip is a small aperture, often the choke point for spray performance. When you insert the needle, you do so with the system off and with any residual pressure released. A delicate touch matters more than brute force; a few careful nudges can free a particle that otherwise would resist a flush. The aim is to reestablish the original flow path without injuring the nozzle, which can be easily deformed or worn if mishandled.
In parallel, compressed air can prove incredibly useful for drying and dislodging stubborn material after a flush. The air acts as a quick sweep to remove residual moisture and to loosen crusts that still cling to the jet orifice. The key here is to keep the pressure modest. High pressure can force debris into pockets that were only just cleared, or it can push fluid into seals that are not designed for forced expansion. A short, controlled burst at each nozzle, followed by another round of flushing, tends to yield the best results. The goal remains consistent spray, not a one-off pop in the nozzle that later regresses to the same clogged state.
When a nozzle remains recalcitrant after fluid treatment and air, a flexible cleaning probe or a non-abrasive wire tool can be employed to reach deeper into the path. Long hoses and tubing can harbor subtle kinks or bends that restrict flow, and the interior surfaces may harbor residues that do not respond to surface cleaning. Probing must be gentle and guided. The tool should bend with the tubing, not gouge the interior walls. If contact reveals a blockage, withdraw and re-flush rather than forcing the probe through, which risks damaging seals or dislodging a component that controls spray geometry. The probing step, though small, is a crucial hinge in the overall sequence because it clears pathways that the other methods cannot reach from the reservoir to the nozzle.
There are times when the path to a clean spray requires a bit more access than the usual service routine provides. Accessing the nozzle assembly or removing a portion of the reservoir cap can yield unimpeded visibility of interior components. A screwdriver or a small Allen key then becomes necessary for disassembly. This is an occasion for respect and patience rather than force. Note how gaskets seat and how threads engage before reassembly. The objective is not to force disassembly but to give yourself a clear view of possible wear or damage. In many cases, you will find that after cleaning the seats and inspecting the seals, the spray performance returns. When cleaning does not restore flow, the nozzles may be damaged and require replacement with compatible parts. In practice, replacement is frequently the most economical path to restoring spray geometry and reliability, especially when the jets have developed microcracks that trap residues or alter spray patterns.
Yet even after a thorough nozzle clearance or replacement, the system’s long-run health hinges on what happens downstream in the hose. A clogged hose can be misleading because the blockage may lie anywhere along the length of the tubing. Inspect the hose for kinks, cracks, or abrasions that could restrict flow. A hose in good condition carries the fluid smoothly; a compromised hose acts almost like a reservoir itself, collecting debris and creating new choke points. If you locate a blockage that cannot be cleared in place, detach the hose and flush it separately, or use a thin pipe cleaner to coax a stubborn bend back into alignment. Restoring continuity from reservoir to nozzle is the final step toward restoring a reliable spray pattern.
The sequence you follow matters as much as the tools you use. The recommended cadence is straightforward: begin with a dedicated cleaner in the reservoir and perform a full flush cycle to dilute and move debris; then employ mechanical clearing with a needle to clear the nozzle holes; follow with a controlled blast of compressed air to dry and free any residual moisture; use a flexible probe to navigate the interior and confirm passage; and finally, reassemble and test with fresh fluid. Repeating cycles after each intervention helps ensure that no residual film remains and that the system’s parts stay hydrated rather than desiccated by aggressive cleaning. In fleet environments, maintaining this cadence also acts as a preventive measure, preventing a small clog from becoming a recurring fault that interrupts service during cold or wet weather.
In environments with mineral-rich water, you may cycle through a targeted treatment sequence that combines the flush solution with a short, careful application of alcohol. Start with the flush to dissolve waxy or mineral layers, then introduce a small amount of isopropyl alcohol to loosen any lingering crust, and finish with a final rinse of clean washer fluid. The logic is straightforward: let the flush do the heavy lifting for deposits, then use the solvent to loosen anything the flush did not dissolve, and end again with a clean flush to wash away softened debris. This approach reduces the likelihood of reformation and supports smoother future cycles. Never mix cleaners without following the recommended contact times and warnings. The goal is a robust, repeatable pattern that keeps the path clear without compromising seals or hoses.
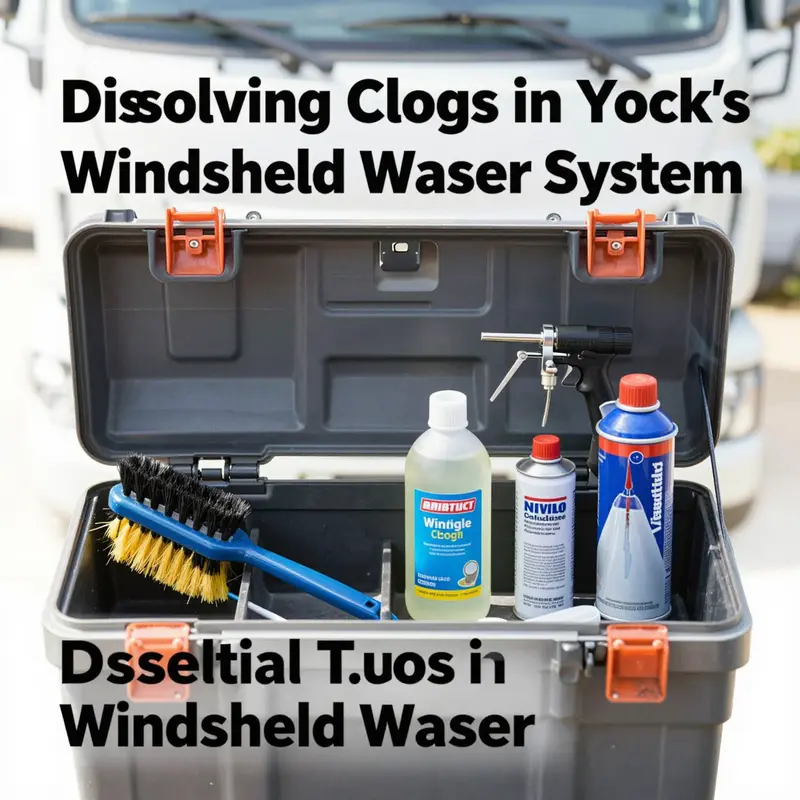
Beyond the technical steps, prevention remains central to reliable operation. A fleet that adheres to a regular maintenance schedule gains more than clean jets; it gains predictability. A fixed annual or seasonal protocol—start-of-winter checks, mid-winter flushes, and post-season inspections—moves the washer system from a reactive repair to a proactive program. The cost of a proper maintenance kit—a few bottles of cleaner and the right hand tools—pales against the downtime and safety risks of a spray failure on a long-haul route. Moreover, documenting interventions in a maintenance log helps technicians identify recurring patterns, such as repeated nozzle wear or hose aging, so issues can be addressed before they affect driver visibility. The end result is a fleet that maintains visibility under the toughest conditions rather than a collection of vehicles that suffer from sporadic spray failures.
To tie the approach to a broader maintenance framework, consider the value of integrating these practices with the shop’s overall workflow. A disciplined routine, applied consistently, reduces the incidence of unexpected clinic visits for windshield spray failures and supports the driver’s visibility and safety. A simple habit, such as flushing the washer system with a dedicated cleaner at the start of each winter season or at regular intervals during peak usage, becomes a guardrail against the creeping build-up that besets heavy-duty hardware. This chapter’s philosophy centers on the idea that practical tools and materials, used in the right order, enable a reliable spray that lasts longer and performs better in adverse weather. It also recognizes the interconnectedness of the washer system with the rest of the truck’s fluid networks, reminding readers that a clogged nozzle can be a symptom of a broader pattern of corrosion, wear, or contamination that deserves attention in the ongoing maintenance calendar.
In the spirit of practical implementation, one more note about site-specific workflows can help bridge theory with hands-on operation. If you manage a fleet or a shop where trucks come and go and the washer system is a constant companion to winter driving, you can draw on established facility management practices to coordinate the cleaning routine with other preventive maintenance tasks. Streamlined procedures for access to the reservoir, the ability to safely isolate electrical power, and a straightforward method for resecuring hoses and nozzles after servicing all contribute to a smoother, safer workflow. For more on integrating maintenance tasks with broader facility operations, see the discussion on facility management for truck wash businesses. This reference emphasizes that a predictable, documented process reduces downtime and supports service continuity across a fleet of vehicles.
In summary, dissolving clogs in a windshield washer truck system relies on a thoughtful blend of chemistry, careful mechanical work, and disciplined maintenance habits. The right fluids break ice and wash away mineral residues. The right tools enable delicate contact with nozzles and tubing without damaging sensitive parts. The right sequence—flush, clear, check, and test—transforms a stubborn obstruction into a reliable spray that helps keep drivers’ visibility intact in challenging weather. The chapter above provides a practical map for technicians and fleet managers alike, highlighting not only what to use but how to use it in a way that respects the system’s design and the fleet’s operational tempo. As a final reminder, always defer to official guidelines and industry standards when in doubt, and use them to inform your internal procedures and training materials. For authoritative best practices, consult the industry standards provided by the professional association.
External resource: https://www.tema.org/
null

null
Clear Signals, Clean Winds: Mastering the Art of Dissolving Clogs in Truck Windshield Washer Systems

A windshield wiper system on a truck is more than a convenience; it is a critical safety feature that keeps your view clear in rain, sleet, or dust. When the washer system begins to sputter or fully refuse to spray, it can feel like a small nuisance but quickly becomes a bigger threat on high-speed highways or dirt roads where debris flies and visibility demands constant attention. The tendency for windshields to accumulate grime in freight operations—the dust from open lots, road spray, or mineral deposits from hard water—means the washer system is always working against a built-in clock. Over time, clogs develop in the nozzles, hoses, reservoir, or even within the pump assembly itself. To a driver, the spray pattern shifts from a wide, even fan to a narrow jet or, worse, nothing at all. The remedy, however, is rarely dramatic: it is a careful, systematic dissolution of the little blockages and a recommitment to maintenance that prevents future buildup. The best approach blends practical, hands-on steps with a broader understanding of why those clogs occur in the first place, so that the system functions reliably when you need it most.
Begin with the simplest starting point—the reservoir. A recurring pattern in clogged systems is tied to the fluid itself. If the reservoir is low or the fluid is stale, the system is more prone to drawing in air and sucking debris that has settled at the bottom. The first action, therefore, is to inspect the reservoir and fill it with a quality windshield washer fluid. In colder regions, never rely on water alone; diluted or undiluted water can freeze or gel, leaving the pump to fight against a solid plug rather than a fluid flow. The goal is not just to restore volume but to ensure the fluid chemistry remains compatible with the seals, hoses, and nozzle materials. A good fluid also includes additives that help prevent freezing and reduce future mineral buildup, which can otherwise anchor itself to walls and corners of the reservoir. The step connects to a broader maintenance mindset: keep the system supplied with clean fluid that can do the work without introducing new contaminants.
If fluid level appears normal yet the spray remains inconsistent, the next move is to flush the system with clean water. After turning off the engine and, if possible, disconnecting the power to the washer pump, pour in a steady stream of fresh water and activate the lever several times. The intent is to push out loose debris and dislodge minor clogs without forcing solvents through components that may be distressed or aged. This flushing is sometimes all that’s needed for a small obstruction caused by dirt or old fluid residue. It is a low-risk, low-cost action that buys time for a more thorough cleanse if the problem persists. The careful sequence of flush, observe, and reflush creates a feedback loop: you see whether the flow improves, and you adjust your next step accordingly. In many fleets, this practice becomes part of a routine check that aligns with broader maintenance protocols that govern truck wash operations and emissions considerations—an alignment you can verify through the industry guidelines and compliance standards that shape daily workflow. External reference: https://tripleatruckwash.com/truck-wash-industry-compliance-emissions-regulations/.
When the nozzle pattern remains stubbornly inconsistent after a flush, attention should shift to the nozzle openings themselves. The nozzles are tiny orifices designed to deliver a fine spray that covers a broad swath of the windshield. Debris, mineral crust, or dried fluid can chalk the tiny holes, reducing spray velocity and distorting the spray angle. A soft brush or a cautious puff of compressed air can dislodge particles that are clinging to the surface. Take care not to bend or damage the nozzle tips—their geometry is critical to spray distribution. If brushing or air alone fails, the next step is to inspect the nozzles with a small, gentle tool, like a thin needle, to clear the individual holes. This step requires turning off the system and ensuring no residual pressure remains in the line. It is a delicate operation: force can gouge the tip or push debris deeper into the orifice. Patience matters more than force here, and the reward is a return to a proper spray pattern without the need for more invasive interventions.
If the nozzles refuse to yield, the investigation should advance to the hose that carries fluid from the reservoir to the spray body. A kink, wear, or hidden obstruction in the hose can starve the nozzles of fluid even when the pump and reservoir are functioning correctly. Gently disconnecting and inspecting the hose can reveal a soon-to-be-obstruction that has migrated toward the spray outlets. In some cases, the blockage sits within a segment of hose that is difficult to access in situ. Removing that hose and flushing it with water can clear a stubborn clog, or a small flexible brush can be advanced through the line to reestablish a clear channel. If the hose shows signs of cracking or deformity, replacement is the prudent course. The entire path—from pump to nozzle—must be clean for the system to deliver the intended curtain of wash fluid rather than a trickle.
Mineral deposits, accumulated from hard water, are a quiet but persistent antagonist to washer systems. When you operate in regions with high mineral content or rely on reclaimed water for demonstration or cleaning purposes, scale can crystallize along the reservoir walls, in the hose, or inside the nozzles. For deposits that resist simple flushing, a vinegar solution can be an effective, gentle agent. Mix equal parts white vinegar and water, pour into the reservoir, and run the washer system several times. The acetic acid content in vinegar helps dissolve mineral scale and can prevent future buildup if used periodically as part of a maintenance regimen. The important caveat is to ensure that the vinegar is thoroughly flushed from the system before using it with any other cleaners or heavy-duty bypassing of seals. The idea is not to rely on vinegar alone for long-term maintenance but to use it as a targeted remedy for mineral deposits that hamper flow. In the broader maintenance framework, the vinegar approach aligns with the principle of using non-aggressive methods first and reserving stronger measures for situations where deposits have already anchored themselves in hard-to-reach corners of the system.
For stubborn deposits that endure despite flushing and vinegar, a more direct intervention may be required: replace the nozzles. Nozzles can become permanently clogged or etched with mineral buildup that resists cleaning. OEM or compatible replacements are available at most automotive parts outlets. Replacing the nozzles is typically straightforward but demands caution to avoid striping mounting threads or misaligning the spray pattern. Once new nozzles are installed, test the system at several pressure points to confirm the spray distribution is even and wide enough to blanket the windshield. If the spray remains uneven after replacement, reexamine the hose routing or consider a more comprehensive check of the pump if it shows signs of wear or insufficient pressure. The replacement step often yields the most reliable improvement when other cleaning methods have fallen short, and it underlines the fundamental lesson: sometimes the problem is simply worn components that no longer respond to cleaning alone.
Beyond cleaning and replacement, attention to the system’s ecosystem—the reservoirs, seals, and wiper components—helps prevent recurrences. The windshield wash fluid must be mixed with proper compatibility in mind. A fluid that is too thin or too viscous can create unusual flow characteristics that compound the issues in the system, particularly in cold weather where viscosity shifts can mimic clogging. Regular inspection of rubber seals and the pump housing can prevent leaks that allow air to enter the circuit and disrupt the flow. Even the wipers themselves can influence the perceived effectiveness of the washer spray: worn blades can smear or fail to clear the glass, leading to larger issues with visibility that can tempt operators to overwork the washer system. When blades are near the end of life, replacing them becomes part of a comprehensive strategy to maintain glass cleanliness. In practical terms, the maintenance cadence should include periodic cleaning of the reservoir cap, ensuring the venting system is unobstructed, and verifying that hoses are free of kinks and cracks. These steps contribute to a system that remains responsive in demanding conditions.
The narrative of dissolving clogs also suggests a broader maintenance philosophy: use proper fluids, avoid improvised improvisations, and treat the washer system as part of the truck’s overall glass care and visibility strategy. Pre-cleaning the windshield itself helps reduce the workload on the washer system. A clean glass surface makes any spray more effective and reduces the pressure required to achieve a clear view. For this reason, drivers and operators often rotate between cleaning the glass and treating the washer system as complementary tasks rather than separate chores. A clay bar designed for automotive glass can help remove embedded contaminants from the surface, improving the interaction between the glass and the spray and preserving the efficiency of the wipers. While this step sits on the boundary between windshield treatment and washer maintenance, it reinforces the cooperative relationship between glass cleanliness and fluid delivery.
From the standpoint of maintenance culture, a healthy washer system is not a one-off fix but a habit. Regular maintenance—cleaning the reservoir and screens, checking for blockages, and replacing worn components—extends the life of the system and prevents the little clogs from becoming big problems. It is essential to follow manufacturer guidelines, not just for the direct components but for the overall fluid management strategy. The guidance often emphasizes compatibility and proper maintenance routines that protect seals and plastics from aggressive cleaners or solvents. In the careful hands of trained operators, the washer system becomes a reliable ally rather than a source of anxiety on stormy or dusty routes. The practical conclusion is simple: start with the clean fluid, work through the noninvasive steps first, and escalate only when needed to avoid unnecessary wear or damage.
In the broader ecosystem of truck maintenance, the windshield washer system is integrated with fleet standards and safety protocols that govern daily operations. A thoughtful maintenance approach should reflect a balance between immediate, actionable steps and longer-term preventive practices that reduce the likelihood of future clogs. Employing high-quality washer fluid year-round, especially in winter, and avoiding the use of plain tap water are straightforward measures with outsized benefits. Periodic system flushes with clean water or a mild cleaning solution help maintain a clear pathway from reservoir to nozzle. For more complex or stubborn cases, the literature on vehicle window and windscreen maintenance provides additional context on pre-cleaning glass surfaces, using a clay bar to remove embedded contaminants, and ensuring wiper blades remain in good working order. All of these considerations feed into a consistent practice that supports visibility, safety, and efficiency on the road.
For readers who want to anchor these practices in a broader industry framework, the linked resource on truck wash industry compliance and emissions regulations offers a succinct overview of how routine maintenance fits into regulatory expectations and operator responsibilities. It is worth noting that while the washer system may seem a modest subsystem, its reliability echoes the same discipline that governs more visible, high-stakes maintenance decisions across fleets. Keeping a clean, well-maintained windshield washer system reduces the likelihood of visibility-related incidents and aligns everyday maintenance with the standard of care that fleets aim to uphold. External reference: https://www.autorepair.net/vehicle-windshield-washer-system-cleaning
Final thoughts
Maintaining a fully functional windshield washer system is crucial for the safety and efficiency of truck operations. By understanding the steps to effectively dissolve clogs, utilizing the right tools, implementing preventive measures, and being aware of common issues, fleet managers can ensure that their vehicle visibility remains optimal. Regular maintenance not only enhances safety but also contributes to the longevity of your fleet. Stay proactive and keep your trucks in peak condition for any journey ahead.