
A well-functioning windshield washer system is critical for safety and visibility, especially for fleet managers involved in logistics, construction, and trucking. Understanding how to replace the windshield washer reservoir on a 1996 Chevrolet truck can save time and costs associated with professional repairs. This guide breaks down the essential steps from gathering tools to final testing, ensuring your fleet remains operational and drivers maintain optimum visibility in all conditions. Each chapter focuses on a vital aspect of the reservoir replacement process, providing a structured approach tailored to fleet management demands.
Gearing Up Right: Essential Tools and Materials for Replacing the Windshield Washer Reservoir on Your 1996 Chevy Truck
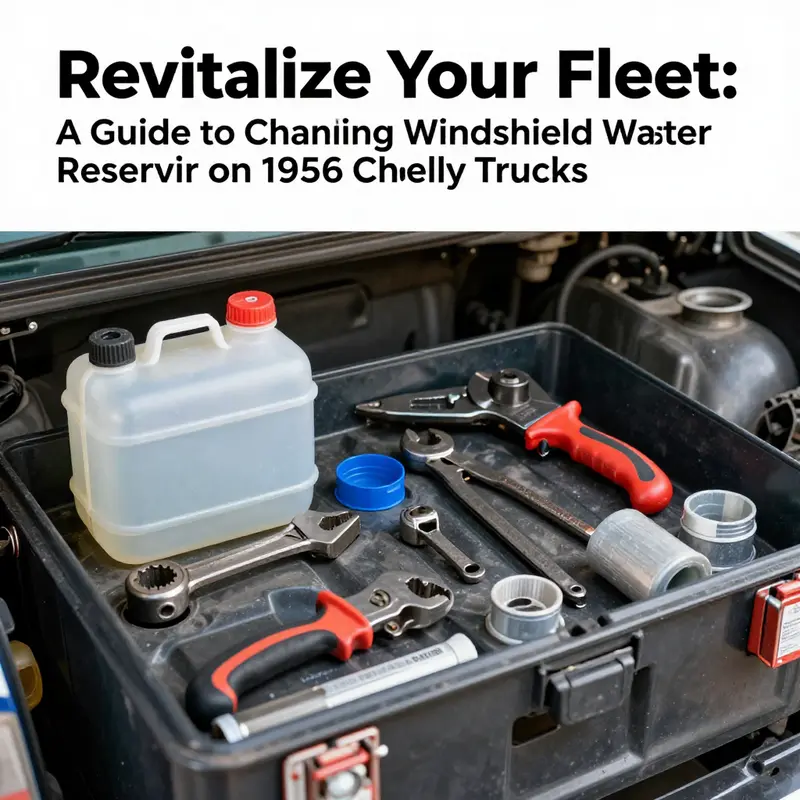
Before you drop under the hood of your 1996 Chevrolet truck, gathering the right tools and materials sets you up for a smooth windshield washer reservoir replacement. A quick inventory prevents mid-job dashes to the parts store and ensures you tackle every bolt, hose, and connection with confidence. This chapter walks through everything you need, from common hand tools to specialized parts, so you can prepare a tidy workspace and approach the swap with clear purpose.
Start by clearing a well-lit area in your garage or driveway. A flat, stable surface reduces the risk of dropped hardware and spills. Lay down a clean shop towel or cardboard sheet to catch drips and small parts. You’ll appreciate having a flashlight or work light ready. Many mounting points and hose connections hide in shadow near the radiator support. A handheld LED light or magnetic work lamp ensures you see every clip and bolt head.
With your workspace lit and clean, it’s time to assemble the basic hand tools. A socket wrench set with metric sockets—typically 8 mm, 10 mm, and 13 mm—handles the bolts securing the reservoir bracket. A ratchet with an extension simplifies access behind hoses and bumper support. Complement these with a set of screwdrivers: a Phillips for retaining clips on the pump assembly and a flathead to gently pry hose clamps free. If clamps are rusty or stubborn, a pair of slip-joint pliers gives extra leverage when you twist and slide them back on the hose.
A small container or drain pan is just as critical. Even after you drain most washer fluid, residual liquid can spill while you pull hoses free. Position the pan beneath the reservoir before you loosen any fittings. Keep a few clean rags or shop towels close at hand. They soak up remaining fluid and wipe grime from the reservoir’s mounting area.
Once your hand tools and cleanup supplies are ready, shift focus to the replacement parts themselves. Your new windshield washer reservoir must match the original’s mounting points and hose fittings. Whether your truck is a C1500, C2500 or similar model, verify the part number in your truck’s service manual or online catalog. If you plan ahead, you can order a direct-fit reservoir from an auto parts supplier. This eliminates the need for trimming or drilling.
Inspect the new unit before you begin swapping parts. Look for the correct number of hose ports—usually two: one for the pump outlet and another for the vent line. Check that the mounting ears line up with your truck’s bracket. If the reservoir comes with a replacement washer pump, ensure the pump’s electrical connector matches your truck’s wiring harness. If the pump is sold separately, confirm you have compatible gaskets or O-rings to avoid leaks.
In addition to the reservoir itself, fresh hose clamps provide a secure seal when you reconnect the rubber tubing. Metal post-style clamps or quality pinch clamps work best, avoiding the plastic variety that can become brittle. If any section of the old hose shows cracking or stiffness, replace that segment too. A short length of 5/16-inch windshield washer hose and a pair of new clamps costs just a few dollars, but it prevents future leaks.
Finally, you need windshield washer fluid. Skip plain water, which can freeze in cold weather or promote mold growth. Choose a fluid rated for your climate, especially if temperatures dip below freezing. Antifreeze-blend washer fluid keeps nozzles clear and protects against cracks in the new reservoir. Fill the container at least three quarters full before you start testing sprays, so you can spot drips and confirm pump operation right away.
As an optional touch, a small tube of silicone lubricant can ease hose installations. A light coating stops rubber sleeves from binding on plastic ports or metal fittings. It also helps achieve a snug fit without tearing hose ends as you push them into place.
With tools, parts, and fluids in hand, you’re ready to start the reservoir swap in the next chapter. A well-organized toolbox and a complete materials list simplify every turn of the wrench. After installation, this preparation pays off with a leak-free system and clear visibility through your windshield.
For accurate part identification and detailed guidance, consult RockAuto’s detailed reservoir diagrams and compatibility checks: https://www.rockauto.com/en/moreinfo.php?pk=128577&cc=1376765&mpn=128577
null
null
Precision Draining: Emptying Your 1996 Chevy Truck’s Windshield Washer Reservoir

Changing the windshield washer reservoir on your 1996 Chevy truck starts with one essential step: removing every drop of the old fluid safely and cleanly. Proper drainage prevents spills, protects painted surfaces, and gives you a clear workspace for installing the new reservoir. Whether you’re a seasoned DIYer or tackling this for the first time, following a systematic approach ensures the entire replacement process goes smoothly.
A Smooth, Spill-Free Drainage Process
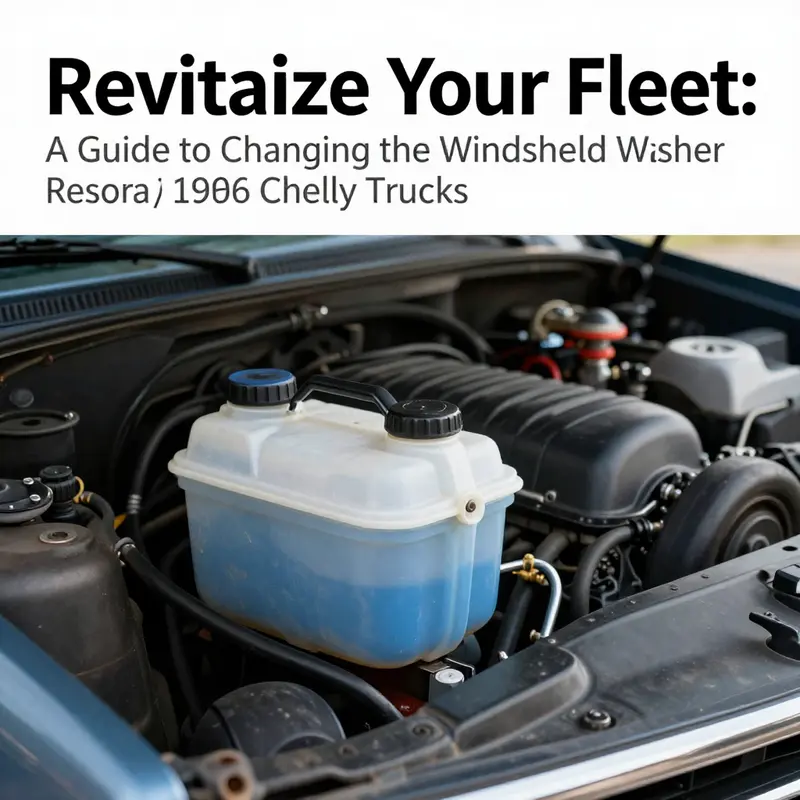
Begin by parking on level ground and shutting off the engine. Engage the parking brake and slide on safety gloves. Under the hood, locate the translucent plastic reservoir—usually on the driver’s side near the radiator support, marked with a windshield symbol. Before you start, position a bucket or shallow tray beneath the lowest edge of the reservoir to catch all fluid. If you have a funnel with a flexible tube or a siphon pump, keep them on hand to simplify the later refill.
With everything in place, remove the reservoir cap. This small step relieves internal pressure and promotes a steady flow when you open the drain point. If your truck has sat in the sun, wear goggles—you may encounter a trickle rather than a rush, but every drop matters in preventing messy drips onto engine components or the frame.
Most 1996 Chevy reservoirs feature a rubber or plastic drain plug molded into the bottom corner. Inspect the reservoir’s undercarriage for a small, removable stopper. Grip the plug with your fingers or a flathead screwdriver and pull it straight out. Watch as the old washer fluid streams into your waiting container. If it drains slowly, gently rock the reservoir side to side until the flow picks up. Patience here keeps you from forcing the plug and risking damage to the reservoir’s outlet.
Some trucks lack a dedicated plug, so you’ll rely on the tipping method. Remove any retaining bolts or clips that prevent the reservoir from shifting. Once free, lift the reservoir straight up, tilt it carefully toward your container, and pour the fluid out. Keep the reservoir tilted at a shallow angle to avoid sloshing. Pause to let the last remnants settle, then repeat until the reservoir feels nearly empty when lifted and swirled.
Whether using the drain plug or tipping, be mindful of painted surfaces. Washer fluid can stain or dull paint if left to soak. Lay clean rags or cardboard underneath the reservoir to catch stray drips. If any fluid escapes, wipe it up immediately with a damp cloth. This step preserves both your truck’s finish and the tidy environment you’ve worked to maintain under the hood.
Once drained, look inside the reservoir’s interior with a flashlight. Over time, sediment, dirt or small rubber fragments from old hoses can accumulate at the bottom. If you spot debris, clean the reservoir before moving on. Even if you plan to replace it entirely, removing loose particles prevents them from settling in the engine bay or clogging new hoses when you refill.
For a quick internal rinse, pour warm water mixed with a drop of mild dish soap into the nearly empty reservoir. Swirl the solution gently for a minute, then drain it the same way you removed the original fluid. Repeat with clear water until the liquid runs clean. Finally, tip the reservoir upside down and allow it to air-dry on a stack of absorbent rags or paper towels.
Drying the reservoir fully is critical. Any leftover moisture can dilute fresh washer fluid or promote microbial growth. If you need the reservoir to be bone-dry faster, use compressed air at low pressure to blow out pockets of water. Keep the air nozzle several inches away from the plastic to avoid stress cracks. When the interior is dry, inspect the drain plug’s O-ring or seal for wear—replace it if it looks cracked or deformed.
With the old fluid removed and the reservoir prepped, turn your attention to disposal. Windshield washer fluid contains chemicals that can harm plants and wildlife. Never pour it on driveways, lawns or storm drains. Instead, seal the container tightly and take it to a household hazardous waste facility. Many municipal recycling centers accept used automotive fluids and will process them safely.
Proper disposal closes the loop on your maintenance task and keeps your workspace compliant with environmental regulations. If you have leftover fluid in good condition, consider reusing it for cleaning stubborn grease spots on your truck frame—but only if it hasn’t become contaminated. Otherwise, fresh fluid ensures the best performance and longevity for your new reservoir.
At this point, your reservoir is empty, clean, and ready for the next phase of replacement. The mounting area beneath should be free of drips and debris, giving you full visibility of bolts or brackets that secure the tank. This clean slate prevents delays when you install the new reservoir and reconnect hoses.
Draining and cleaning the old windshield washer reservoir may seem like a minor detail, but it sets the tone for a seamless swap. By taking these careful steps—relieving pressure, catching fluid precisely, inspecting for sediment, and handling disposal responsibly—you protect both your truck and the environment. Once drained and dried, you’re ready to fit a fresh reservoir, reconnect hoses, and top up with crystal-clear fluid for the first test spray.
For specific technical details about replacement reservoirs compatible with your 1996 Chevy truck, including OEM specifications and installation guidance, refer to this resource: https://www.automotive.com/technical-resources/washer-reservoirs-for-1996-chevy-trucks
Freeing the Flow: Expert Disconnection of Hoses and Wiring on a 1996 Chevy Truck Washer Reservoir

Every successful reservoir swap on a 1996 Chevrolet truck begins with a careful, damage-free disconnection of hoses and electrical connections. Focusing on a fluid, step-by-step narrative, this chapter shows how to separate every hose and unplug each connector without stress or mess. It blends safety, precision and foresight so later installation is seamless.
Before you touch any lines or fittings, make safety a top priority. Ensure the engine is fully shut off and cool. Slip on durable gloves and eye protection, then lay down absorbent rags or a drip tray under the reservoir area. Having clean rags on hand prevents spilled washer fluid from running onto belts, pulleys or painted surfaces. A small drip pan or shallow container catches residual fluid with minimal cleanup.
Next, identify the hoses attached to the washer reservoir. On most 1996 Chevy C/K models, two rubber tubes link the translucent plastic tank to the washer pump and to an overflow or vent port. The larger tube feeds fluid from the reservoir to the pump, while the smaller vent line prevents vacuum lock and overpressure. Trace each hose until you locate the quick-connect fitting at the reservoir nipple. A firm grip on the hose, combined with a light push on the locking tab, releases the clip without damage.
Depress the plastic locking tab on the fitting and pull the hose straight off. Avoid wiggling or twisting that could tear the rubber or crack the plastic nipple. Hold each hose end low and let residual fluid drain into your drip tray. Immediately blot any escaping drops with a rag. If a hose fitting resists, apply a drop of penetrating lubricant around the base, wait a minute, then reattempt. Never use a screwdriver as leverage—this risks gouging the reservoir port.
While hoses drain, inspect each fitting for wear. Tiny cracks at the barb and hardened rubber can lead to leaks when you refit the new reservoir. If clamps look corroded or brittle, replace them with fresh stainless-steel rings. Label each hose with masking tape and a marker so you know exactly where it returns. Well-marked lines speed reassembly and eliminate cross-connections that could leave one side unserviced.
Older Chevy trucks may house an electrical connector at the pump or level sensor on the reservoir’s base. Locate the small wiring harness plug and press its release tab. Pull firmly but gently on the connector housing, not on the wires themselves. If the tab feels stuck, wiggle the plug up and down to free it. Inspect the connector halves for bent pins or signs of corrosion, then tuck them aside so they don’t dangle near hot components once the reservoir is removed.
As you clear hoses and wiring, protect each open port from debris. Slip a clean rag or plastic cap over each nipple. This prevents leaves or dirt from entering during the reservoir swap. Likewise, secure the loose wires away from belts and pulleys using a temporary zip tie. Safe stowage ensures nothing gets pinched or frayed while you extract the old reservoir from its mounting.
After all disconnections, take a moment to reassess each component. Check that no hose fragments remain in the holders and no electrical pins are bent. Brush away any spilled fluid with a damp rag and wipe the mounting area dry. A clean workspace guarantees the new reservoir seats properly and seals tightly at every connection point.
Labeling each hose, clip and connector emerges as a simple but powerful habit. It transforms a potentially confusing reassembly into a smooth, error-free process. When the new reservoir is in place, each tube snaps into its original port with confidence. Electrical plugs click back with the same ease you applied to remove them.
With all lines safely disconnected and stowed, you’re ready for the next phase: removing the mounting hardware and lifting out the old tank. Your careful work here directly affects how quickly and cleanly the new reservoir integrates. Keep notes on any worn hoses or clamps you plan to replace, and double-check that all connectors are undamaged. For detailed model-specific diagrams and further guidance, refer to the official service manual available on AllData: https://www.alldata.com
Locking Down the Finish: Priming and Verifying Your New Windshield Washer Reservoir on a 1996 Chevy Truck

Once the new windshield washer reservoir is firmly mounted on your 1996 Chevy truck, it’s time to complete the final steps. These finishing touches determine long-term reliability and leak-free performance. Attention to detail here prevents future headaches on the road. Each connection and seal must receive careful inspection. Take a moment to review each hose, clamp, and fitting. A systematic approach ensures you won’t miss a critical point. With the reservoir in place, you can move into the phase of reconnecting hoses and priming the system. A well-executed final run-through guarantees your washer will deliver fluid on demand.
Begin by reconnecting all hoses that feed into the reservoir. The supply hose delivers washer fluid to the pump. A vent or return line maintains proper air pressure. Slide each hose over its fitting until it sits flush. Inspect the inner diameter for signs of collapse. Use replacement clamps if the originals show rust or damage. Tighten clamps evenly without crushing the hose. Avoid kinks, twists or sharp bends that restrict flow. Ensure hoses follow their original routing under the hood. A smooth, unobstructed path ensures consistent pressure at every nozzle.
Next, fill the reservoir with fresh windshield washer fluid to the marked level. Use a high-quality winter blend in cold climates. Warm weather formulas may lack antifreeze protection. Turn the ignition to “ON” without starting the engine. Press the washer lever or button to activate the pump. Listen for a smooth, even hum. Watch fluid travel through lines, purging trapped air. Repeat priming three to five times until both nozzles spray steadily. Avoid long, continuous cycles that overheat the pump. Short bursts preserve pump life and maintain consistent pressure.
After priming, conduct a thorough leak inspection while fluid remains under slight pressure. Inspect every fitting for damp spots or drips. Pay special attention to where the pump seals into the reservoir. Check the reservoir body itself for hairline cracks. Small fractures often appear only under load. If you spot any weeping, tighten clamps or apply a suitable sealant. Replace a damaged reservoir rather than risk continued leaks. Let the system sit for five minutes. A completely dry installation confirms a reliable seal.
With no visible leaks, confirm the reservoir fluid level one more time. Most tanks have molded marks indicating minimum and maximum fill. Do not overfill. Excess fluid creates pressure when thermal expansion occurs. Leave a small air pocket at the top. This cushion allows fluid to expand without stressing hoses. Add distilled water if levels drop below minimum. Tap water can leave mineral deposits. Replace the cap with care, ensuring any seal or gasket seats evenly. A properly sealed reservoir maintains clean fluid and prevents contaminants from entering.
Now take your truck for a brief road test. Keep speeds moderate and activate the wipers. Engage the washer spray repeatedly. Observe the spray pattern across the windshield. Fluid should cover the glass evenly from both nozzles. If one side underperforms, remove and clean the nozzle with a fine pin. Clear any debris or ice crystals. Retest until coverage is uniform. Try spraying while turning left or right. Ensuring even distribution under varied conditions means you have reliable visibility in rain or road spray.
Driving in winter demands extra vigilance. The fluid you chose earlier must contain alcohol or methanol additives. Frozen or slushy fluid can lock up the system. If fluid begins to gel, drain the reservoir completely and refill with a heavy-duty winter blend. Consider installing a small heater pad on the reservoir. Insulate hoses that run near the firewall. Check pump wiring insulation for brittle jackets. Keeping the system functional when temperatures plunge ensures you maintain optimal visibility and safety at all times.
The final physical check is securing any loose components under the hood. Reinspect mounting bolts and brackets after the test drive. Confirm each bolt torques to factory specs. Verify hoses stay clear of moving parts, engine heat, and sharp edges. Route lines away from the serpentine belt and exhaust manifold. Use protective sleeve or loom where hoses pass hot surfaces. Secure excess hose length with zip ties. Bundling hoses and wiring prevents vibration fatigue. A stable installation reduces the chance of abrasion or clamp failures over time.
Once everything seems stable, power off the engine and scan the worksurface for stray fluid or tools. Remove any rags, old clamps, or stray hardware. Apply thread locker on bracket bolts if desired. Close the hood and ensure the latch engages smoothly. Confirm that no hoses snag or bulge near the hood seal. If your Chevy includes accessory wiring side by side with the reservoir, verify those harnesses did not shift. A clean and orderly engine bay simplifies future maintenance and inspections.
Incorporate these final steps into your regular maintenance schedule. Check reservoir fluid levels every month. Replace washer fluid twice a year to avoid algae or deposits. Install a simple inline filter to catch debris. Periodically remove and clean the reservoir exterior with mild soap and water. Inspect hoses for softness or cracks. Keep nozzle tips free of road grime. Activate the system briefly once a week, even in dry seasons. Routine checks protect pump longevity and ensure you always have a clear view.
A final review of your work ensures long-term success. Take a short drive around your block and test the washer under varied angles. Ask a friend to watch for any stray drips while engaging the pump. Document this service in your maintenance log. Scheduling future reminders in your calendar prevents forgotten checks. Over time, this disciplined approach makes reservoir swaps and fluid refills faster and more reliable. When each connection receives proper attention, your Chevy’s washer system will require minimal fuss.
If you still experience issues, check the pump motor’s electrical circuit. Locate the fuse box and identify the washer pump fuse. Test voltage at the connector while someone activates the lever. Replace any blown fuses and repair damaged wiring. Consult your vehicle’s fuse diagram in the manual. A silent pump often points to an electrical fault rather than a fluid leak. Resolving these issues ensures your new reservoir and washer system perform flawlessly.
For model-specific torque values, bracket diagrams and wiring details, refer to trusted online resources. The repair library at AllData DIY provides factory specifications and detailed illustrations for your 1996 Chevy truck. Access step-by-step guidance that matches your exact model. Combining careful hands-on work with reliable reference material creates a durable, leak-free washer system. With these final checks complete, you can enjoy clear, streak-free visibility with confidence in any weather.
Final thoughts
Replacing the windshield washer reservoir on a 1996 Chevy truck is a straightforward process that enhances vehicle safety and functionality. For fleet managers, knowing how to perform this task ensures that vehicles are well-maintained and capable of providing reliable service. By following the steps outlined, teams can effectively minimize downtime and address essential vehicle repairs efficiently. With basic tools and the right knowledge, this simple maintenance task can be accomplished swiftly and accurately, leading to improved operational readiness for any fleet.