
How to Wash a Trucker Hat
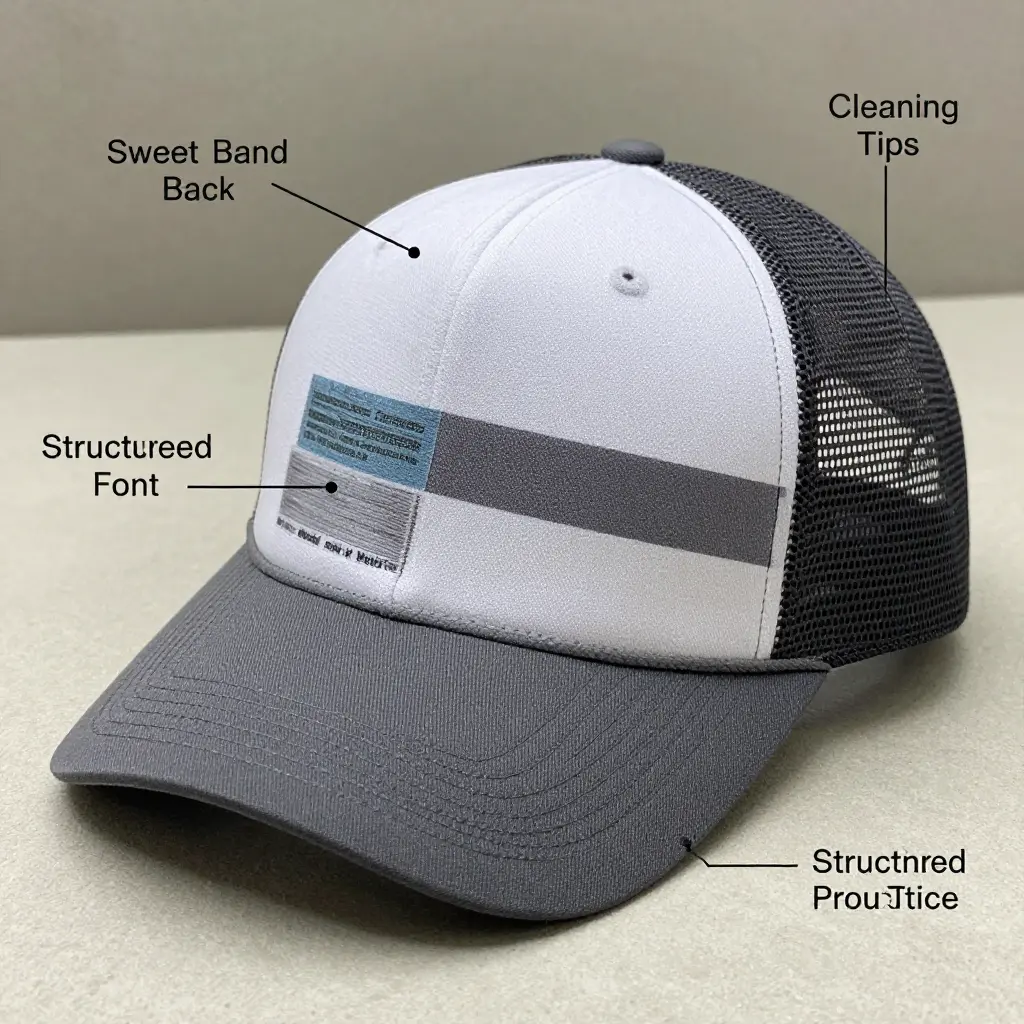
A trucker hat is not one fabric. It is a polyester mesh back, a cotton sweatband, and a stiffened front panel sewn into a single cap, and each of those parts reacts to water differently. Wash the whole thing the same way and you can shrink the front panel, warp the brim, or tear the mesh.
This guide is for anyone who wears a trucker hat hard: truck drivers who keep one on all day, people who grab one on the way out the door, and collectors who baby every stitch. None of them need a dry cleaner. A few household supplies, a soft brush, and some patience will get the cap clean without changing how it fits. The same patient approach that works on grease and grime on hard-working vehicles applies here.
Why Mesh Backs, Sweat Rings and Structured Fronts Need Separate Steps
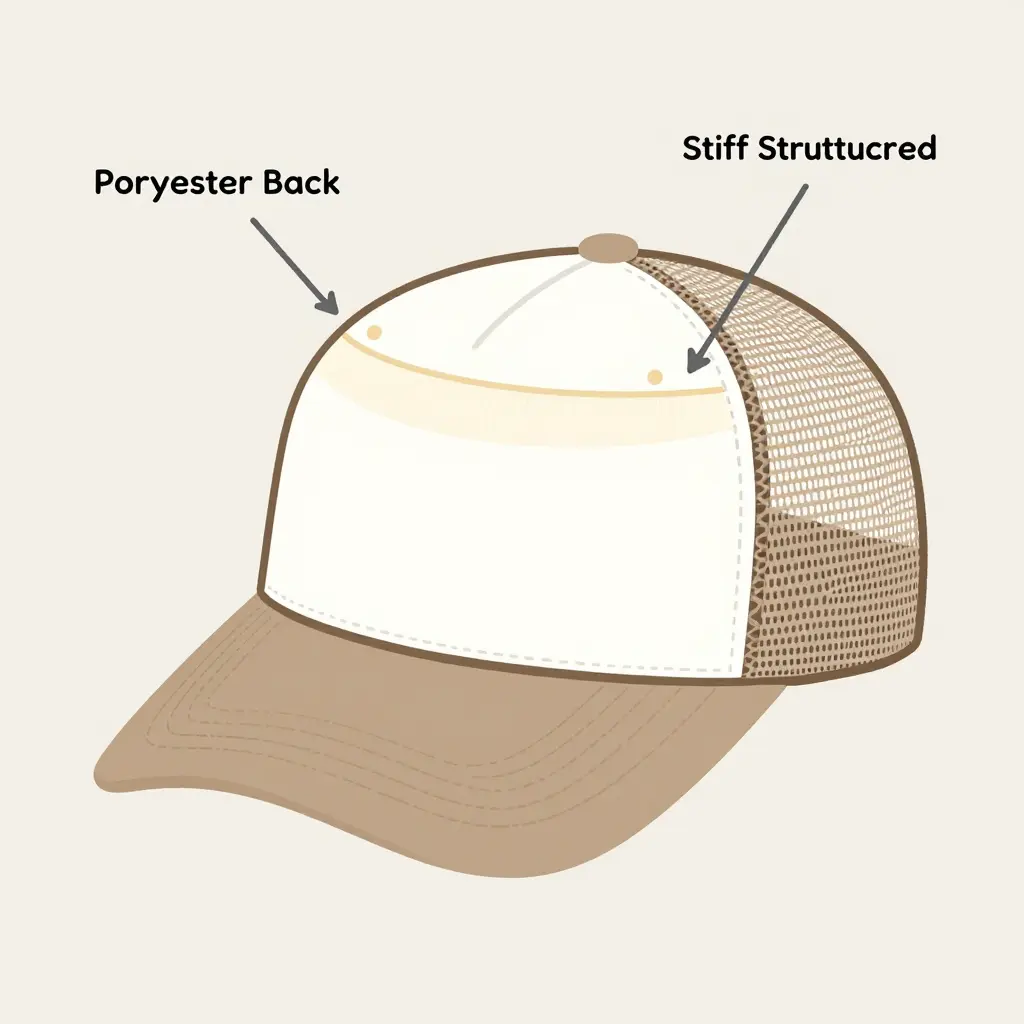
Water treats the three materials of a trucker hat differently. That is why a single method fails: it may clean one zone while damaging another.
The Polyester Mesh Back
The mesh back is the vent that keeps your head cool, and polyester is why it dries so fast. Water runs off, air passes through, and a blotted mesh back is usually dry within minutes.
That speed has a downside. The same open weave that dries quickly stretches when it is pulled while wet, so wringing it out or hanging it soaked can leave the crown sagging and misshapen.
The Cotton Sweatband and Its Stubborn Sweat Rings
The sweatband is the sponge of the cap. It soaks up salts, oils, and dead skin from your forehead all day.
Those deposits build up, oxidize, and turn into the dark, crusty rings that a quick rinse will not touch. Cotton holds moisture deep in its fibers, so it needs a real treatment, not a surface wipe.
The Structured Front Panel
That crisp, upright front is not just fabric. Inside is a stiffener: buckram, foam, or plastic mesh.
Water gets in and does not easily get out. Once the stiffener soaks through, it warps, wrinkles, and sags, and reshaping will not bring the bill and crown back to their original lines.
The Guiding Rule
Three zones, three different reactions to water. Treat each one on its own terms and the cap keeps its shape, color, and comfort.
What You’ll Need Before You Start
Round up your supplies before you touch the mesh. The right tools keep the job short and stop you from reaching for something that will damage the fabric.
- Mild liquid detergent – a few drops of dish soap does the job
- Soft-bristle brush – firm enough for grime, kind to mesh
- Microfiber cloth – for wiping, blotting, and drying
- Cool water – room temperature beats anything heated
- A bowl or basin – deep enough to submerge the front panel
- An old toothbrush – reaches tight seams and sweatband folds
- Distilled water – for a final rinse that leaves no streaks or mineral spots
One rule to keep in mind: skip bleach and hot water. They fade colors, break down mesh, and can warp a structured front beyond repair.
Step 1: Inspect and Prep Your Hat
Give the hat a close look before any water touches it. A dry inspection takes a few minutes and protects the parts that damage most easily.
Check the stitching first
Run your fingers along the seams, especially where the mesh back meets the front panel and around the sweatband. Loose or frayed threads are an early warning. If stitching is already pulling apart, plan on gentle hand washing instead of scrubbing, and never pull a loose thread; it can unravel a whole seam.
Examine the brim
The brim usually hides a stiffener, a firm insert that holds its shape. Heat, such as a cap left on a hot dashboard, can crack or crease it. Flex the brim gently. A sharp edge or a faint crunch means keeping it away from hot water and hard scrubbing.
Find the set-in stains
Sweat rings along the band, oily fingerprints on the brim, and grime along the panel edges each need different handling. Find them while the hat is dry so they do not spread once it is wet.
Lift loose dust with a dry brush
A dry, soft-bristled brush works well here; a clean shoe brush is fine. Short, gentle strokes over the crown, mesh back, and front panel loosen the dust.
Pre-treat obvious marks
Dab a small amount of mild liquid detergent onto visible marks with a soft cloth and let it sit a few minutes. Five minutes of prep makes the wash safer and more even.
Which Cleaner Works for Which Part
The front panel, mesh back, sweatband, and brim react differently to water, heat, and chemicals. Matching the cleaner to the section is what separates a crisp cap from a warped one.
| Hat Component | Recommended Cleaner | Wash Method |
|---|---|---|
| Structured front panel | Mild detergent | Spot clean by hand |
| Polyester mesh back | Cool water and gentle detergent | Light agitation |
| Sweatband | Oxygen-based cleaner | Targeted soak and blot |
| Brim | Soft cloth | Surface-only wipe |
Delicate structure gets gentle handling; the grime collectors get more attention. The front panel holds its shape only if you skip scrubbing, so a dab of mild detergent and a light touch is enough. The mesh back can take a little more movement, and cool water with gentle detergent worked in lightly lifts dust and odor without stretching the weave. The sweatband is the dirtiest zone, so a targeted soak with an oxygen-based cleaner breaks down oils where they actually sit. The brim usually only needs a surface wipe to remove fingerprints and dust without soaking the stiffener.
If the hat has picked up grease or oily grime beyond the usual sweat and dust, the same approach applies: match the product to the stain and give it time. Our guide to cleaning grease and tar covers heavier buildup.
Step 2: Wash the Mesh Back Gently
With the hat prepped and the worst marks pre-treated, turn to the mesh back. Polyester mesh is durable, but its open weave bends easily, so it needs a light hand.
Follow these steps:
- Fill a clean basin or sink with cool water. Skip the hot water, since heat can warp the mesh back and set stains deeper into the fibers.
- Add a small amount of mild detergent. Use a drop or two of gentle dish soap or laundry soap. Too much soap leaves residue trapped in the mesh back.
- Submerge the mesh back and let it soak for about five minutes. This loosens the dirt clinging between the strands.
- Agitate lightly with a soft brush. Move the brush in small circles across the mesh back. Keep every stroke gentle and even.
- Work around the seams and the sweatband edge, where grime tends to collect. Rinse the brush often as you clean the mesh back.
- Rinse the mesh back thoroughly with cool water. Hold it under a steady stream until the water runs clear and free of suds.
- Press out excess water with a clean towel. Lay the mesh back flat between two towels and pat it dry. Do not wring or twist the mesh back.
Never wring or twist the mesh back. Twisting pulls the weave out of alignment, which distorts the mesh and leaves stretch marks you cannot undo.
Treat the mesh like a net, not a rag. Cool water and light pressure do the work. Keep the mesh flat while it dries so the crown holds its shape.
Step 3: Lift the Sweat Rings
Sweat rings are the real test of a trucker hat. The cotton band soaks up oil, salt, and dead skin all day, which leaves the brown band and the pale yellow halo that creeps onto the front panel. These marks come out with patience, not force.
Here is the step-by-step method:
- Mix a diluted oxygen-based cleaner. Add one scoop or capful of oxygen-based powder (or a splash of liquid oxygen cleaner) to a gallon of cool water. Stir until it dissolves completely. Leave chlorine bleach out of this entirely.
- Dampen a soft cloth. Use a clean, lint-free microfiber or cotton cloth. Wring it out so it stays damp, not dripping.
- Apply to the sweatband and the rings. Press the cloth gently against the cotton sweatband and the visible salt-and-oil rings on the front panel. Dab and blot – do not scrub.
- Let it sit briefly. Give the solution five to ten minutes to lift the oils and salts. Keep the area damp; do not let it dry out.
- Blot, then rinse. Blot the spot with a clean, dry cloth, then rinse with cool water or wipe the area with a fresh damp cloth to remove any residue.
- Repeat gently if needed. If any sweat rings remain, run through the process again. Go softer, not harder – repetition lifts stains where force only spreads them.
Heat and bleach set stains in place. Hot water, a hot dryer, or a hot iron bakes the proteins and oils into the cotton and makes the rings worse, and bleach can leave a yellow tint of its own. Keep everything cool and let time do the work.
Step 4: Clean the Structured Front Without Warping It
The structured front is what holds the cap’s shape, so it gets the gentlest treatment of all. Spot clean this panel instead of dunking the whole hat, and the crown stays crisp.
-
Mix a few drops of mild detergent into a bowl of cool water. Dampen a soft, lint-free cloth, wring it out until it is only slightly wet, and gently dab the soiled areas. Never pour or spray water directly onto the panel.
-
Work along the grain of the fabric. Move your cloth in one steady direction instead of scrubbing in circles, since rough motion can stretch, pill, or fuzz the material.
-
Rinse with a barely damp cloth. Wipe away the soap residue using a clean, nearly dry cloth, then blot the area with a towel to lift the remaining moisture.
-
Never fully submerge the panel. The hidden stiffener is what keeps the structured front standing tall, so saturation is the real enemy here. Soak it and the front can sag, ripple, or lose its shape for good.
Let the panel air dry in a cool spot away from direct sun and dryers. Heat and heavy moisture soften the stiffener, and a few hours of gentle drying keeps the front looking sharp.
What Actually Ruins a Trucker Hat
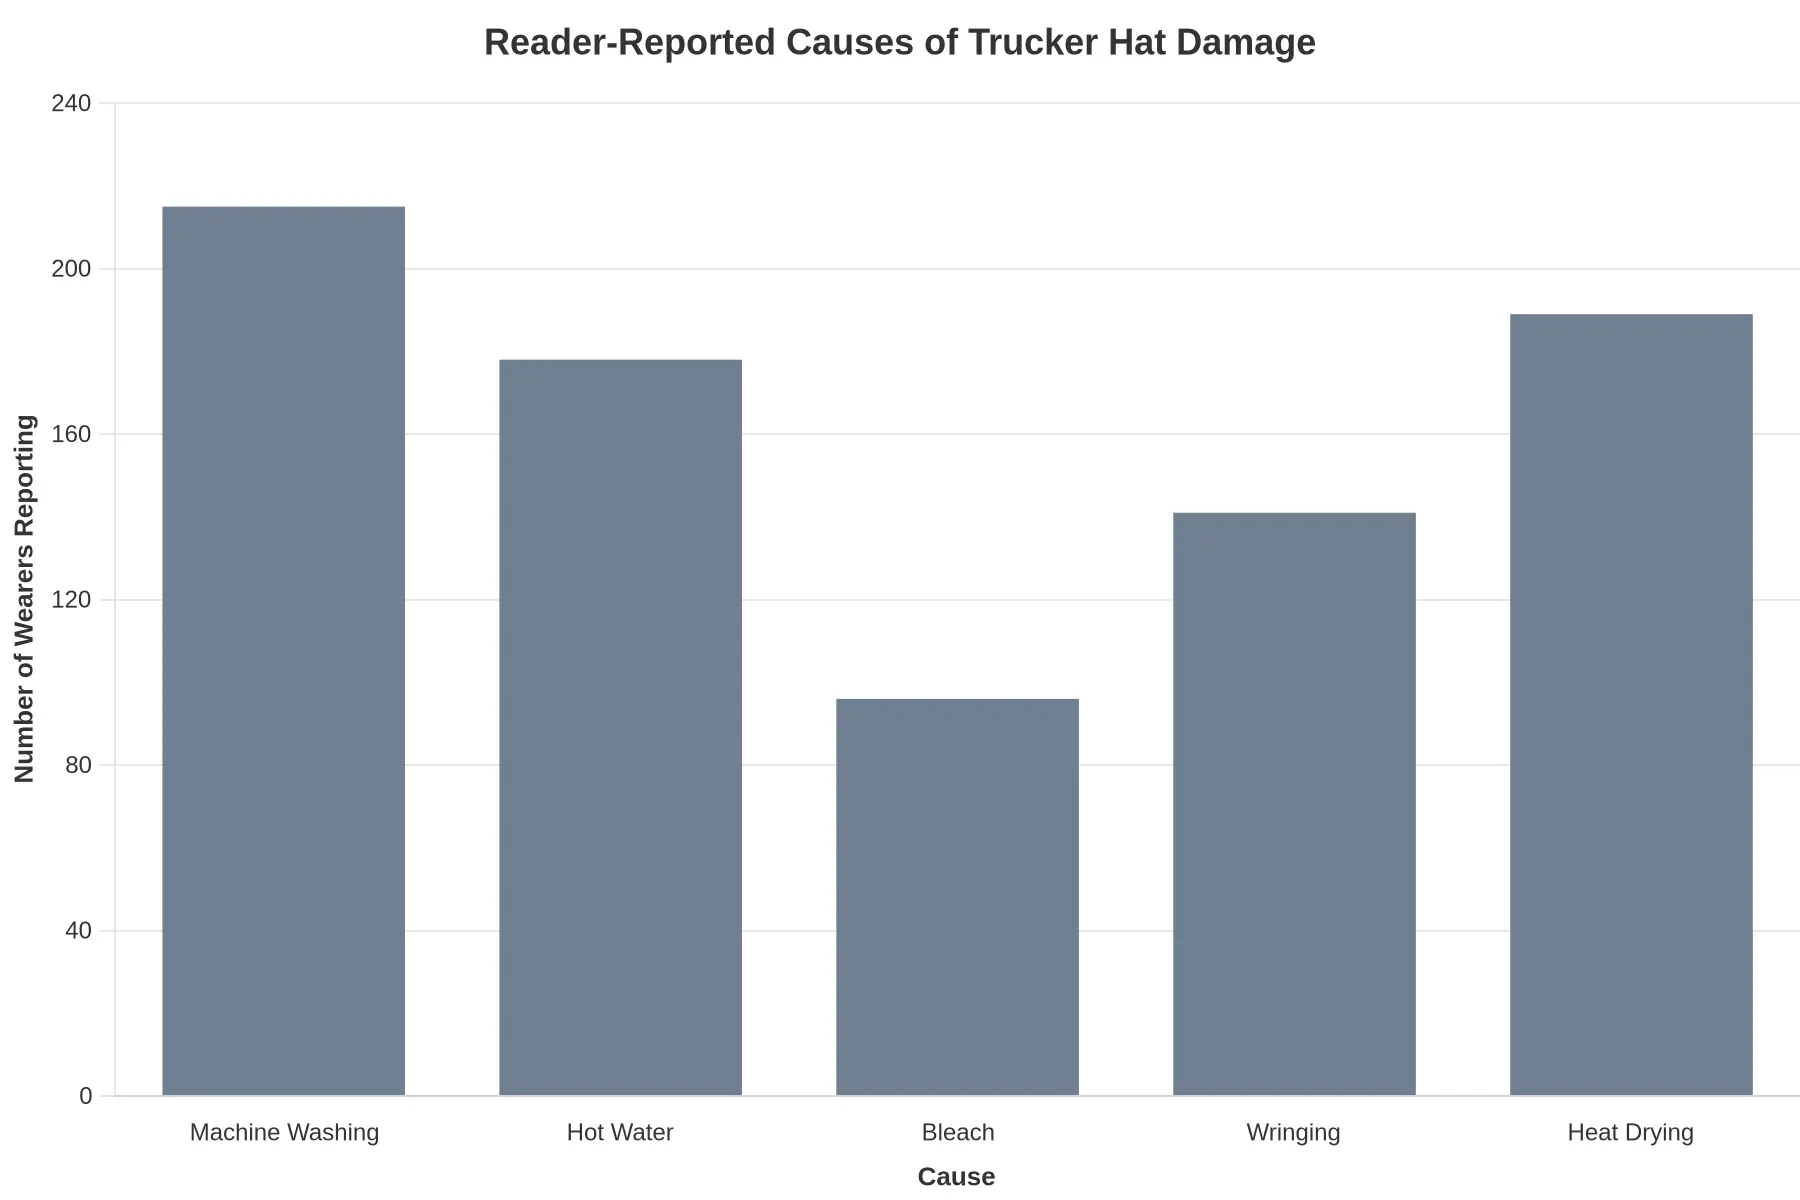
Anyone who has pulled a shapeless cap out of the wash tells a similar story. We asked our readers one question: what do you think caused the damage to your trucker hat?
Machine washing drew the most reports, followed by heat drying and hot water. Bleach came up least often, and readers linked it to faded, eaten-away color.
Reading the Numbers
| Cause Reported | Wearers Reporting | What It Damages |
|---|---|---|
| Machine washing | 215 | Structured front, seams, shape |
| Heat drying | 189 | Front panel, brim, mesh shrinkage |
| Hot water | 178 | Adhesive, dye, fabric fibers |
| Wringing | 141 | Mesh back, crown shape |
| Bleach | 96 | Color, fabric integrity |
Every cause on that list is a cleaning method, not a hat defect. The cap itself is tougher than most people assume. The mesh back, the sweatband, and the stiffened front fail for different reasons, and in almost every case the failure traces back to a step that seemed harmless at the time.
Why Machine Washing Tops the List
A trucker hat is three hats stitched into one. The structured front is foam or buckram held by adhesive and stitching. The mesh back is an open weave that snags and stretches. The brim carries its own stiffener. A washing machine treats all three the same, tumbling and flexing until the adhesive lets go and the foam buckles. That is why the washer tops the list, not the sweat and grime it was supposed to remove.
The same idea applies to grime-heavy jobs: the right method beats brute force. Our guide to cleaning grease and tar off your trucks makes the same point.
The Takeaway
Readers blamed washing mistakes, not the hat, for the damage they worried about. Hand washing in cool water with a gentle touch is how you avoid those mistakes, and the steps above cover it one panel at a time.
Keeping Your Trucker Hat Fresh Between Washes
You do not need to wash the cap every weekend. Most damage happens quietly between washes, when sweat sits in the band, dust settles into the mesh, and the front panel gets squashed under a pile of gear. Small habits prevent big problems.
Rotate More Than One Hat
Treat your trucker hats as a rotation rather than one workhorse. Owning two or three and swapping them gives each cap time to dry out completely, which is the simplest way to stop odors and sweat-ring stains before they set. If you own only one, let it air out overnight somewhere dry instead of putting it straight back on.
Spot Clean After Heavy Use
A hot, sweaty day or a dusty job site calls for a quick touch-up, not a full wash. Blot the sweatband with a damp cloth and a drop of mild soap, then let it air dry. Dealing with a stain early is far easier than fighting a baked-on one later.
Store It Right-Side Up
The front panel is the fragile part. Store the cap right-side up on a hook or shelf so nothing presses the crown flat. Do not stack heavy items on it, and avoid cramming it into a crowded bag where the foam or buckram can bend.
Use a Breathable Cover
For travel or long storage, use a breathable cotton or mesh dust bag instead of a sealed plastic bin. Air needs to move so moisture can escape; sealed containers trap dampness and invite mildew. The same principle behind regular trailer maintenance applies to storage: a little routine care prevents a bigger failure later.
The Three-Zone Rule, Made Simple
Cleaning a trucker hat does not take harsh chemicals or hard scrubbing. It takes respecting that the cap is three zones in one: the breathable mesh back, the sweatband and its rings, and the structured front that holds the silhouette together. Each gets its own step and its own gentle touch.
Work through them in order: wash the mesh back without stretching it, lift the salt and sweat from the band, then spot-treat the structured front and let the whole cap air-dry back into shape. The same discipline that removes stubborn buildup without damaging a surface applies to the hat on your head.
Gentle handling beats aggressive cleaning every time. Skip the washing machine, the bleach, and the frantic scrubbing.
Follow that sequence and the crown holds, the curve stays, and the fit is as good as the day you bought it.