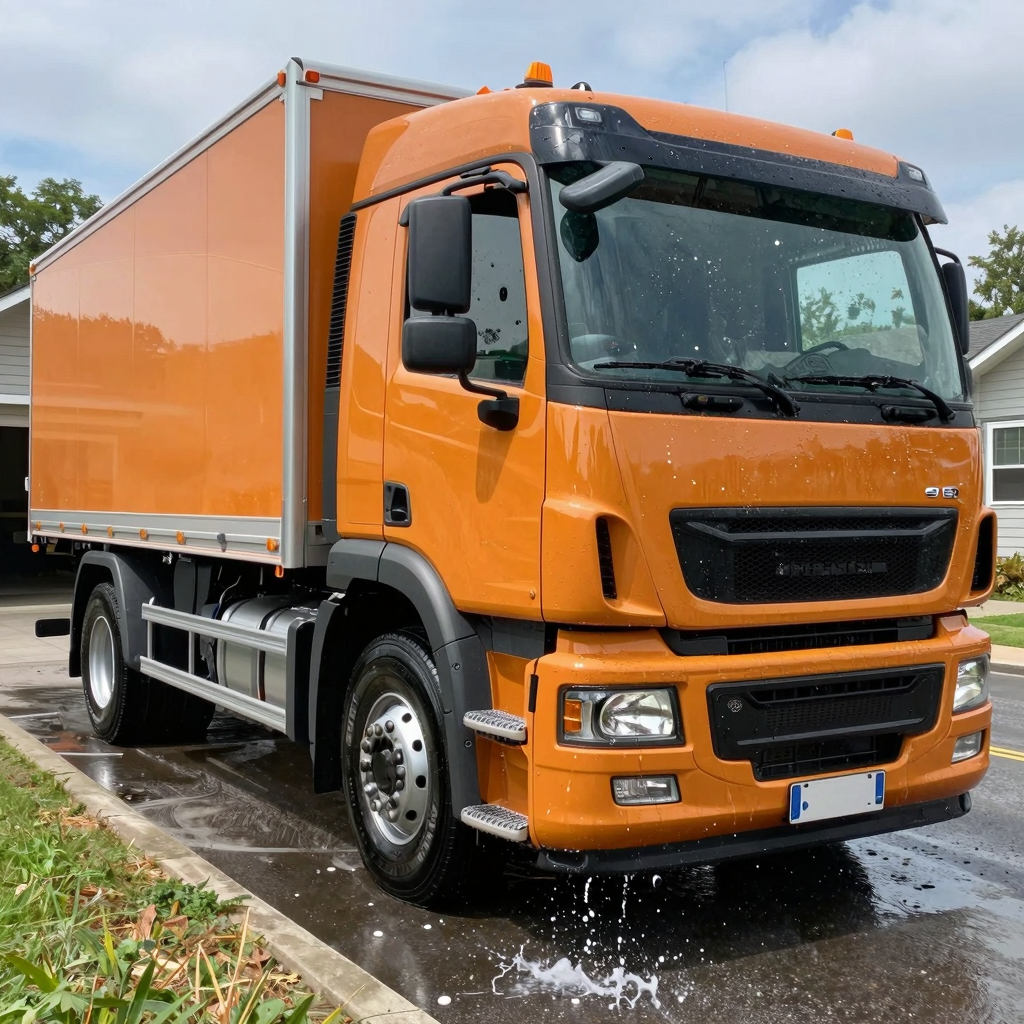
In the fast-paced world of logistics and transportation, the appearance and longevity of your fleet are paramount. Washing your truck at home not only enhances its aesthetic appeal but also plays a crucial role in maintaining its structural integrity and operational efficiency. Regular cleaning removes harmful substances, such as road salt, grime, and oil build-up, which can lead to corrosion and mechanical issues over time. By dedicating time to wash your trucks, you ensure that they remain in optimum condition, thus lowering maintenance costs and prolonging their lifespan. Moreover, a well-maintained truck reflects a professional image, instilling confidence in your clients and stakeholders. With simple yet effective techniques, you can master the art of home washing, driving value for your logistics or trucking business. To delve deeper into how regular maintenance practices can enhance operational success, be sure to learn more about regular trailer maintenance. Elevate your fleet management strategies by introducing effective home washing techniques that not only beautify but also optimize performance and safety.
Tools and Materials Needed for Washing a Truck at Home
Washing a truck at home requires specific tools and materials to ensure that the process is effective and safe for the vehicle’s finish. Here is a comprehensive list of essential items:
-
Pressure Washer: A pressure washer is highly recommended for cleaning large vehicles like trucks. It provides powerful water jets that effectively remove dirt, mud, and grime from the surface. A model with adjustable pressure settings is ideal to avoid damaging the paint.
-
Two-Bucket Wash System: This method involves using one bucket for soapy water and another for rinsing your wash mitt. This helps prevent dirt and debris from scratching the truck’s surface, maintaining its finish.
-
Car Wash Soap: Choose a quality car wash soap that is specifically designed for vehicle surfaces. Avoid dish soap, as it can strip away protective wax and damage the paint.
-
Microfiber Wash Mitts: Unlike regular sponges, microfiber mitts pick up dirt without scratching the paint. They are absorbent and help efficiently clean the truck’s surface.
-
Grit Guard: Placing a grit guard at the bottom of the rinse bucket helps to trap dirt and prevent it from getting back onto your wash mitt. This is crucial in protecting the truck’s paint from scratches.
-
Wheel Brush: A dedicated wheel brush helps clean the wheels and tires effectively. Look for brushes with soft bristles to avoid damaging the wheel finish.
-
Microfiber Towels: Once washing is complete, use microfiber towels for drying. They absorb moisture quickly and help avoid water spots while being gentle on the surface.
-
Detailing Spray: A detailing spray can be used after washing to enhance shine and protect the paint. They often contain protective polymers that form a barrier against dirt and grime.
In addition to these items, it’s also important to have a good-quality hose with a nozzle for rinsing. Washing your truck at home not only saves money but also ensures that your vehicle is clean and well-maintained. To optimize your fleet’s maintenance routine, consider the importance of regular trailer maintenance to ensure safety and efficiency in operations.
A Step-by-Step Guide on How to Wash Your Truck at Home
Washing your truck at home not only keeps it looking new but can also extend its lifespan by preventing rust and corrosion. This comprehensive guide will demonstrate an effective step-by-step procedure for washing a truck, including pre-washing, washing, rinsing, drying, and applying wax. Whether you manage a logistics fleet or operate a single vehicle, this guide will serve you.
Supplies Needed
Before starting, gather the following materials:
- pH-balanced truck wash soap: Gentle on paint but tough on grime.
- Microfiber wash mitts: For washing surfaces without scratching.
- Soft bristle brushes: Useful for tires and rims.
- Pressure washer or hose: For rinsing and applying soap effectively.
- Buckets: Two buckets, one for soapy water and one for rinsing.
- Drying towels: Microfiber towels are best to prevent scratches.
- Wax: A good quality wax for protecting the paint.
- Wheel cleaner and tire dressing (optional): For extra shine on tires.
Step 1: Pre-Wash Preparation
- Choose the Right Time and Place
- Wash your truck in a shaded area to prevent water spots from sunlight.
- Check the weather to avoid rain immediately after washing.
- Inspect the Truck
- Walk around and identify any heavy dirt, mud, or rust spots that may require extra attention. Consider using specialized cleaning products for these areas.
- Remove any items from the truck bed and inside the cab that may get wet or damaged.
- Gather Your Supplies
- Set up your washing area with all necessary supplies within reach.
- Fill one bucket with water and the appropriate amount of pH-balanced truck wash soap as per the manufacturer instructions, and leave the other bucket for rinsing your scrubbers.
Step 2: Washing the Truck
- Initial Rinse
- Using a pressure washer or a hose with a spray nozzle, rinse the entire truck, starting from the top down. This helps remove loose dirt and debris.
- Pay special attention to areas such as the wheel wells and undercarriage, which often accumulate more grime.
- Wash in Sections
- Begin washing the truck’s roof and work your way down to the sides, hood, and tailgate. This ensures dirt flows downward instead of getting re-applied to previously cleaned areas.
- Use a microfiber wash mitt soaked in soapy water. Re-soak the mitt in the soap bucket as needed, and rinse it in the clean water bucket frequently to avoid scratching.
- Tires and Rims
- Clean the tires and rims last to avoid getting dirt and grime on already cleaned surfaces.
- Use a soft bristle brush to scrub the tires and wheels with a dedicated wheel cleaner. Rinse off with water afterward.
- Heavy Stains
- For any stubborn stains, reapply soap or consider using a clay bar or tar remover for heavy spots. This step can prevent damage to the paint and keep the finish looking fresh.
Step 3: Rinse
- Thorough Rinse
- Rinse the entire truck again thoroughly to remove all soap residue; this includes crevices and corners where soap can hide.
- Ensure no suds remain, particularly in areas like door sills and around badges, to avoid streaks and potential damage.
Step 4: Drying
- Prepare to Dry
- Use microfiber drying towels or chamois to dry your truck, starting from the top down again.
- This helps to avoid water spots and keeps the paint looking good.
- Pay Attention to Details
- For better finish, use a separate towel for windows and mirrors to prevent cross-contamination with dirt.
- Check seals and weather stripping for trapped water, drying them as well.
Step 5: Apply Wax
- Choosing Wax
- Use a high-quality automotive wax or sealant that will protect the paint.
- Apply Wax
- Using an applicator pad, apply wax in circular motions. Follow the manufacturer’s instructions regarding the suggested drying time before buffing.
- Buff the wax with a clean microfiber towel until the surface shines.
Maintenance Tips
- Regular Washing: Regular washes (every few weeks) keep your truck in better condition overall.
- Inspect After Washing: After washing, inspect the truck for any scratches or damage that needs attention.
- Use Specialized Products: For specific areas such as the interior or any unique surface materials, use products designed for those materials.
Conclusion
Washing your truck might seem straightforward, but following these detailed steps ensures that you are not only maintaining its aesthetics but also its functional integrity. By being proactive about cleaning and maintenance, you extend its lifespan and preserve its value.
For more insights into truck maintenance, check out the importance of regular trailer maintenance and proven strategies for cleaning grease and tar off your trucks fast.
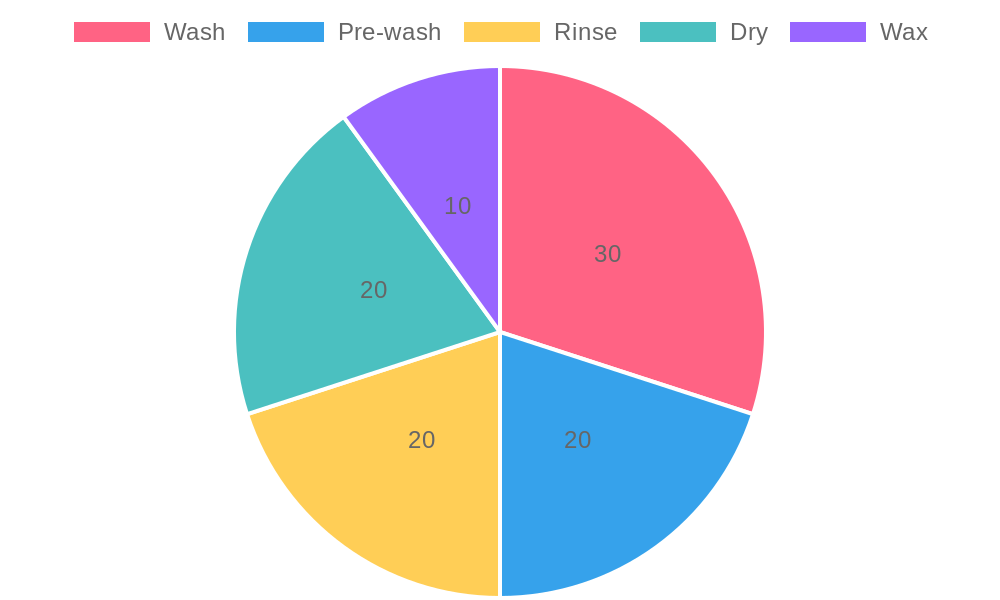
Visual Reference
Importance of Cleaning Steps
Checklist Table for Washing Your Truck
| Step | Materials Needed | Estimated Time |
|---|---|---|
| 1. Rinse Truck | Hose, Water | 5 minutes |
| 2. Apply Soap | pH-balanced truck wash soap, Foam cannon | 5 minutes |
| 3. Scrub Surface | Microfiber wash mitts, Soft brushes | 10 minutes |
| 4. Rinse Off Soap | Hose, Water | 5 minutes |
| 5. Dry Surface | Microfiber towels, Drying cloths | 10 minutes |
| 6. Clean Wheels and Tires | Tire cleaner, Wheel brush | 5 minutes |
| 7. Final Rinse and Inspect | Hose, Water | 5 minutes |

You can also refer to the article on the importance of regular trailer maintenance to ensure the longevity and performance of your fleet.
Common Mistakes to Avoid When Washing Your Truck at Home
Washing your truck at home can save costs and help maintain the vehicle’s appearance, but it’s crucial to do it correctly to prevent damage. Below are common pitfalls to avoid along with actionable solutions:
1. Using the Wrong Cleaning Products
A common mistake is using dish soap or household cleaners to wash the truck. These products can strip wax and harm the paint finish.
- Solution: Always use a dedicated vehicle wash soap that is pH-balanced and safe for automotive paint. Look for products specifically designed for cleaning trucks.
2. Washing Under Direct Sunlight
Many people do not consider environmental conditions while washing, leading to streaks and water spots due to rapid drying.
- Solution: Wash your truck in a shaded area or during cooler parts of the day, such as early morning or late evening.
3. Not Pre-Rinsing the Vehicle
Failing to pre-rinse can lead to scratches from debris and dirt being rubbed into the paint during the washing process.
- Solution: Use a high-pressure hose to pre-rinse the truck thoroughly. This step helps to remove loose dirt and grit before applying soap.
4. Applying Excessive Pressure While Washing
Using too much pressure can damage the clear coat or paint.
- Solution: Use soft sponges or microfiber mitts with a gentle touch. Learn the two-bucket washing method to minimize pressure while maximizing cleaning efficiency.
5. Skipping Wax or Sealant After Washing
After a wash, neglecting to apply a wax or sealant can leave the truck’s paint unprotected against environmental elements.
- Solution: Make it a habit to apply a quality wax or sealant after washing and drying your truck. This will enhance shine and protect the vehicle’s exterior from contaminants.
Below is a summary of the impact and frequency of these common mistakes:
| Mistake | Frequency | Severity |
|---|---|---|
| Using the wrong cleaning products | High | High |
| Washing under direct sunlight | High | Medium |
| Not pre-rinsing the vehicle | Medium | High |
| Applying excessive pressure while washing | Medium | High |
| Skipping wax or sealant after washing | Low | Medium |
Each of these practices can significantly affect the longevity and appearance of your truck’s paint. For fleet managers and operators, maintaining your fleet’s aesthetic and condition can improve company branding and maintenance costs.
By adopting these cleaning practices, company morale and fleet longevity can be positively influenced, reflecting on your commitment to maintaining a professional outlook for clients and stakeholders.
For further reading, consider the importance of regular trailer maintenance to support your overall fleet management strategy.
Maintenance Tips Post-Wash: Keeping Your Truck Looking Fresh
Once you have washed your truck, maintaining its appearance and functionality is essential. Here are several crucial tips and tricks to preserve the shine and integrity of your vehicle, ensuring that it remains in excellent condition for the long haul.
1. Dry the Truck Thoroughly
After washing, use clean towels or a high-pressure air dryer to remove all water from the body, windows, mirrors, and undercarriage. This step is crucial to prevent water spots and rust formation. Ensure that you pay special attention to areas where water can collect, such as door handles and seals.
2. Inspect for Damage or Wear
Once the truck is dry, take a moment to inspect the exterior for any scratches, dents, or areas of paint chipped away. Analyze tires, lights, and seals for signs of deterioration or damage. Identifying any issues early can save on costly repairs later.
3. Clean and Inspect Wheels and Rims
The wheels often collect brake dust and grime, which can dull their appearance. Use a dedicated wheel cleaner and a brush to remove any buildup on the rims and tires. While cleaning, inspect for cracks or warping that may require professional attention.
4. Lubricate Moving Parts
Regular lubrication is key for maintaining smooth operation. Apply lubricant to areas like door hinges, window tracks, and other moving components. This prevents stiffness and helps avoid future mechanical issues. Consider using a silicone spray or lithium grease for long-lasting results.
5. Check and Top Off Fluid Levels
Post-wash is a perfect time to check all essential fluid levels. Verify engine oil, coolant, brake fluid, transmission fluid, and windshield washer fluid after cleaning. If any levels are low, promptly refill them to ensure the truck operates efficiently.
6. Inspect and Clean the Interior
Maintaining a clean cabin is as important as the exterior. Wipe down the dashboard, seats, and floor mats with appropriate cleaners. Additionally, vacuum carpets and check for spills or debris. A tidy interior creates a pleasant environment for drivers and extends the life of the upholstery.
7. Maintain the Undercarriage
In areas with harsh winter conditions, it’s essential to rinse and inspect the undercarriage for corrosion, debris, or damage. Accumulation of road salt and grime can lead to significant long-term damage if not addressed. Regular inspections after washing can help safeguard against these elements.
8. Reapply Protective Coatings
Regularly applying protective coatings such as wax, sealants, or ceramic coatings to your truck’s paint surface can help maintain its shine and protect against environmental elements. These coatings provide an additional layer of protection against dirt, UV rays, and road debris, prolonging the truck’s aesthetic appeal.
Additional Considerations
- Routine Cleaning: Establish a routine cleaning schedule, ideally washing the truck every two weeks and performing a thorough inspection and maintenance check monthly. Learn more about the importance of regular trailer maintenance.
- Professional Detailing: Consider hiring a professional for a deeper clean and maintenance every six months. This can help maintain the truck’s resale value.
Regular cleaning and care post-wash not only help in keeping the vehicle looking fresh but also extend its lifespan. By following these maintenance tips, fleet managers and truck operators can ensure that their vehicles not only operate efficiently but also present a professional appearance, leading to enhanced brand reputation.

Summary
Keeping your truck in pristine condition involves a series of routine maintenance tasks that begin immediately after washing. By drying thoroughly, inspecting for damages, cleaning wheels, lubricating parts, checking fluids, and regularly treating the finish, you can maintain an attractive and functional fleet. Regularly adhering to these steps guarantees that your vehicles will stand the test of time and keep your operations running smoothly.
For further information, refer to our comprehensive guide on tips for maintaining a clean fleet.
The Importance of Washing Your Truck at Home
Washing your truck at home not only maintains its aesthetic appeal but also prolongs its lifespan. As noted by industry experts, “Regular truck fleet washing helps protect vehicles, improve safety, and lower long-term repair costs by removing harmful contaminants that can damage the vehicle.” This highlights the crucial role that regular washing plays in reducing maintenance costs and enhancing vehicle longevity.
For fleet managers and trucking company owners, understanding the financial and operational benefits of maintaining a clean fleet is essential. By investing in cleaning practices, you ensure a positive brand image while protecting your assets.
For further insights, consider the benefits of regular trailer maintenance.

Conclusion
In conclusion, maintaining the cleanliness of your fleet is an essential responsibility for fleet managers that goes beyond mere aesthetics. Regular washing of trucks is crucial in protecting the value of your assets, improving safety, and reducing long-term repair costs. As highlighted throughout this article, a clean fleet not only enhances your company’s brand image but also helps prevent corrosion and buildup that can lead to costly repairs.
Fleet managers are encouraged to adhere to recommended washing frequencies to ensure that their vehicles remain in optimal condition. Under normal conditions, washing trucks at least once a week is advisable, while harsher environments may warrant washes every 3-5 days. A detailed wash should also be scheduled at least twice per month to maintain the quality of the fleet.
Alongside these practices, it is crucial to consider the strategic aspects outlined in this article. For further insights on maintaining fleet compliance with emissions regulations, consider checking out our article on truck wash industry compliance and emissions regulations. Additionally, establishing a routine for washing your fleet is integral to enhancing overall trailer performance-explore the importance of regular maintenance for your business.
Investing time and resources into regular washing of your trucks ensures the longevity and reliability of your fleet, ultimately contributing to your operational efficiency and success in the logistics and transportation industry.
| Criteria | Hand Wash | Automated Wash | Power Wash |
|---|---|---|---|
| Cost per wash | $25 | $10 | $30 |
| Time taken | 60 minutes | 10 minutes | 30 minutes |
| Effectiveness (dirt removal, 1-10 scale) | 8/10 | 6/10 | 9/10 |
| Equipment needed | Buckets, soap, sponge | Automated washing system | Power washer |
Note: Data based on industry estimates and operational benchmarks as of 2026.