
Effective vehicle maintenance is crucial for fleet managers and owners, especially in logistics, trucking, construction, and mining sectors. An increasingly popular product, Rain-X, is often misused as a washing solution. However, understanding its intended purpose is vital for preserving the integrity of your fleet’s investments. This article outlines the shortcomings of using Rain-X as a wash substitute, the science behind its water-repellent technology, potential dangers of misuse, the right washing techniques prior to application, and best practices for achieving the best results with Rain-X. By the end, fleet managers will be equipped with the knowledge necessary to protect their vehicles while ensuring they remain clean and in optimal condition.
Hydrophobic Shields, Not Detergents: Why a Coating Is Not a Wash Substitute for Your Truck
The idea of a single product turning a muddy, splattered truck into a pristine, water-shedding dream is undeniably appealing. Yet the steady promise of a hydrophobic coating as a stand-in for a proper wash is a misreading of how these coatings work. Hydrophobic films are designed to sit on a clean, dry surface and to form a chemical bond with that surface. They do not scour away dirt, bird droppings, tar, or road grime. When you try to use them as a cleaner, you risk locking contaminants into the top layers of paint or glass. The result can be streaking, hazing, or uneven bonding that diminishes both the coating’s water-shedding power and the underlying paint protection. In short, you cannot wash your truck with a coating, not as a substitute for soap and water, and certainly not in a rainstorm or on a dirty surface. This is not merely a cautionary tale; it’s a practical reminder about preparation, sequence, and the limits of any coating designed to resist water rather than remove it.
The science behind a hydrophobic treatment centers on a chemical bond. Most formulations rely on siloxane-based compounds that, when applied to a surface, create a low-energy barrier that repels water. The more pristine the surface, the more uniform that barrier can form. Dirt, minerals, and organic residues act like pinholes and roughness in the coating, preventing even coverage. When a surface is dirty, the coating’s molecules cannot align and bond as intended. Instead, dirt becomes trapped under the rim of the coating, giving you a misleading sheen that quickly deteriorates as washing attempts to remove the trapped grime reveal gaps in adhesion. This is why the product’s instructions consistently emphasize a clean, dry surface before application. The inverse—coating over grime—undermines the coating’s purpose and can damage the very layer meant to protect.
Dust, mud, and road film on painted surfaces are not simply cosmetic. They are abrasive in effect when agitated during washing. A typical wash cycle, especially one using a sponge or a brush, can scour away the coating’s bonding layer. Soap, water, and physical agitation remove contaminants from the surface, but they also strip away the wax, sealant, or prior coatings that may have been laid down earlier. If the coating has not yet cured on a perfectly clean surface, it may never achieve the smooth, uniform finish that makes water bead and roll off. The result is reduced efficiency and the need for more aggressive steps to restore performance, which often means reapplication from scratch. These consequences underscore why the recommended workflow is clear: a thorough wash first, then the coating as a maintenance add-on, not a substitute for cleaning.
The proper sequence is simple in theory but critical in practice. Begin with a thorough wash using a quality vehicle shampoo and plenty of clean water. A standard wash removes the bulk of dirt, salt, and organic residues that accumulate over days or weeks of driving. Rinse completely to ensure no soap film remains, as residual suds can interfere with bonding. Next, dry the vehicle thoroughly with a microfiber towel or a dedicated drying tool to eliminate any lingering moisture. The presence of even a small amount of water can disrupt the coating’s ability to bond, especially if the surface is not free of contaminants. Only when the surface is completely dry should you consider applying the hydrophobic coating, and even then you should limit the coating application to the surfaces intended by the product’s guidelines. Glass, particularly windshields and mirrors, is the most common target for these coatings, where the water-repellent effect is most valuable for visibility. Painted exterior panels may also benefit, but only if the product instructions explicitly authorize such use and only after a meticulous cleaning and drying routine. While some manufacturers permit coatings on painted surfaces, those surfaces must be spotless and free of waxes or sealants that could hinder adhesion. The key is to respect the surface preparation requirements and to understand that curing occurs best in a clean, dry environment.
What happens if moisture intrudes at the wrong moment? Curing is a delicate phase. If you apply a coating to a surface that’s still damp or not perfectly clean, you’re inviting moisture to disrupt the chemical bonding process. The film may cure unevenly, leaving micro-roughness that traps more dirt and creates a haze as it ages. In a rainstorm or after a rain event, the risk increases. The water-not-only-beading effect that users celebrate can become a misleading indicator if the coating is still working to set. The practical takeaway is simple: do not apply or reapply a hydrophobic coating in the presence of rain or after exposure to fresh moisture. Allow the surface to dry fully and ensure it is free of contaminants before applying any protective film. The coatings are maintenance enhancements, not shortcuts for weather-driven washing or immediate protection in the field.
As with any long-term maintenance plan for a fleet or a personal truck, the philosophy should be this: invest effort in cleaning first, then apply protection, and treat the protection as a complement to, not a replacement for, a proper wash cycle. Once the coat has cured on a clean, dry surface, it will shed water more effectively, make rinsing easier, and potentially reduce the adhesion of light contaminants over time. But the coating’s life depends on the surface’s condition. If you neglect cleaning, or if you insist on treating a dirty or damp surface as preparation for coating, you’ll shorten the coating’s lifespan and diminish its effectiveness. For that reason, the best practice is to separate responsibilities: wash and dry, then apply as directed, and finally maintain with light, residue-free cleans that preserve the coating’s integrity.
If you’re curious about handling stubborn grime without compromising protective films, there are practical strategies that extend beyond a single product. For instance, when you encounter heavy grease or tar on a truck, you’ll benefit from targeted cleaning methods that respect the coating’s lifecycle and the painted surfaces. See Proven strategies for cleaning grease and tar off your trucks fast. This resource emphasizes the importance of conditioning the surface with appropriate cleaners, using the right tools, and avoiding aggressive scrubbing that could lift the film or remove waxes and sealants. By approaching grime with a plan that respects the coating’s properties, you keep the surface ready for its next maintenance cycle and preserve the long-term benefits of the shield you’ve applied.
This approach does not undermine convenience; it enhances it. A well-maintained exterior that has been properly washed and dried before coating is more predictable in its behavior. The water-shedding effect will be more uniform, and the coating will maintain its appearance longer if it is not constantly assaulted by dirt, salt, and moisture that should have been removed first. And while the temptation to cut corners remains strong, the realities of how these coatings cure and bond make shortcuts costly in the long run. A clean truck after washing, followed by a controlled, instruction-guided application, sets the stage for the coating to perform as intended for months or even years, depending on climate, exposure, and maintenance habits.
External resource offers further perspective on why such coatings are maintenance enhancers rather than cleaning agents. For additional reading, you can consult a hydrophobic coatings FAQ external resource on hydrophobic coatings. By keeping this distinction in mind, truck owners can balance efficiency and protection without compromising the surface’s integrity or the coating’s longevity.
Beads Aren’t Clean: Why Hydrophobic Coatings Aren’t a Substitute for a Real Truck Wash
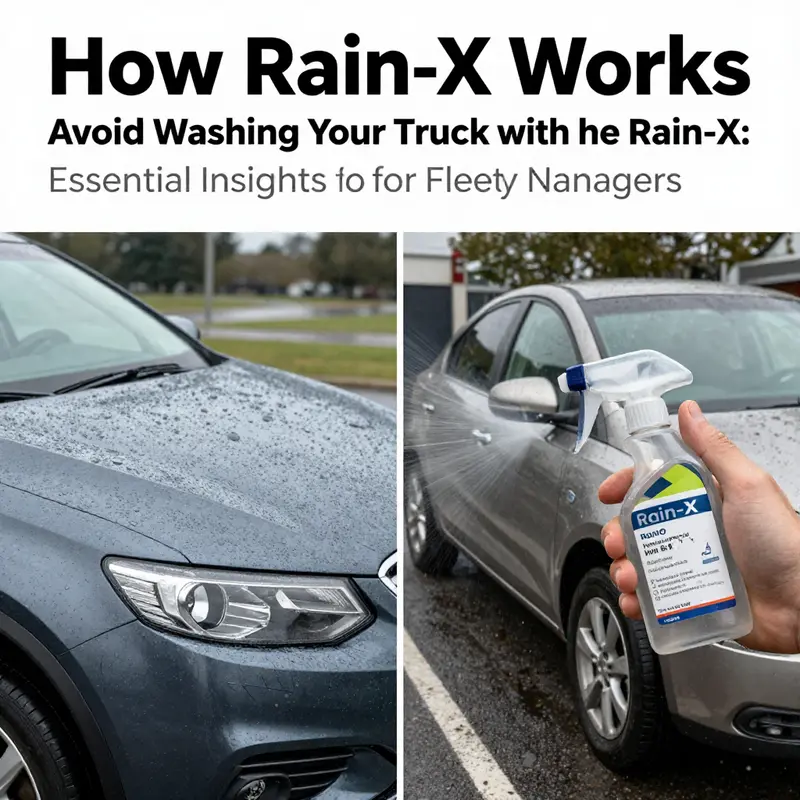
If you’ve heard whispers about hydrophobic coatings making rain vanish from the windshield, you’re not alone in wondering if they could replace a proper truck wash. The short answer is no. A water-repellent coating is a post-wash treatment designed to aid visibility and reduce water marks on glass, not a substitute for cleaning dirt, grime, or road contaminants from a heavy-duty vehicle. On trucks, the dirt you collect—from dust and mud to tar and bird droppings—wants to cling. Attempting to skip the wash and apply a coating as if it were a cleaner risks trapping that grime against the paint and clear coats, where it can cause problems over time. The science behind the coating is elegant, but the practical takeaway is straightforward: clean first, protect later. The coating does its best work when it meets a surface that is clean, dry, and properly prepared. This is not a critique of the coating’s chemistry; it is a reminder of its intended role and limits within the broader process of truck maintenance. When used correctly, the coating creates a microscopic, water-repelling film that helps water bead and roll away, reducing spots and streaks on glass surfaces during rain. But that same chemistry, misapplied to a dirty or wet surface, can backfire, leaving you with hazy glass, streaks, or even paint damage as contaminants and solvents mingle on contact. The distinction matters for fleets that rely on clarity of vision, not just the cosmetic appeal of a freshly coated truck.
What makes the coating work is a precise chemical approach built on hydrophobic, organic silicon polymers. Engineers describe the essence as a bond to the surface through a silanization-like process with hydroxyl groups present on common substrates. On glass, the coating forms a micro-thin, invisible layer that alters how water interacts with the surface. The surface tension of water is high, so it tends to form beads rather than spread out in a sheet. When a treated glass surface meets rain, those beads stay compact and are easily carried away by wind or the motion of the vehicle, leaving the driver with a clearer view. This is the heart of the technology: a tiny, durable film that reduces the contact area between water and the surface, making runoff quick and predictable. The chemistry also involves solvents—often a blend that aids even spreading before the coating cures—so the product can bridge and adhere across micro-roughness on the glass. Once the solvent evaporates, a polymer film remains, offering a protective barrier and a simpler path for water to depart. The practical upshot is a clearer windshield, better visibility in downpour or spray, and less water spotting on glass surfaces. Beyond automobiles, the same principle has found use in other fields—military, outdoor sports, and laboratory settings—where reducing water adhesion can improve performance or reduce buildup on sensitive surfaces. The underlying science is robust, well-documented, and studied in controlled settings, but the translation to everyday truck care requires discipline: apply the coating to the right surface and only after you have cleaned the surface thoroughly.
The central caveat is simple and sometimes overlooked: coatings are not cleaners. They do not remove caked-on mud, oily film, bird droppings, or industrial residues. If you apply a coating to a dirty surface, the dirt and oils can become trapped beneath the film. That trapped material can etch into the substrate or abrade the protective layer over time, leading to etching lines, hazing, or uneven appearance in the coating film. In the worst cases, a damp, dirty surface combined with solvent action can produce chemical residues that leave streaks or even induce micro-marks on paint or clear coats. This is why proper surface preparation matters more for coatings than for many cleaners. The manufacturer’s guidance is explicit: ensure the surface is clean, dry, and waxed or sealed where appropriate before applying the coating. The goal is a uniform, adhesive-friendly surface so the coating can form a strong bond and a smooth, consistent film.
If you are thinking in terms of a fleet operation, the workflow is worth anchoring in routine practice. Begin with a thorough wash using a quality car shampoo and a generous rinse to remove loose dirt. The wash step is more than aesthetic; it removes particulate matter that could scratch paint or embed itself in micro-roughness. After washing, dry the truck completely with a clean microfiber towel. Residual moisture can interfere with coating adhesion and create spots that mimic the very issues you’re trying to avoid. Drying is not a luxury here; it’s part of creating an even, reliable canvas for the coating to cure. Only after that commitment to a clean, dry surface should you introduce the coating, and then only on the surfaces it is designed for—typically glass elements like the windshield and side mirrors, not the painted panels of the truck. If a painted surface is specified by a coating product for occasional use, follow the exact instructions for that surface and be aware of the limitations. The overarching principle is clear: protect surfaces that benefit most from water beading, while understanding that a clean, prepared canvas is the prerequisite for durable results.
Within this framework, the proper sequence becomes a disciplined ritual rather than a single-step miracle. The wash-and-dry plan ensures contaminants do not linger in the micro-roughness of paint or glass. When you reach the application stage, apply only to the intended surfaces and use the product as directed. The process benefits from patience—work in small sections, allow the coating to cure according to the guidelines, and avoid exposure to prolonged moisture while the film cures. It is tempting to rush through a wash to reach the coating stage, but the coherence of the coating’s performance rests on faithful adherence to surface preparation requirements. In the field, where fleets confront varying climates and hours on the road, the difference between a coating that performs consistently and one that yields streaks can hinge on a single missed step in preparation. The science is precise; the practice, though simple, demands vigilance.
For readers seeking practical strategies tied to heavy-duty cleaning challenges, there are proven approaches for difficult contaminants like grease and tar that can support the broader goal of a clean surface before coating. For an accessible reference, see the guide on proven strategies for cleaning grease and tar off your trucks fast. It situates the need for thorough decontamination within a broader maintenance framework and reinforces the idea that coatings function best on clean substrates. This link provides context for builders and operators who want to harmonize cleaning with protection, rather than treating coatings as a substitute for core washing and decontamination routines. proven strategies for cleaning grease and tar off your trucks fast. By connecting the dots between robust washing practices and post-wash protection, fleets can sustain clarity of glass, extend the life of painted surfaces, and keep cosmetic improvements aligned with actual cleanliness goals.
The broader takeaway is practical and approachable: you cannot wash a truck with a coating, and you should not expect a coating to repair a dirty surface. The coating’s value comes after the surface has been cleaned, dried, and prepared. Perspective matters here—the coating is a tool for durability and visibility, not a substitute for the essential work of washing. In the long run, the most reliable path to a clean, protected truck bed and bodywork is a disciplined wash-dry-coat sequence, done consistently across the fleet, with attention to the specific surfaces the coating is intended to protect. The result is not just better aesthetics; it’s improved functional performance during rain, reduced water spotting on glass, and a smoother interaction between cleaning protocols and protective chemistry. External references can illuminate the chemistry and application details further, but the practical routine remains anchored in timely washing, careful drying, and deliberate, surface-appropriate coating application.
External resource: https://www.rain-x.com
Rethinking Rain-Repellents: Why a Dirty Truck Isn’t Cleaned by a Hydrophobic Coating

When the weather turns damp and a bottle of a rain repellant sits within reach, the impulse to skip a full wash can feel tempting. The idea sounds efficient: spray something on a dirty surface and let it do the work. But the truth is less forgiving. A coating that claims to bead water and push debris away is not a substitute for soap, water, and diligent scrubbing. It is a finish applied to a surface that has already been cleaned and dried. If you skip the wash and apply it to a dirty truck instead, you are courting uneven results at best and real damage at worst. The science behind these coatings is straightforward enough. They are engineered to form a water rejecting layer on clean, dry surfaces. They work by bonding to the topmost layer of the finish and creating a slick barrier that causes water to bead and roll away. This is valuable when the surface is properly prepared. It is not, however, a cleaning agent. It cannot dissolve or remove the dirt, oil, bird droppings, or road film that accumulate during daily driving. When dirt sits on top of the coating, the coating cannot form a uniform bond. Instead, it traps contaminants against the paint. The result is an imperfect shield, not a perfect shield. You can end up with a blotchy, hazy, or streaked appearance where the layer forms unevenly. The implications extend beyond looks. The uneven bond means water will collect in places, grime can stay lodged in crevices, and the coating’s protective function will be compromised. In turn, the paint beneath the flawed layer remains vulnerable to the same wear patterns you wanted to avoid, perhaps even more so because the coating can act like a magnifying glass for dirt and moisture. The surface loses that smooth, even glide that makes future cleaning easier and allows water to carry contaminants away more readily. The irony of this setup is clear: instead of simplifying upkeep, a dirty surface invites more labor and more potential trouble. An honest assessment of the process reveals why a wash must come first. The coating’s primary value emerges only when it sits on a clean, dry, and prepared surface. On a surface still contaminated with dust, grease, or road film, the right sequence is broken. The chemistry does not lie to you, and the chemistry is unforgiving in its own way. What happens chemically is instructive. The ingredients in a typical rain repellant include silicones or siloxanes and related polymers designed to form a robust film. These components rely on intimate contact with a clean, non-porous substrate to adhere evenly. If the surface carries dirt or oil, the coating cannot wet it evenly. It cannot establish the uniform molecular network that yields lasting water repellency. Instead, you end up with patches where the film forms, patches where it resists forming at all, and patches where it hugs contaminants. The end product looks inconsistent and functions inconsistently. From a practical standpoint, the troubling scenario is not just cosmetic. It can set the stage for micro scratches and dulling of the clear coat over time. As heat and moisture cycle, trapped contaminants can move around or react locally, slowly contributing to wear in areas beneath the coating. The microscopic battles happening under the surface are rarely visible at first, but they accumulate. Small abrasions can accumulate in lighter shades of the finish, and the overall luster can begin to look worn or patched rather than uniformly glossy. It is a subtle but meaningful form of degradation that undermines the purpose of applying a coating in the first place. The problem compounds if the surface has recently been washed but is not fully dry. Water droplets and lingering soap residues can interfere with adhesion. Even a momentary lapse in surface preparation can leave a misty or cloudy appearance once the coating cures. That cloudy look is not just cosmetic; it signals that the coating could be weaker where it contacts water and debris. The coating is meant to shed water and contaminants, not breed them. A contaminated layer has to work harder to achieve its goal, and that extra effort translates into shorter life span and diminished performance. The simplest and most reliable path to success is a disciplined routine. Start with a thorough wash using a pH-neutral car wash soap. A neutral soap helps lift grime without harshing the finish or leaving residues that can interfere with bonding. Rinse thoroughly to remove all traces of soap and loosened dirt. After that, dry the surface completely with a clean microfiber towel. Any remaining moisture can interfere with the coating’s ability to bond. The goal is a dry, clean, and smooth surface, free of soap film, wax residues, or polish dust. Only then should you proceed with the coating as intended. The coating should be applied to the surfaces it’s designed for, typically glass and select painted areas that benefit most from water beading, following the exact instructions on the product label. It is worth reiterating that the windshields and mirrors are the primary targets for these coatings because their primary function is to improve visibility rather than protect the body finish. The broader finish on a vehicle is better protected with standard wash routines and appropriate waxes or sealants that are designed to cooperate with the paint system. In practice, accounts from those who have learned this through experience emphasize the value of keeping a sharp line between cleaning and coating. The correct approach is not simply to apply a protective film and hope dirt will be repelled. It is to ensure the surface is pristine, dry, and properly prepared before any coating goes on. If you want a practical reminder of how to manage dirt and grime without undermining protective layers, consider a resource that outlines thorough cleaning strategies for difficult build-ups, such as proven strategies for cleaning grease and tar off your trucks fast. That resource is written for hands-on maintenance and highlights the importance of surface readiness before any coating is applied. For readers who want to see the bigger picture, this approach to surface preparation echoes the broader principle at work: coatings do not replace cleaning. They supplement it, but only after the surface has been properly prepped. When you bring this mindset to your truck maintenance, you reduce the risk of missteps that can lead to dull finishes, micro-scratches, or uneven coating. The moral is simple and durable: you cannot wash your truck with a rain repellent. You cannot substitute a wash for a proper preparation step. Start with a thorough wash, move to a complete dry, and apply the coating only to surfaces it was designed to protect. The health of the paint and the longevity of the protective layer depend on this sequence. The cautionary tale here does not require elaborate explanations or flashy disclaimers. It rests on the straightforward truth that dirt is not a cleaner, and coatings are not cleaners. They are tools that, when used properly, amplify protection and simplify maintenance. When misused, they can complicate maintenance and invite new forms of wear. In the end, the clean truth is liberating: a truck that is clean and dry before coating will reward you with a smoother finish, better water beading, and a coating that lasts longer. The opposite path invites compromise and disorder. External resource for further detail on coating safety and application practices can be found at https://www.rain-x.com. This material complements the practical guidance and reinforces the core message about preparation, not substitution, in achieving lasting results. For a deeper dive into related maintenance practices and industry insights, you can explore more on practical cleaning strategies here: proven strategies for cleaning grease and tar off your trucks fast.
Wash First, Shield Later: The Essential Prep Before Hydrophobic Glass Coating on Your Truck

A hydrophobic glass coating performs best when the glass is clean and dry before application. The coating is not a cleaner; it cannot fix pre-existing grime, hazy film, or wax. If you apply it to a dirty or residue-coated surface, you’ll compromise bond and performance and may trap dirt.
Prep starts with a dedicated automotive glass cleaner formulated for windshields. Avoid household cleaners that leave films. Generously mist the glass and wipe with a microfiber in smooth, even motions, paying close attention to edges and corners where dirt hides. If stubborn deposits persist, repeat the cleaning before you proceed. The goal is glass that feels smooth, looks clear, and has no dusty outlines.
Wiper blades matter too. Wipe the blades with the same cleaner to remove film; inspect for nicks or hardened residue and replace as needed.
Drying completes the prep. Let the glass air dry in shade until every area feels dry to the touch and sample tests show no tackiness. Any remaining moisture or film can undermine bonding and curing. Rushing this step invites uneven coating and reduced durability.
With a clean, dry surface, apply the coating strictly to the intended glass areas (typically windshield and side mirrors) following the product’s instructions. Avoid applying over wax, sealant buildup, or residues, which will compromise bond and optics. The bond is strongest when the surface is pristine, and the coating will perform best in rain and sun.
If you want broader context on removing tough contaminants before protection, see guides on removing grease and tar from trucks. In practice, a truck-safe prep sequence is: wash with car shampoo, rinse thoroughly, dry completely, then apply the coating to intended surfaces. Skipping the wash or coating over grime reduces clarity and safety in wet weather.
Wash First, Shield Later: The Correct Rhythm for Hydrophobic Coatings on Your Truck

A common misunderstanding surrounds the idea that a hydrophobic coating can substitute for a wash. In truth, these coatings are designed to create a water-repellent barrier after cleaning, not to replace the dirt-cutting act of washing. They do not remove the automotive grime that builds up on a truck’s exterior over days, weeks, or months. When you apply a water-repellent treatment to a dirty surface, you’re essentially trapping oils, dust, tar, bird droppings, and road grime against the paint. That trapped residue can chemically etch or physically abrade the finish over time as the sun, salt, and UV light work on it. The coating’s chemistry is optimized for a clean canvas, not for dealing with the contaminants that a wash would remove. Without that initial cleansing, the coating’s ability to shed water is reduced and its life shortens, while the risk of creating hazy patches or streaks increases.
Because the coating is not a detergent, it won’t dissolve tough deposits. It won’t lift stubborn grime from the fenders or the rocker panels, and it won’t remove embedded mineral deposits that leave white spots after a rain. If you apply it to a surface that’s wet, muddy, or oily, the coating can mix with those residues and cure in irregular patterns. Those patterns may appear as hazy circles or uneven sheens that contradict the very purpose of a hydrophobic layer. The net effect is not a sleeker, cleaner look but a higher maintenance bill, since removal of a contaminated coating is far more work than simply washing a decontaminated surface in the first place. In short, the idea of washing the truck with a hydrophobic coating is a logical trap—one that leads away from proper care and toward potential damage.
The proper sequence is straightforward but essential. Begin with a thorough wash using a high-quality car shampoo and plenty of water. If the truck has been exposed to heavy contamination—bird buildup, industrial residues, tar, or stubborn brake dust—a supplemental decontamination step may be warranted. This step targets contaminants that cling to the paint and can interfere with adhesion. A dedicated decontaminant or a carefully chosen degreaser can remove oily residues that water alone cannot. The goal is to arrive at a surface that feels clean to the touch and looks uniformly bright in the sunlight. It’s important to rinse away all cleaner remnants and then dry the vehicle completely with a microfiber towel. Any residual moisture can compromise subsequent steps, so the drying stage is not merely cosmetic; it is a safeguard for the coating’s performance and longevity. A clean, dry surface is the foundation on which all protective layers stand.
Once the truck is washed and dried, attention shifts to the coating itself. The coating in question is intended for glass and, in some cases, for painted surfaces as a supplemental protective layer. However, the primary and most reliable use remains on glass: the windshield and the side mirrors, where visibility is most critical. The painted surfaces can be sensitive to certain chemistries, and many professionals advocate applying the coating only to glass components unless the product explicitly states suitability for paint. If you do choose to apply a hydrophobic layer to painted panels, do so with caution and follow the exact instructions provided by the product’s guide. The surface must be clean, dry, and free of wax or sealant residues. Any presence of previous coatings or polishing compounds can undermine the new coating’s adhesion and performance. The manufacturer’s instructions generally emphasize that a waxed or sealed surface provides the best bond, yet that sealant should be fully cured and free of residues before any new treatment is added.
A notable practice among enthusiasts is to optimize ongoing protection by using the coating in a way that complements the vehicle’s daily use. Some users dilute the coating’s presence by integrating a treat-and-protect approach for the windshield wiper system. Specifically, the concept—used by some operators—would be to add a hydrophobic solution into the windshield washer fluid reservoir. This creates a continuous, light layer of protection across the windshield as the fluid cycles through, potentially improving visibility during rain. While this approach can offer convenience, it is not universally recommended for all coatings or all vehicle configurations. The primary caveat is that any dilution or reservoir-based method should be approved by the product’s instructions and tested in a controlled manner. If the manufacturer warns against introducing the coating into a fluid system, this practice should be avoided. More conservative drivers prefer applying the coating directly to clean, dry glass surfaces for a targeted, longer-lasting effect, especially on the windshield’s interior-facing side and on exterior mirrors where water beading and sheeting can substantially reduce spray and improve visibility.
After application, allow the coating to cure for a minimum window, typically around 10 to 15 minutes, before exposing the treated surfaces to rain or washing the vehicle again. The cure period is critical: rushing into rain or mass washing can wash away or disturb the coating before it has a chance to form a robust bond with the glass. During the cure, resist wiping or touching the surface unless the product’s guidelines explicitly call for it. The goal is a clean, dry, and properly cured film that sets the stage for the coating to do its work. In the days and weeks that follow, monitor the beading behavior and the ease with which dirt releases from the glass; if you notice diminished performance, consider touch-up or reapplication in accordance with the product’s recommended schedule.
For long-term results, many practitioners advocate reapplication every few months or after exposure to heavy rain, UV exposure, or a car wash. The frequency depends on driving conditions, climate, and how aggressively the coating is used. A vehicle that spends a lot of time on highways, where stone impacts and abrasive dust are common, might require more frequent maintenance than one kept primarily in covered or urban environments. The idea is not to view this coating as a set-and-forget solution, but as part of a comprehensive care routine that begins with proper washing and continues with careful, timely reapplication.
To delve deeper into the rationale behind surface preparation and how it informs coating choices, explore the practical insights offered in resources that discuss cleaning strategies for heavy-duty surfaces. For more on how to prep a surface and select compatible cleaners before applying protection, see the Proven strategies for cleaning grease and tar off your trucks fast. This link provides a perspective on removing stubborn residues when preparing a surface for protective treatments and helps contextualize why a decontaminant wash can be a prudent precursor to any coating.
In the end, the question of whether you can wash your truck in a hydrophobic coating hinges on understanding the coating’s role and respecting the sequence that supports its efficacy. A wash first, then a shield, and only then should you consider extending protection with a targeted application on glass elements. This disciplined rhythm preserves the paint, maintains clarity in the glass, and sustains visibility in challenging weather. It also aligns with a broader maintenance philosophy: treating a vehicle as an evolving system that rewards careful preparation, deliberate steps, and adherence to tested guidelines rather than improvising with shortcuts. The result is a truck that not only looks cleaner but is protected more effectively against the harsh elements of the road, the beating sun, and occasional downpours that test every driver’s judgment. External resources exist to guide these decisions, including official application guides for hydrophobic coatings that emphasize surface prep, curing times, and proper use. By following the sequence—wash, dry, then apply to the appropriate surfaces—drivers can achieve predictable, durable outcomes rather than chasing imperfect beading and hazy patches caused by misapplied products.
External resource: https://www.rain-x.com/application-guides/
Final thoughts
In summary, using Rain-X as a substitute for washing a truck is not only ineffective but can also cause significant damage to your vehicles’ paint. Understanding that Rain-X is a protective coating meant for clean surfaces ensures that you utilize this product correctly. By following the outlined washing techniques and application best practices, fleet managers and truck operators can maintain their vehicles effectively, ensuring long-term performance and preserving their visual appeal. Keeping these insights in mind will safeguard your fleet against unnecessary maintenance issues and extend the operational life of your trucks.