
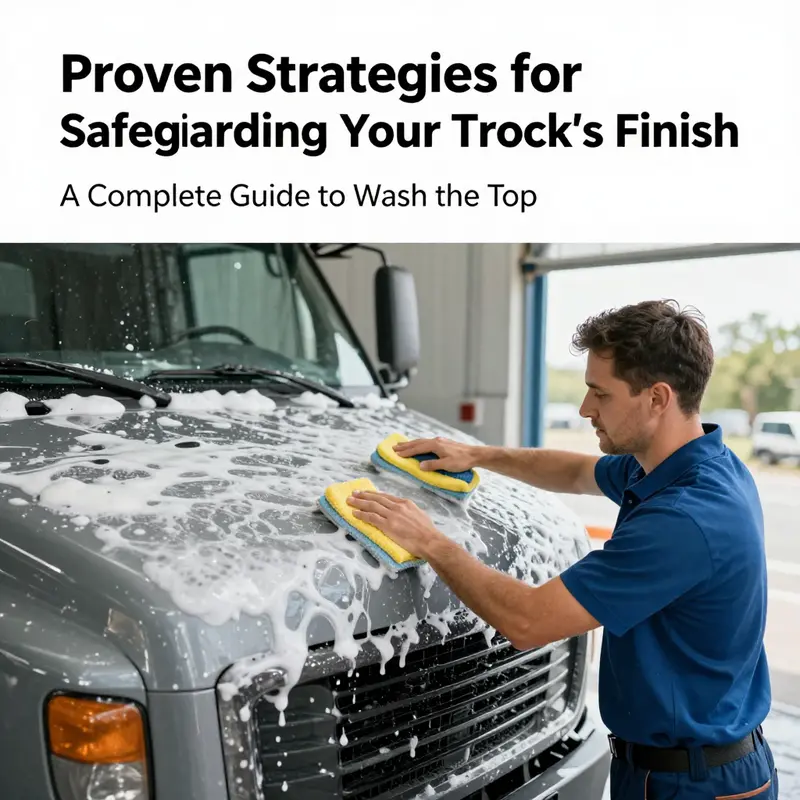
Maintaining the top of your truck is crucial for preserving its appearance and ensuring a longer paint life, especially for logistics and freight companies. A clean truck not only reflects professionalism but also protects against the elements and potential damage. This comprehensive guide covers effective methods for washing the top of a truck, addressing specific conditions such as heavy mud and stubborn stains, presenting eco-friendly solutions, and highlighting vital safety considerations. Each chapter will equip fleet managers, trucking company owners, and construction supervisors with the necessary insights and practical steps for optimal truck maintenance.
Raising the Roof: A Thorough, Gentle Guide to Washing the Top of Your Truck
The roof of a pickup or work truck is more than a surface to clean; it is the high ground where dust, pollen, tree sap, and weathered grime accumulate and where the first impression of care or neglect is formed. When you set out to wash the top, you enter a small ritual that blends patience, technique, and respect for the paint. The goal is not just a cleaner shine but a method that protects the long term integrity of the finish. A well executed roof wash reduces the risk of scratches, swirl marks, and water spots while making the rest of the wash easier and more effective. The process begins with preparation, moves through gentle cleansing, and ends with a careful dry and optional protection that revives color, brings back luster, and shields against the elements.
Preparation and safety anchor the entire job. Park in a shaded area or perform the wash during cooler parts of the day. Direct sun can bake cleaning solutions onto the surface, leading to streaks or residue that takes extra effort to remove. Turn off the engine and all electrical systems, and if possible remove any loose items from the roof. This is not just about convenience; loose items can shift during rinsing and create unexpected hazards or scratches. With the roof clear, you move to the next phase: removing loose debris so the scrub has nothing to grind into the paint. A soft brush or microfiber cloth works best here. Lightly sweep to lift off dust, leaves, and small particles. The aim is not to scrub but to lift, so you preserve the finish underneath.
Choosing the right cleaning solution is essential. The best practice is to reach for a dedicated automotive wash solution that is pH balanced and designed to be gentle on paint. Household detergents, including dish soap or laundry soap, can strip wax and dull the finish over time. A solution that respects the vehicle finish helps you maintain the protective layer and keeps the roof clean without forcing you to chase micro blemishes later. Dip a soft sponge or microfiber mitt into the diluted soap and begin the cleanse. Work in sections, moving in a methodical pattern from the center of the roof toward the edges, and from the top down. This top to bottom approach helps prevent dirty water from running onto already cleaned areas and reduces the chance of streaks forming along the lines of paint. If stubborn grime clings to the surface, apply a little cleaner directly to the spot and let it dwell for a short while to break down the grease. This small dwell time can unlock caked grime without aggressive scrubbing that could mar the finish. The emphasis is on patience and precision rather than brute scrubbing power.
For the heavy mud and grime that trucks often encounter, many drivers instinctively reach for more aggressive tools. Yet the risk with heavy mud is not just a scratch on the roof but the chance that grit embedded in the mud will be ground into the paint by rough brushes. The right approach preserves the surface: use a soft wash brush with very gentle bristles or a long handled car wash mitt that allows you to scrub without pressure. The technique is to let the soap and water do most of the work, lifting the mud before you touch it with a sponge. Rinse or wring the mitt frequently in clean water to keep the dirt from spreading and to prevent re depositing grime on a clean area. The result is a roof that feels smooth to the touch and looks even in color, not streaky with particles trapped in the fibers.
Rinsing is the next critical phase, and it should be thorough yet gentle. A garden hose with a mild spray setting is ideal for most roofs. If you rely on a pressure washer, use a low pressure setting and maintain a safe distance, ideally at least a foot or more from the surface. The goal is to blast away the suds and loosened dirt without forcing water into seams or under trims. Begin at the top and work downward in steady passes, paying attention to any water that pools near the edge where it can run into channels or gaps. Punjab style caution aside, the safe rule is to keep the nozzle moving and never linger in one spot long enough to etch into paint or push water into sensitive areas. After the rinse, you can see the roof regain its clarity as the soap and grime are carried away, leaving the finish looking more uniform and refreshed.
Drying the roof immediately after rinsing is more than a matter of convenience; it prevents water spots and mineral deposits from forming as the water evaporates. A clean, soft microfiber drying towel or a dedicated drying cloth is ideal for this task. Gently pat and roll the cloth across the surface rather than scrubbing. The goal is to wick away moisture without rubbing the surface aggressively, which can create micro scratches that worsen as the day goes on. A careful, patient drying technique pays dividends in the long run, especially on roof contours and any subtle curves that can trap dampness if neglected. Once the roof is dry, you can assess whether the finish appears uniform and whether the light catches it without distracting specks of water or residue in any corner.
There are scenarios where additional steps are worth considering. For heavy mud and grime, full high pressure blasts are discouraged. Instead, pre soak the affected areas with water to soften the soil, then use the soft brush and wash mitt technique described earlier. If the roof bears stubborn stains such as oil or tar, slight targeted applications of an automotive cleaner designed for spot work can help. Apply the cleaner per the manufacturer’s directions, allow a short dwell time, and wipe away with a clean microfiber. This is where patience again pays dividends; a brief dwell is enough to break the bond of stubborn grime without risking damage to the paint. If you have access to a steam cleaning option, it can be an eco friendly choice for deep cleaning. Steam can lift grease and grime with heat and moisture, reducing the reliance on harsher chemical cleaners while leaving a clean, fresh surface behind.
The chapter of protection follows the wash. After a roof is clean and dry, you can apply a finish that helps repel dirt and shield the paint from the sun’s UV rays. A high quality wax or sealant can be layered on the roof once it is completely dry. The extra step creates a hydrophobic surface that makes future cleanups easier and adds a level of gloss that can brighten the entire vehicle. The decision to wax or seal depends on the climate and the level of exposure to contaminants; many owners choose a protective layer at least every season or after a particularly harsh weather period. For those maintaining heavy fleets, this is a sensible habit that reduces the frequency and intensity of future scrubs while preserving the roof’s appearance and structural integrity.
A practical note for heavy duty trucks: if the truck frequentlyOperates in environments with thick mud, it can be beneficial to pre soak the roof before washing. This softens soils and reduces the need for aggressive scrubbing. In such scenarios, avoid direct high pressure on the paint and avoid blasting water into seams around the roof or sunroof and window frames. Water intrusion can compromise seals and lead to rust or electrical issues. A cautious approach, with careful hand scrubbing and controlled rinsing, yields the best outcomes and protects the truck from avoidable damage. The overarching message is clear: slow, deliberate technique beats aggressive, careless cleaning every time when it comes to the roof of a truck.
As you integrate these steps into a routine, you begin to notice a rhythm. The rhythm favors thoroughness over speed, and cleanliness over haste. A roof washed with care looks more uniform, and the rest of the body benefits from the cleaner environment created during the top down approach. Regular maintenance pays dividends not only in appearance but in the vehicle’s long term protection against environmental exposure. When the roof is consistently cared for, the entire wash becomes easier, and the vehicle maintains a more consistent color and finish across panels that face the sun and the elements every day. The natural consequence of a patient, methodical wash is a truck that reveals its true color and a finish that resists the dulling effects of dust, pollen, and mineral deposits.
For those who desire deeper guidance, there are community and professional resources that discuss related strategies. For example, you can explore proven strategies for cleaning grease and tar off your trucks fast, which covers additional approaches to stubborn contaminants and how to apply them without risking the paint. This reference helps align the roof wash with broader maintenance practices, ensuring you have a cohesive method that you can apply to the entire vehicle when needed. For further exploration of paint protection and maintenance routines, consider looking at materials discussing best practices for fleet management and regular maintenance routines. The synergy between roof care and overall vehicle upkeep becomes evident when you adopt a holistic approach to cleaning and protection.
In the end, washing the top of a truck is about more than removing grime. It is a disciplined practice that respects the paint, hardware, and the environmental realities the vehicle faces daily. It tunes your senses to temperature, time of day, and the type of grime you encounter, and it rewards you with a roof that gleams with uniformity and resilience. The process may seem meticulous, but the payoff is straightforward: fewer swirls, a more even finish, and a better foundation for protection that keeps your truck looking its best on the road and in the yard. A roof cleaned with this approach sets a positive tone for the entire wash and, more importantly, protects the investment you have made in your vehicle. If you continue to practice the method with consistency, your truck will maintain a presence that communicates care and durability without demanding extra effort in the future. External resource: Car maintenance guidance
Mud Mastery on the Truck Roof: Safe Techniques for Washing the Top in Heavy Mud Conditions
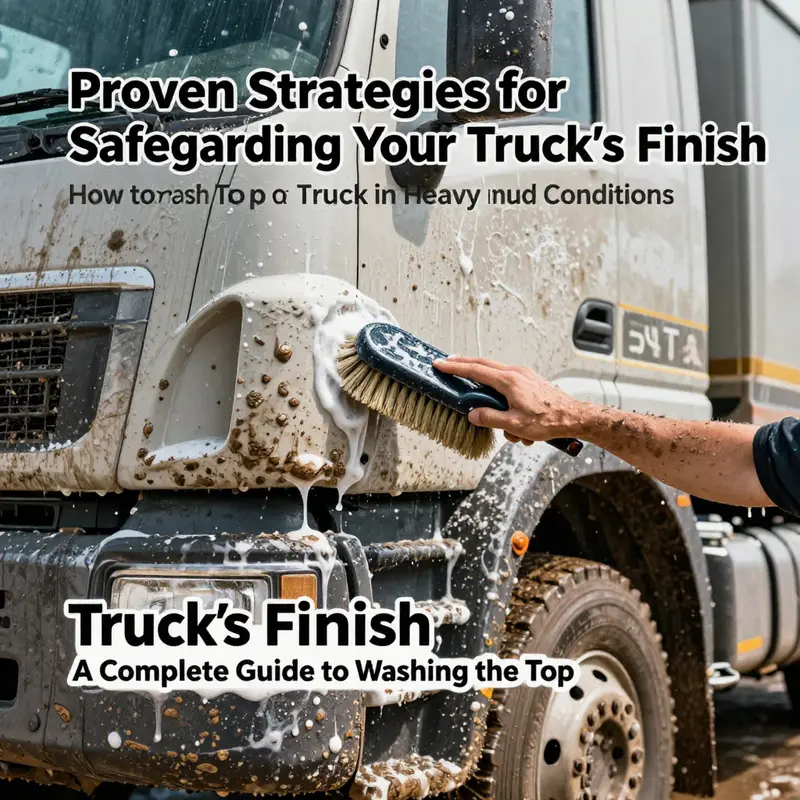
The moment you scramble up near the roof of a truck, especially after a run through a muddy route, you stand at the edge of two forces: gravity pulling grime downward and mud stubbornly clinging to every contour. Washing the top of a truck in heavy mud conditions demands a careful blend of patience, technique, and respect for the vehicle’s finish. It’s not just about removing dirt; it’s about safeguarding paint, seals, and the parts that meet the elements every day. When mud cakes on the crown of the vehicle, the best approach is deliberate, not hurried. Start with a plan that reduces risk, then move through a sequence that loosens, lifts, and finally rinses away the grime, all while keeping the surfaces honest and intact. In doing so, you’ll find that mud becomes manageable rather than menacing, and the roof once again gleams without damage or residue left behind.
Preparation is the quiet, unsung hero of any successful wash. Before you touch the metal, take a moment to assemble the essentials: a soft sponge or microfiber cloth, a bucket of warm water with a mild car wash solution, a soft brush with gentle bristles, a plastic scraper for stubborn chunks, and a stable platform or ladder if you need to reach the highest points safely. Park in a shaded area or during cooler parts of the day to keep cleaning solutions from drying on the surface and leaving streaks. If you have access to a lift or a secure platform, it can dramatically reduce the risk of slips and allow you to work more steadily. Cover delicate glass surfaces and seals with plastic or towels to prevent splashes and to avoid letting dirt migrate into seams where it can later attract more grime. While these steps may feel meticulous, they set the stage for a clean roof without introducing new problems elsewhere on the vehicle.
With tools in hand, you begin with a gentle but essential first step: loosening the mud. Heavily caked mud is not your friend in either direction. A low- to medium-pressure rinse from a high-pressure gun helps to soften the crust and loosen it from the paint without pushing it into tiny crevices or forcing it under loose trim. This initial rinse should flow from the top of the roof toward the edges, creating a controlled path of least resistance where dirty water runs away rather than pooling and recontaminating cleaned areas. The goal here is to dislodge rather than blast. High-pressure bursts at this stage can pry mud deeper into seams and scratches, so restraint is essential. If you notice mud has settled around roof vents, seams, or trim lines, take a moment to direct the water and stage a pre-rinse that targets those zones, avoiding aggressive sprays that might damage weather seals.
Next comes the cleansing solution. A mild car wash soap, properly diluted, is your ally. Dip the sponge or microfiber cloth into the sudsy water and begin in a corner, moving in smooth, wide arcs toward the center. The mud, now softened by the rinse, yields more readily to a gentle touch. For areas with stubborn, baked-on mud, apply a touch of cleaner directly to the spot and let it dwell for a minute or two. The principle here is simple: give the solution time to work without forcing it. While you wait, you can plan your path so that every pass you make brings you closer to a cleaned section rather than circling back over dirty patches. This approach minimizes the need to re-wet already cleaned areas and reduces the chance of scratching the paint where minerals and grit are still embedded in the fibers of your cloth.
Scrubbing comes after letting the cleaner begin its work. Use a soft-bristled brush or a sponge with pale bristles to avoid micro-scratches. The key is to keep the pressure light and consistent; mud can hide sharp mineral grains that could mar the surface if brushed aggressively. Concentrate on problem zones where mud collects, around vents or along trim lines, but never let the brush ride across the surface with force. If you encounter an especially stubborn patch, switch to a circular, even motion and let the soap do its job rather than pressing hard. It’s better to make multiple gentle passes than to attempt a forceful single stroke that might peel off wax or scuff clear coat.
After you’ve scrubbed, it’s time for a thorough rinse. Begin again with low pressure or a gentle setting, then move to a normal flow that covers the entire crown, the edges, and the gutters if present. The objective is to remove both the soap and the loosened mud, ensuring no residue dries on the surface. Work from the top down so gravity helps carry the dirty water away from already clean sections. If you’re using a pressure washer, keep the nozzle at a safe distance—ideally at least a foot or more from the surface—to reduce the risk of pitting or other paint damage. A long, even sweep across the roof helps keep the water moving in a controlled arc rather than a stray jet that might force water into seams.
Drying is not a luxury here; it’s a protective measure. After the roof is rinsed clean, dry it immediately with a clean microfiber towel or a lint-free cloth. Water spots and mineral deposits can etch into the finish if allowed to air-dry, especially on metallic paints. Take the time to dry the edges and corners where water tends to pool. A careful, methodical dry-down prevents streaks and keeps the roof looking uniform. If the roof has any recessed sections or trim lines, wipe those as well to ensure no residual moisture remains that could later trap dirt.
Even in heavy mud, the cycle of loosen, lift, and rinse can leave small pockets of soil behind. It’s worth a final sweep with a soft cloth to check for missed spots, especially on the slopes where mud might cling just enough to catch sunlight and reveal itself as a dull patch. If you discover a stubborn area, a second pass using the same mild soap solution will usually do the trick, provided you avoid aggressive scrubbing that could introduce micro-scratches. The precaution here is simple: respect the finish. Your aim is a clean roof, not a distressed one.
In some circumstances, additional measures can improve the final result without adding risk. A plastic scraper can remove dried mud that refuses to yield to sponge and brush, but it must be used with great care to avoid scratching. If you consider deeper, more persistent grime, you may turn to an automotive cleaner designed for problematic stains, applying it strictly according to the manufacturer’s instructions and permitting it to dwell briefly before gently wiping away. If you have access to more advanced tools, a steam cleaner can offer a deeper clean with fewer harsh chemicals, but it should be used only if you’re confident it won’t compromise seals or cause water intrusion around sunroofs or windows.
As you complete the wash, a quick assessment of the roof confirms whether you’ve achieved an even finish. Look for water spots still beaming in sunlight, and re-wipe any areas that look dull or cloudy. This final check is less about vanity and more about coating longevity; uniform drying minimizes the risk of mineral buildup and helps keep wax or sealant layers intact for longer. If you plan to carry protective wax or sealant afterward, this moment is ideal to consider applying it to the roof, especially after a mud-heavy cleaning that could remove some existing protective layers. A fresh film of protection adds resilience against future mud, helps water sheet off, and makes the next wash easier.
Throughout the process, it helps to be mindful of the broader maintenance picture. Regular washing, especially after mud-rich runs, reduces the chance of long-term damage from abrasive grit and environmental contaminants. It keeps paint vibrant and the roof metal components free from corrosion triggers. For operators managing fleets or multiple vehicles, there’s value in integrating wash routines into a broader maintenance schedule that coordinates resources, safety protocols, and timely care. This broader planning is captured in discussions about the right balance of facilities management for truck wash businesses, which emphasizes safe, efficient operations and consistent outcomes. See how such strategic planning can support a smoother, more repeatable wash cycle by exploring resources focused on facility management for truck wash businesses.
For those seeking a deeper dive into the topic beyond hands-on technique, it’s worth comparing your approach with authoritative guidance from established automotive wash resources. This external reference offers additional context on washing in heavy mud conditions and can complement the practical steps outlined here: https://www.autocar.co.uk/article/how-to-wash-truck-top-heavy-mud-conditions
Stubborn Stain Strategy: Mastering the Top-Wash on a Truck Without Scratching Its Shine
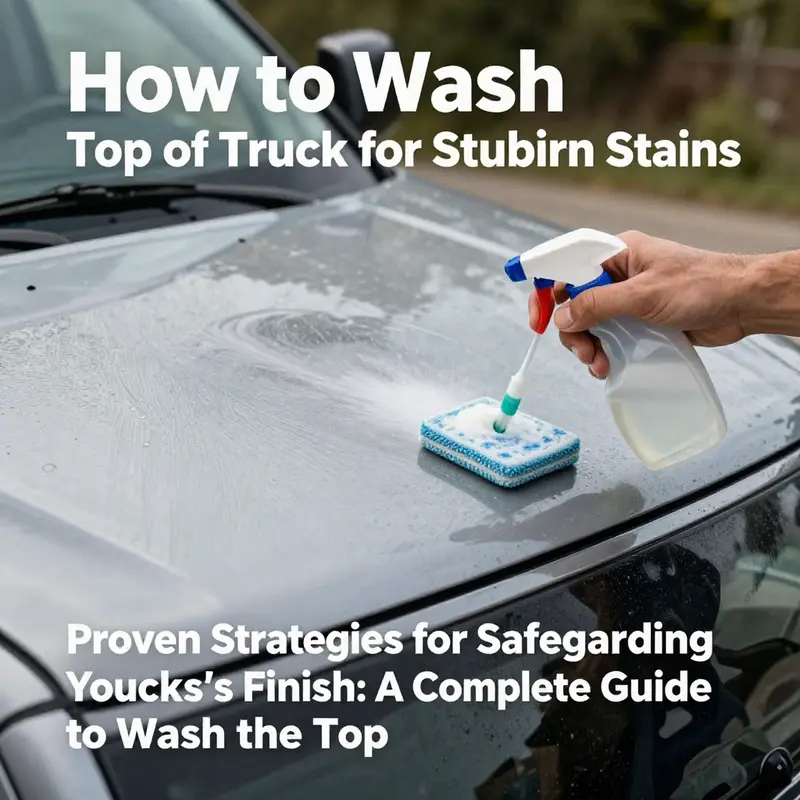
Washing the top of a truck is a careful dance between agitation and restraint. It’s not just about removing dirt; it’s about safeguarding the paint and the gloss that signals care. When stubborn stains appear—tar, sap, bird droppings, or mineral deposits—the approach shifts from routine washing to targeted, stain-specific methods.\n\nPreparation matters: shade, a clean surface, and protection for windshields and seals. Remove loose debris with a soft brush or long-handled tool, edge to center to minimize scratching. Then, choose a cleaning solution that respects the finish: a dedicated car wash soap diluted per the instructions, and a soft microfiber mitt.\n\nWash in sections from the top down, gently working the soap into the stain. If a spot resists, apply a small amount of cleaner directly to it and let it dwell for a few minutes. Rinse thoroughly with a garden hose or low-pressure washer, keeping a safe distance to avoid forcing water into seams. Dry immediately with a clean microfiber towel to prevent water spots.\n\nFor stubborn stains, identify the type. Oil and tar may respond to a tar remover; organic stains such as bird droppings or sap can be treated with a bug and sap remover. Avoid aggressive scrubbing; blot and lift rather than grind. Rinse again and dry. Mineral deposits or water spots can be tackled with a dedicated water spot remover or a weak acid like white vinegar, followed by thorough rinsing and drying.\n\nWhen embedded contaminants resist, a clay bar with lubrication can lift them gently. Use it with care and follow the guidance from the product to avoid marring the finish. If a stain persists after clay, consider a professional evaluation for deeper correction. The guiding principle is progress without risk to the clear coat.\n\nFinally, maintain regular washes to prevent the buildup of stubborn grime. A disciplined rhythm—gentle tools, slow rounds, mindful drying—yields the best, long-term protection for the roof. For those seeking deeper refinement, a finishing polish may restore clarity after successful stain removal, but only after caution and testing.
null
null
Rooftop Rinse: Safe, Thorough Techniques for Washing the Top of a Truck

The roof of a truck is more than a resting place for sun and weather; it is a shielded stage where grime, sap, road dust, and the occasional splatter of oil accumulate, often in patterns that tell stories about routes taken and loads hauled. Washing the top effectively demands patience, a careful touch, and a plan that respects the material of the roof and the integrity of the vehicle’s paint. When you approach this task, picture it as a gentle restoration rather than a battle against caked grime. The result should be a smooth, streak-free surface that gleams with the light of a clean finish and remains protected from the elements long after you step away. The best cleans begin with preparation, not brute force, because the roof, with its curves and seams, can trap moisture and debris in ways that a careless spray could worsen rather than improve the surface. Start by choosing a window of time that avoids the sun’s direct glare. Early morning or late afternoon light is kinder. If you must work in the heat of the day, be sure to keep the surface shaded and to work in small sections so the cleaner has time to do its work before it dries. A shaded setting also helps you monitor whether you’re rinsing thoroughly rather than leaving patches of soap that could later become water spots or film. As you prepare, protect the sensitive parts of the truck. The windshield and mirrors deserve a barrier, not to be neglected, and the roof edges near the seams and around openings deserve as much care as you give to the paint itself. A simple precaution—covering these components with a light plastic sheet or a couple of towels—can prevent drips from creeping into crevices that are harder to dry and might invite rust or electrical issues later on. With the scene prepared, you can begin the work of removing loose debris. A soft brush or a long-handled broom is your ally here. The goal is not to rub the dirt into the finish but to lift it away so that the subsequent cleaning steps don’t scratch the paint. Run the brush with a light touch, letting gravity and the movement of air carry away the bulk of what rests on the roof. This initial sweep feels almost meditative, a quiet ritual that signals you’re protecting the finish rather than harming it. While you brush, you might notice tree debris, windblown dust, and the occasional leaf stuck in a seam. These small items, if left to cling, can become sources of abrasion when you scrub later or create pockets that trap moisture. The next move requires choosing the right cleaning solution. A dedicated car wash soap designed for trucks is preferable because it is formulated to lift grime without stripping wax or damaging clear coats. If you don’t have car-specific soap on hand, a mild detergent diluted in water can work, but you should avoid harsh household cleaners that are alkaline or caustic. Dish soap, laundry detergent, or any solvent that promises “deep clean” often strips protective layers and can dull the finish over time. The key is to select a product that is gentle, pH-balanced, and calibrated for automotive paint. Once you’ve selected a cleaner, the application follows a simple rhythm: dip a soft sponge or microfiber cloth into the soapy water and begin at the crown of the roof, gradually moving downward. You want to work in small, overlapping circles rather than broad, aggressive strokes. For stubborn spots—think bird droppings, tar, or oily streaks—a tiny bead of cleaner applied directly to the stain with a brief dwell time can help break the bond between the grime and the surface. Do not let it dry completely; you’re aiming for a controlled dwell of a minute or two, enough time for the cleaner to soften the stain but not so long that it dries to a crust. As you scrub, keep the surface damp. This helps prevent scratching and makes the removal of encapsulated dirt easier. When it’s time to rinse, you’ll want to be thorough. A garden hose with a gentle spray setting is ideal for the roof, followed by a careful rinse from top to bottom to prevent dirt from migrating downward onto areas that you’ve already cleaned. If you choose to use a pressure washer, keep the nozzle at least 12 inches away from the surface and use a low-pressure setting. The roof’s surfaces, seams, and any exposed metal or fiberglass panels can be sensitive to high-pressure jets, which can push water into joints and potentially cause rust or electrical issues. After you’ve rinsed to the point of clean water flowing away, dry the roof immediately with a clean microfiber towel. The aim is to prevent mineral deposits and water spots from setting in as the roof air-dries, a habit that pays off in a more uniform, glossy finish. The difference between a surface that looks merely clean and one that holds a resilient shine is often the speed and effectiveness of drying. The warmth of the sun can suddenly cause a seemingly simple project to morph into a streaked challenge, so be ready to move the towel in long, straight motions from the center outward, picking up droplets as you go. For some crews, a light second pass with a fresh microfiber ensures even dryness and minimizes any remaining residue. In certain seasonal or environmental contexts, you might consider treating the roof with a wax or sealant after washing. A protective layer can boost gloss and help repel UV rays and environmental contaminants for longer intervals. The idea isn’t to layer on heavy coatings each time but to provide a light, protective film that makes future washings easier and more effective. This is particularly relevant if the truck frequently travels in dusty or tar-prone corridors where grime adheres more tenaciously. When you think about stubborn mud and grime that resist the soft brush and the mild cleaner, remember that forceful scrubbing can grind grit into the paint, producing micro-scratches over time. The guidance here is conservative: rely on gentle methods first, and escalate only when needed. For truly tenacious oil stains or waxy residues, a specialized automotive cleaner designed for such issues can be used with the manufacturer’s dwell time. Apply, wait a moment, and wipe away with a fresh microfiber, being mindful of any surface sensitivities. If you prefer a deeper cleaning without chemical excess, consider a steam cleaning approach. Steam can loosen grease with minimal chemical use, offering an eco-friendly option that leaves the surface clean and well-sanitized. The heat works with the cleaning solution to break down deposits and lift them away, while the controlled humidity minimizes the risk of trapping moisture in seams. This option is not a universal replacement for soap and water, but a complementary method that can be particularly effective on heavily loaded fleets when used by trained operators. Beyond the mechanical and chemical aspects of washing, a few overarching considerations guide every rooftop wash. First, avoid direct sunlight or high temperatures that can cause the soap to dry too quickly and leave streaks or water spots. If you can’t avoid the sun, schedule the work for cooler windows or shorter sessions, and work in sections rather than tackling the entire roof at once. Second, always wash from top to bottom. The roof is the highest point, and gravity will pull the loosened dirt downward. If you skip ahead to the sides or the undercarriage before the roof is clean, you risk recontaminating the surfaces you’ve just cleaned. Third, use soft tools. Microfiber cloths, soft sponges, and gentle brushes are designed for automotive finishes. Hard tools and stiff bristles press grit into paint and produce micro-scratches that accumulate over time. Fourth, maintain a conservative spray approach. A gentle spray and a careful scrub protect the seals around windows, sunroofs, and door frames. Water intrusion into seams can lead to rust and electrical issues, so wipe the edges after rinsing to catch any stray moisture that might seep into joints. Finally, regular maintenance pays off. The more consistent you are about washing the roof with attention to the right products and techniques, the less stubborn grime becomes, and the easier future cleanings become. When it comes to integrating the broader practices with the specific top-wash routine, you might explore related fleet practices that emphasize responsible maintenance and efficient workflows. For readers who want to see how these rooftop techniques connect to larger fleet cleanliness strategies, consider the following practical reference: Proven strategies for cleaning grease and tar off your trucks fast. This link offers a broader perspective on grime management that complements the rooftop-specific guidance without stepping away from the core focus on safe, effective washing. If you’re building a cohesive maintenance program, you’ll find it useful to align rooftop washing with other truck-wash practices, ensuring consistency across different vehicle surfaces and cleaning scenarios. While the roof receives careful handling, the same principles extend to the body, the doors, and the wheel wells, and the discipline you cultivate on top will translate into better outcomes across the vehicle. In all cases, the spirit remains the same: treat the paint with respect, use tools that protect the finish, and play a long game of prevention rather than a quick fix after damage has occurred. As you move forward, keep in mind that the roof is often the first contact point with environmental challenges and the last line of defense for preserving a truck’s aesthetics and value. A steady, patient approach pays dividends, whether you’re detailing a single vehicle or managing the routine care of a whole fleet. External resources can provide additional context and validation for these practices. For a broader, well-regarded breakdown of truck-washing safety and technique, consult external automotive guidance, which outlines complementary approaches to cleaner, safer results: https://www.autoguide.com/truck-washing-tips
Final thoughts
In summary, regular maintenance of the top of your truck is vital for preserving its aesthetic and prolonging its lifespan. Adhering to proper washing techniques and using appropriate cleaning products ensures marks and grime do not adversely affect the vehicle’s paintwork. By integrating eco-friendly methods and addressing specific challenges, trucking company owners, fleet managers, and supervisors can actively reduce maintenance costs and enhance the overall appearance of their fleet. Staying informed and applying these practices will undoubtedly result in improved satisfaction and enduring vehicle integrity.