
The cleanliness of truck engines is crucial not only for performance but also for extending the lifespan of valuable fleet assets. For fleet managers in logistics, freight, construction, and mining, washing very dirty truck engines becomes a necessity that must be approached with careful planning and execution. This guide addresses the critical steps to prepare for washing, effective cleaning methods to adopt, and essential post-washing procedures to ensure the safety and durability of engine components. By adhering to these practices, you can maintain an efficient fleet while minimizing downtime and repair costs.
The Quiet Prewash: Preparation for Safe Engine Cleaning

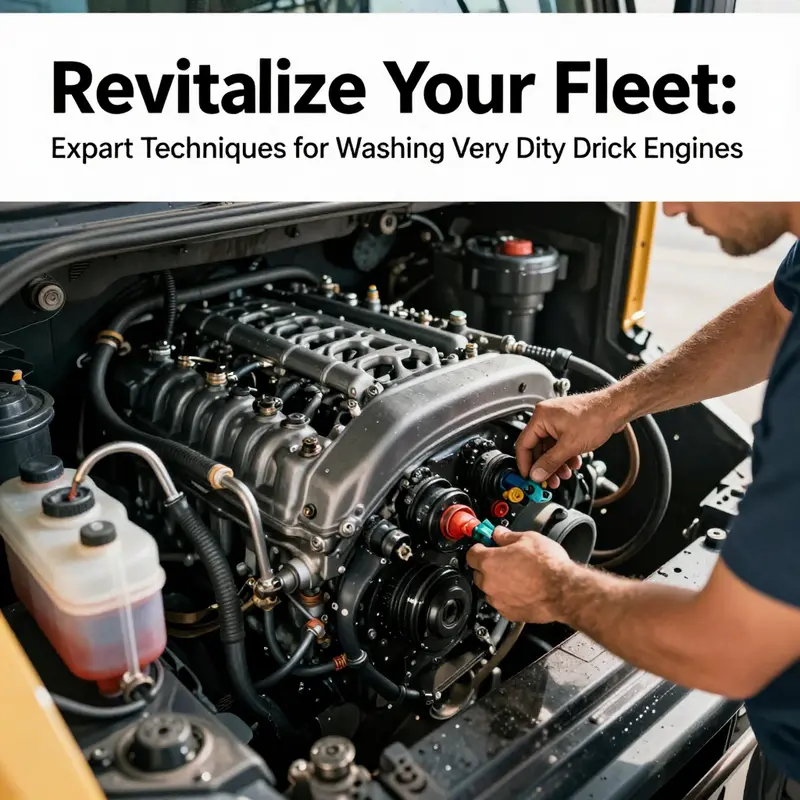
Before washing a very dirty truck engine, begin with cool, calm preparation. Allow the engine to cool completely, shield electrical components with purpose built covers, remove loose debris with a brush, choose a low pressure rinse, apply a neutral pH degreaser and let it dwell briefly, rinse from top to bottom, dry thoroughly with towels and low pressure air, recheck levels and connectors, and finally run a short idle to confirm everything remains dry and functional.
Reviving a Relentless Mess: A Safe, Thorough Approach to Washing Very Dirty Truck Engines

When a truck works hard under heavy loads and rough conditions, its engine can accumulate grime that tests even the toughest maintenance routines. A dirty engine isn’t just unsightly; it can mask leaks, hamper cooling, and sap fuel efficiency. The goal of washing a very dirty truck engine is not to chase a showroom shine but to restore performance while safeguarding sensitive components. The process begins with restraint and respect for heat, electronics, and critical seals. A cool engine is the foundation of a safe cleaning session. Allow it to rest for several hours after shutdown; a conservative window of two to three hours is a prudent minimum. This pause reduces the risk of thermal shock, which can crack metal parts or stress gaskets and seals. In the same breath, the cleaning plan must honor every vulnerable node in the system. Modern engines are a mosaic of wiring, sensors, and interfaces that crave protective barriers. Electrical components—battery terminals, fuse boxes, the engine control unit, alternator, air intake, and countless sensor connectors—must be shielded from intruding water. The safest approach is to snugly seal these areas in waterproof bags or purpose-built engine covers, using duct tape to reinforce edges and keep moisture out of crevices. With the engine cooled and protections in place, the scene is set for a methodical removal of grime that respects both the chemistry of the cleaning agents and the physics of moisture. Before any spray touches metal, a careful sweep of the exterior surfaces removes loose debris. A stiff brush or a quick puff of compressed air can lift away leaves, dust, and grit that would otherwise layer into the crevices during washing. This step reduces the amount of chemical needed and minimizes the risk of grinding dirt into sensitive surfaces. Once the loose material is cleared, the cleaning becomes a dialogue between chemistry and technique. The guiding principle is gentle, low-pressure action combined with a cleaning agent formulated for automotive engines. High-pressure water is an adversary here; it can force water into seals, dislodge sensor covers, and push moisture into electrical junctions where it can linger and cause corrosion or short circuits. The recommended approach uses a low-pressure spray, ideally a garden hose with a wide-angle nozzle rated at three bars or less, or a dedicated low-pressure car wash system. A foam cannon with a soft spray setting is also compatible with this discipline, provided the spray remains even and non-turbulent. The chosen cleaning agent is a heavy-duty engine degreaser designed to cut through thick grease, oil sludge, and carbon buildup. The product should be chosen for automotive use and formulated to work safely with aluminum and cast iron, as well as seals and gaskets. Generous application across the entire engine bay is followed by a dwell time of five to ten minutes. This pause allows the degreaser to soften the worst deposits so that subsequent agitation becomes more effective. For stubborn areas, a soft-bristled brush can be employed to coax away the residue. Metal brushes are strictly off-limits here; they can scratch, burr, and create new opportunities for corrosion or guided leakage paths. After the dwell, a careful scrub helps lift the loosened grime. The next step is rinsing, which must be performed with the same care given to the initial application. Rinse from top to bottom in a downward sweep, avoiding direct spray on sensors, connectors, and electrical junctions. The water delivery should be consistent and slow enough to avoid splashing into openings. The goal is to wash away the degreaser as well as the loosened debris without turning the operation into a flood. Once the visible surfaces appear cleaner, it’s time to address residual moisture. Microfiber towels can absorb most surface water, but moisture often hides in crevices, behind hoses, and around connectors. A light puff of compressed air at very low pressure—no more than three tenths of a megapascals—can herd moisture out of tight spots. With most of the engine now visibly drier, a cautious test run becomes possible. Start the engine and let it idle for ten to fifteen minutes. This controlled warm-up serves two purposes: it evaporates remaining moisture from interior passages and provides a quick diagnostic check. If any dashboard warnings illuminate during this idle, or if unusual noises appear, it’s a sign to stop and reassess, because moisture may still be present in critical junctions or sensors. The heart of the cleaning effort lies in the balance between removing grime and preserving the engine’s life. For engines that have not only dirt but heavy carbon deposits, a deeper cleaning might be warranted. In such cases, a professional steam-cleaning option can offer a thorough cleanse without the spray pressures that can jeopardize components. Steam cleaning uses high-temperature vapor to dissolve and lift grime, often drying quickly and leaving behind less moisture than a conventional water wash. Steam systems used by reputable repair shops heat to higher temperatures and apply moisture in a controlled way, reducing the risk of water intrusion into electrical and electronic systems. A cautionary note accompanies this path: if the engine shows signs of aging wiring or worn insulation—common in older fleets—tempting as it may be to pursue a deeper clean, DIY deep cleaning should be avoided. Over time, aging rubber seals and insulation are more permeable to moisture, and aggressive cleaning can accelerate corrosion or lead to sudden electrical faults. The broader aim remains clear: cleanliness should support performance. After the cleaning, a thorough post-cleaning check becomes essential. Inspect all protected areas for any signs of water intrusion or dampness. Dry any suspect connectors with a clean cloth and again with compressed air if needed. Check fluid levels—oil and coolant most obviously, but also scan for minor leaks introduced by loosened clamps or hoses during the process. A visual sweep of the engine bay will often reveal slips in hoses or signs of moisture that have pooled in cavities. When the machine is back on its feet, a test drive of a short duration helps ensure nothing emerges from the cleaning that wasn’t there before. If the check engine light glows or a fault code appears after driving, this is a signal that further diagnosis is required. The journey from a dirty engine to a more reliable one is a continuum. For routine maintenance, consider dry methods as your default. Brushing away dust and debris, vacuuming loose particles, and performing regular inspections can significantly reduce the frequency of water-based cleans. Reserve water-based cleaning for deep cleans every one to two years, depending on operating conditions and the level of grime the fleet endures. In the end, the objective is not to chase a pristine, showroom aesthetic but to reclaim engine health and reliability. The process should respect the structure of the engine, preserve sensitive electronics, and minimize the risk of moisture-related damage. For fleets, consistency matters. Develop a standardized routine that matches the engine design, the electrical architecture, and the typical operating environment. A clear checklist helps technicians stay disciplined, reduces the chance of missing protective covers, and ensures that the same high standard is applied every time. The practical value of a careful washing routine extends beyond appearance. A cleaner engine bay often reveals issues earlier—stubborn leaks that might otherwise blend into grease, or loose clamps that loosen under vibration. Cleanliness makes it easier to spot corrosion, frayed wires, and degraded seals before they turn into costly failures on the road. In this sense, washing very dirty truck engines becomes an act of preventive maintenance rather than a single cleaning event. For those who want a concise companion resource that translates these practices into a proven, fleet-friendly protocol, there is a dedicated guide on proven strategies for cleaning grease and tar off your trucks fast. This reference ties together the careful steps described here with practical fleet considerations and a disciplined approach to repeatability. Internal safety and efficiency considerations aside, the chapter closes on a practical, fleet-aware note: reserve the most invasive cleaning for occasions when the engine has cooled, protections are in place, and the work is carried out with clear attention to moisture control. The payoff is not a sparkle in the engine bay but better heat management, fewer drive-line issues, and a lower risk of corrosion or sensor faults over time. External resources can supplement hands-on practice, offering broader perspectives and additional safety protocols that reinforce what has been learned through experience and professional guidelines. For a broader reference on engine cleaning procedures, see established automotive maintenance resources that summarize the core steps and safety precautions, including recommended practices for low-pressure washing and careful handling of electrical systems. External resource: https://www.motortrend.com/cars/how-to-clean-your-cars-engine-in-5-easy-steps/
After the Wash: Safe, Thorough Post-Cleaning Practices for Very Dirty Truck Engines
The moment the spray stops and the last drips fall away, a quiet truth settles in: a successful engine wash is only as good as what happens after. A very dirty truck engine still bears the consequences of heat, grime, and moisture even when the surface looks clean. Without careful post-wash procedures, what you just spent hours scrubbing can turn back into trouble—corrosion on fasteners, water intrusion into sensitive electronics, or hidden leaks that only reveal themselves after a few dozen miles of operation. The post-wash moment is where discipline and technique converge into lasting reliability. It is a phase that demands patience, precision, and a clear sense of how the engine’s under-hood ecosystem works when it is dry, secure, and ready to run smoothly again. A calm, methodical approach after washing protects not only the metal and seals but also the truck’s overall performance, fuel efficiency, and the longevity of expensive components that keep the fleet moving day after day.
Begin with the most fundamental principle: moisture is the enemy of electrical systems, sensors, and wiring harnesses. The engine may look presentable, but the goal now is to confirm that every nook and crevice around the electrical junctions, bloodlines of hoses, and the backbone of the intake and exhaust paths is completely dry. The simplest way to achieve this is to combine careful inspection with deliberate air movement and controlled wiping. The process starts with a careful walkaround—eyeing potential water incursion points at the corners of the battery box, the fuse block, the ECU housing, and the alternator. These are not just metal boxes; they are the nervous system of the engine. If water finds its way into even a single pin or connector, the consequences can range from erratic sensor readings to a no-start condition. Therefore, the first post-wash duty is moisture management, not cosmetic perfection.
The practical path to dryness is deliberately conservative. Use a clean, dry cloth to blot visible droplets on the most exposed surfaces. Then employ low-pressure air—not the blast from a compressor set to industrial levels—to coax moisture from crevices around the wiring harnesses, behind the throttle body, and beneath the corrugated hoses where water tends to nestle. The key is to keep the air pressure gentle and focused; too much force risks forcing water further into seals or loosening a stubborn clip. If a dry cloth does not reach a stubborn damp pocket, pause and re-mask the area briefly with a protective cover before reattempting. This measured approach reduces the probability of pushing moisture deeper into the system, where it can evaporate slowly and dry only after heat cycles that may inadvertently promote rust or corrosion.
When you move from surface drying to a more thorough moisture relief, you must consider temperature dynamics inside the engine bay. A short engine run after drying helps to evaporate residual moisture trapped in hoses and gaskets. However, the run should be limited to a controlled, low-speed idle, and never conducted with an active water film on hot components. Allow the engine to idle for 10–15 minutes in a well-ventilated area, watching gauges and listening for unfamiliar sounds. If you notice anything off—unusual ticking, misfiring, or a sudden hesitation in response—turn off the engine and re-check before proceeding. High-temperature evaporation is beneficial, but not at the risk of creating hotspots or drying out vulnerable seals unevenly. The aim is to create a gentle, uniform warm-up that encourages residual moisture to escape while the engine systems remain closed and stable.
With the engine at idle and the bay thoroughly warmed, the next stage is a careful inspection of all protected and vulnerable areas. Start by confirming that the battery terminals and fuse boxes remain dry and clean. Water intrusion into these connectors is a common post-wash issue, and it can lead to resistant starts or intermittent sensor faults. Wipe down the terminals, carefully dry the connector housings, and inspect for signs of corrosion or white residue that might indicate moisture exposure. If you see dampness around the ECU or its connectors, use a soft-bristled brush or a dry cloth to remove moisture, and consider a light blast of dry air to ensure a complete dry, then re-seat the connectors snugly. A secure, dry connection is the bedrock of reliable engine performance after any wash.
Beyond electrical safety, you should take a brisk but thorough look at the mechanical front lines: hoses, belts, clamps, and the air intake path. Water-related issues often hide in the humbler components that do not reveal themselves immediately. Cracked hoses, softened belts, or loose clamps may have become momentarily more evident after cleaning, when grime had masked their condition. A seasoned eye will notice subtle changes in the texture of rubber, a slight gloss on a belt indicating moisture migration, or a clamp that has shifted out of its ideal bite. If any oddities appear, pause and address them before you resume operation. This isn’t about chasing perfection after a deep cleaning; it’s about recognizing that grime can conceal wear, and a wash can reveal it. Reconnect any parts that were temporarily removed during cleaning, such as the air intake snorkel or the obstructed wiring covers, ensuring every connection is dry and secure. The sequence reinforces reliability: dry, secure, reconnected, and ready to operate.
The visual sweep is complemented by a tactile audit. Run your hand along the tops of the valve covers and across the copper or aluminum heat exchangers to ensure no residual dampness clings to hot surfaces. Moisture on cool metal near hot components can lead to condensate that evaporates irregularly during operation, potentially leaving mineral deposits on sensitive areas. If you detect any dampness, wipe it away with a dry cloth and allow a few extra minutes of idle time, provided you are in a safe, well-ventilated space. While this may feel overly meticulous, it is the kind of routine that separates a routine wash from a maintenance event. A truck engine that leaves your station clean and dry is a machine that will start reliably, stay cool under load, and resist the creeping corrosion that moisture can invite into antiquated wiring and brittle insulation.
After you have confirmed dryness and secure connections, the next step is a careful evaluation of fluids and seals. Even though the cooling system, oil system, and fuel lines are designed for robust service, a wash can reveal leaks that were previously obscured by grime. Look for fresh droplets on the oil pan, valve covers, or around the hose joints. Inspect the coolant reservoir for signs of seepage or staining that could indicate a cap seal problem or a marginal hose clamp. This is not a moment for bravado; if a leak is detected, it must be addressed with the same calm, measured approach you bring to moisture control. Improperly sealed components may seem inconsequential in the short term but can lead to overheating, oil consumption issues, or environmental hazards if leaks persist under load. In the absence of leaks, you should still verify that fluid levels are within factory specifications after a wash. Add or top up as necessary with the appropriate grade and type of oil or coolant, and if you notice an unexpected drop in levels between the wash and the following days, treat it as a diagnostic flag rather than a mere anomaly.
The transition to reassembly and readiness is a mental shift from post-wash troubleshooting to post-wash confidence. If you had to disconnect the battery for safety or to protect sensitive components, ensure that all fasteners are tightened to specification and that all protective covers are reseated properly. For the air intake system, confirm that the path is clear of debris and that there is no lingering foam or wash residue obstructing airflow. A common mistake is leaving a trap of soap solution or cleaning agent near the air filter housing; make sure the intake path is clean and dry and that any seal surfaces are intact and free of contamination. This step—restoring the system to its original, sealed state—makes it far less likely that cleaning residues will be drawn into the engine on the next start.
With everything dry, reconnected, and visually verified, you are faced with a moment that often receives too little attention: starting the engine and observing its first few minutes of operation after a wash. There is a practical rhythm to this moment that reflects the engine’s own needs for warm-up and lubrication. Start gently, then allow the engine to idle without load for several minutes. Listen for any odd metallic rasp, ping, or whistle that might indicate a problem with a seal, a loose connection, or a sensor misreading. Watch the temperature gauge and the oil pressure reading; a sudden anomaly can be a sign that moisture has interfered with a sensor calibration or that a breaching seal is leaking under thermal stress. The goal is not to rush the process but to verify, in real time, that the under-hood environment remains stable as heat returns and system tolerances re-establish themselves. If the engine behaves normally, it is safe to move into light testing on a closed, safe route before returning to full duty cycles. This staged approach protects you from the risk of aggressive throttle inputs immediately after a wash when residual moisture or a slightly unsettled sensor reading could mislead driver controls.
The more you practice post-wash diligence, the more you learn to anticipate what comes next. If the engine bay presents unobtrusive dryness and the mechanicals show no signs of wear, the post-wash phase becomes a straightforward maintenance window rather than a gamble. Yet it is equally true that very dirty engines may require a nuanced assessment: sometimes, stubborn grime in hard-to-reach corners can mask wear that only shows up after cleaning when the insulation or protective coatings have softened slightly from moisture. In those cases, a professional deep cleaning may be warranted, especially when composite materials or aging wiring appear compromised. The guidance from seasoned shop technicians consistently emphasizes that age and condition of wiring or insulation should guide decisions about steam cleaning or aggressive remediation. The ethics of safe cleaning demand that you know your limits and recognize when a problem is beyond DIY scope. If the engine is more than a few years old or features aged insulation, opt for a professional evaluation rather than continuing to push a DIY approach.
In terms of long-term practice, the post-wash routine should be seen as part of a broader maintenance calendar. Schedule post-wash checks as part of a quarterly or semi-annual routine depending on operating conditions. For routine maintenance, some shops encourage dry methods—brushing and vacuuming to loosen and remove dust—rather than frequent water exposure. Reserve water-based cleaning for the deeper, deeper-clean cycles that your fleet may require every 1–2 years, especially for engines that endure heavy grime or thermal cycling. A well-timed wash, followed by a disciplined post-wash inspection, can prevent small issues from becoming large, costly problems. Over the long arc of a truck’s life, the discipline you bring to the post-wash phase translates into reduced downtime, more consistent performance in extreme climates, and a stronger resale value for equipment that has been cared for, not merely cleaned.
For readers seeking a broader perspective on how to balance aesthetics with reliability in the cleaning process, consider exploring related strategies that emphasize practical, field-tested approaches to keeping heavy-duty trucks in top condition. For example, one resource outlines proven strategies for cleaning grease and tar off your trucks fast, a topic that complements engine bay maintenance by reinforcing the principles of thorough pre-clean readiness and post-clean checks. Proven strategies for cleaning grease and tar off your trucks fast can help fleets develop a cohesive cleaning program that minimizes downtime while maximizing cleanliness and protective outcomes across the vehicle as a whole.
External references can provide hands-on perspectives from practitioners who have faced the realities of heavy-duty cleaning in the field. For a broader discussion on safe cleaning techniques and what to avoid when dealing with engines that have aged wiring and sensitive components, see the detailed thread on a dedicated forum, which discusses real-world experiences with cleaning a dirty engine and highlights practical considerations and cautions. External reference: https://www.lrforum.co.uk/forums/topic/cleaning-a-dirty-engine/
Final thoughts
Understanding how to wash very dirty truck engines effectively ensures that fleet managers can maintain reliable operations and safeguard their investments. By properly preparing, applying safe and efficient cleaning techniques, and performing thorough post-washing checks, the longevity and performance of the engines can be significantly enhanced. These systematic approaches not only facilitate optimal engine performance but also diminish the likelihood of costly repairs, providing substantial value in the long run.