Maintaining the undercarriage of trucks is crucial for logistics and transport companies, serving not just aesthetic purposes but significantly contributing to vehicle longevity and integrity. Oil residues, if not addressed timely, can lead to corrosion, component deterioration, and costly repairs. This article provides a detailed guide on effectively washing the undercarriage of trucks, emphasizing preparation, washing techniques, and post-cleaning care. Each chapter is designed to equip fleet managers and supervisors with practical insights for preserving their fleet’s operational efficiency.
Tooling Up for a Thorough Undercarriage Clean: Preparing Your Gear to Remove Oil from a Truck’s Frame
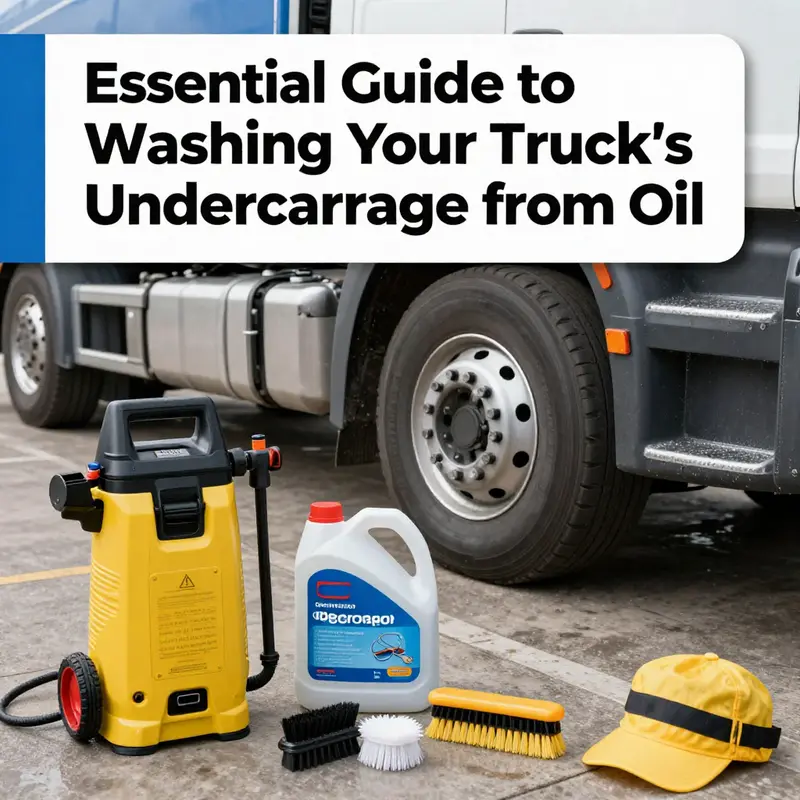
Equipping yourself with the right tools is the first, most actionable step in a process that can otherwise feel daunting. Washing the undercarriage to remove oil is not a task you improvise with a spray bottle and a rag. It is a coordinated action that blends chemistry, mechanical access, and safety. The tools you choose shape not only how clean the surface becomes, but also how reliably you protect sensitive components, seals, and electrical connections. A well-planned toolkit reduces the risk of inadvertently pushing oil deeper into crevices, bending a brake line, or forcing solvent into a gap where moisture can later become a rust trigger. It also speeds up the job, so you can spend more time on inspection and less on wrestling stubborn residues. In this light, tool selection is less about splurging on gadgets and more about aligning capacity with the typical grime profile you’ll encounter on your truck’s undercarriage. Heavy-duty grime—engine oil that has bled out from gaskets, transmission drips that cling to crossmembers, and stubborn tar from road grime—demands gear that can cut through layers without compromising metal or rubber. The aim is to safely loosen, lift, and rinse, not to bend metal or moisten fragile seals with forceful streams. A thoughtful toolkit keeps the process smooth from the first touch of the oil-soaked frame rails to the final check that confirms every corner is dry and ready for protection. In that spirit, the essentials below form a compact set that covers the full cleaning cycle: from initial loosening to thorough rinsing, all the way to the moment you consider protective coatings. A practical approach is to group tools by their primary role rather than by brand, so you can assemble what you need quickly and keep the workflow steady rather than chaotic. First, you need a dependable high-pressure water source. The clearest balance of power and control comes from a pressure washer capable of delivering roughly 3 to 5 MPa, which translates to about 400 to 700 PSI. This range provides enough force to break the bonds of oil and heavy grease without blasting through wheel wells or harming fragile components. A nozzle with a wider spray angle—such as 25° or 40°—helps distribute the pressure in a fan pattern that covers more surface area while keeping the concentrated jet away from seals and wiring. The goal is to deliver a focused but forgiving stream that dislodges loose material and prepares oil for the chemical step to follow. Along with the pressure, choosing a suitable cleaning solution is essential. For undercarriage work, a heavy-duty, biodegradable, pH-neutral cleaner designed specifically for automotive use is far preferable to household detergents. Household soaps strip protective coatings and can leave residues that complicate future rust-prevention treatments. A pH-neutral formulation respects the metal and plastic components while still dissolving motor oil, brake fluid, and road grime. It also reduces the risk of fumes or skin irritation. The cleaning solution should be applied generously to the oily hotspots identified during a visual scan of the underside: engine mounts, crossmembers, exhaust hangers, and along the length of the frame rails where leaks tend to pool. While cleaner is doing its work, you’ll want to bring in brushes designed for the tight geometry of undercarriage crevices. Soft-bristle or medium-grade brushes—preferably nylon or polypropylene—strike a balance between flexibility and rigidity. The aim is to bend around brackets, reach into suspension joints, and scrub away caked oil without scouring the metal or abrading protective coatings. A long-handled brush can reach higher sections near the frame, while a small detail brush tackles the most stubborn pockets around brackets and near the exhaust pipes. For truly dried-on oil that stubbornly clings to the surface, a plastic scraper or rubber blade is indispensable. Metal scrapers risk scratching, especially on painted surfaces or light protective coatings, so a plastic option helps lift the residue without introducing new hazards. Keep this tool in reserve for the toughest spots, and use it with care, applying gentle leverage rather than brute force. Protective gear is not optional here—it is essential. Chemical-resistant gloves protect the skin from cleaner and oil, while safety goggles shield eyes from splashes. Non-slip footwear matters because wet and oily surfaces can be treacherous, especially when you are moving around the frame rails and around the axle area. To guard delicate components, you should have protective coverings on hand as well. Plastic sheeting, garbage bags, or dedicated undercarriage covers can shield electrical connectors, brake lines, sensors, and vulnerable wiring from water intrusion. This layer of protection is crucial if you are rinsing areas where moisture could set up against sensitive electronics or corrugated wiring harnesses. After rinsing, you will want an efficient way to dry the undercarriage so that moisture doesn’t linger in crevices and react with residual oil. An air compressor is ideal for blowing out moisture from tight spaces, followed by clean microfiber towels to blot and finish-dry accessible surfaces. Drying thoroughly before applying any protective coating is non-negotiable; trapped moisture can undermine adhesion and encourage rust. Some operators also use a heat gun with caution to speed drying in cooler climates, but this should be exercised carefully to avoid heat damage to hoses or powder coatings, and never near the exhaust system where temperatures are high. If you anticipate frequent exposure to road salt, consider an optional rust-inhibitor or undercoating spray to cap any remaining pores after drying. The application of these coatings should follow the manufacturer’s directions, and the “sandwich” layering technique—primer, topcoat, and sealant—can offer a robust barrier when done properly. The overarching rationale for investing in a complete toolkit is not only to remove oil efficiently but to create a repeatable process that minimizes risk and yields a consistently clean and protected undercarriage. It is a discipline that rewards careful setup, orderly progression, and attention to the specific challenges posed by your truck’s configuration. In practice, a small but well-chosen kit lets you tailor your approach to the vehicle you’re handling without being overwhelmed by an arsenal of gear. A practical reminder that stays with most experienced technicians is the value of cooling the truck before you begin. A surprisingly large share of heat is stored in the metal and in components near exhaust systems. Cleaning a hot undercarriage invites thermal shock to seals and potential warping in some materials, especially around flexible hoses. So, with safety and durability in mind, you allow the engine and exhaust to cool, then begin the cleaning sequence. When you execute this plan, your work is not just about the moment of scrubbing and rinsing; it is a preparatory act that sets up inspection and protection down the line. The tools invite a broader responsibility: you are not merely washing off spillages but inviting the opportunity to notice leaks, loose fasteners, or stressed brackets before they escalate into expensive problems. Even the angle of your spray matters here. A safer, more forgiving approach is to angle the nozzle around 45 degrees to avoid forcing water upward into gaps that feed corrosion or drop water into electrical connections. This angle also helps direct the flow along the surfaces, enabling cleaner channels where runoff will go and reducing the chance of pooling around critical joints. In this sense, the equipment is not a mere instrument but an extension of your diagnostic eye. The protocol you adopt, shaped by the tools you choose, forms the backbone of a careful evaluation that carries into subsequent maintenance actions. If you occasionally drive in salt-spray environments or through muddy terrain, the value of investing time in a proper toolkit increases. You will not only remove oil and grime but also expose weak spots that require attention—cracked hoses, rust patches on frame rails, or loosened bolts that might otherwise go unnoticed. The habit of checking during cleaning enhances the long-term resilience of the vehicle. To reinforce the practical value of these tools, consider a reference that synthesizes field-tested approaches into actionable steps—a resource that echoes the mindset of efficient, repeatable maintenance. For a concise articulation of strategies that align with fast, effective grease and tar removal, see this guide: Proven strategies for cleaning grease and tar off your trucks fast. While no single product will replace the need for skill and care, the right combination of pressure, cleaner, brushes, and protective measures provides a solid foundation for a clean undercarriage that stands up to the rigors of road conditions and seasonal exposure. Your toolkit should also reflect a discipline of maintenance, not just a one-off effort. After every job, perform a quick audit of your gear: are the brushes still flexible, are scrapers intact, is the protective covering in place for future jobs, and are your gloves and goggles free of wear? Clean equipment lasts longer, performs more consistently, and reduces the risk of contamination during the next cleaning. Finally, the decision to integrate an external reference into your routine—such as the Federal Motor Carrier Safety Administration guidance on vehicle maintenance and undercarriage cleaning—helps ensure that your practice aligns with recognized standards and best practices. This grounding is not about compliance for its own sake; it is about building a maintenance habit that you can rely on when you need to pass a visual inspection or prepare a vehicle for a demanding trip. By investing in the right tools and anchoring your method in proven, safety-conscious steps, you transform undercarriage cleaning from a reactive chore into a deliberate, repeatable procedure that protects your truck’s structural integrity, supports reliability, and extends the life of critical components. For readers seeking to link the practicalities of gear with broader fleet management and maintenance strategy, the following external reference offers additional context and guidelines: https://www.fmcsa.dot.gov
Oil Be Gone: A Thorough Undercarriage Wash to Restore Your Truck’s Vital Underbody
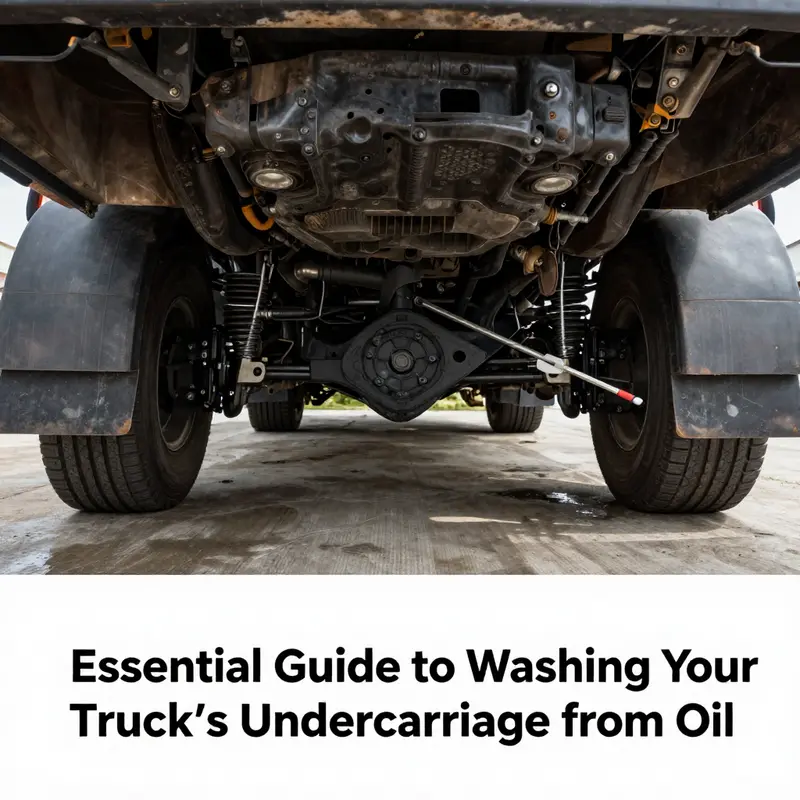
Oil builds up on the undercarriage for a simple reason: gravity, heat, and the spray from roads, leaks, and weather all conspire to deposit grease where you can’t easily wipe it away. Over time, that residue becomes stubborn, dark, and slick, and if you don’t approach it with a methodical plan, you risk masking more than just the appearance. You may overlook leaks, stress points, and corrosion-susceptible areas. The aim of a well-executed undercarriage wash is not merely cosmetic. It is a preventive habit that protects structural components, keeps moving parts free from binding grime, and creates a safer platform for inspection and maintenance. The approach outlined here follows a steady, two-part rhythm: first, break down and lift the oil with a purpose-built cleaner; then, rinse, inspect, dry, and, if needed, protect the surface with a coating designed for metal and rubber seals. The process respects the vehicle’s engineering and the environment, acknowledging that a clean undercarriage is a signal of careful ownership and a prudent maintenance mindset.
Before you lift a single tire, prepare the stage. Safety and environment set the tone for everything that follows. Park the truck on a level surface, engage wheel chocks, and ensure the parking brake is applied. Let the truck cool if you’ve just driven it, and never work on a hot engine or exhaust components. A cool environment is not just comfortable; it prevents you from scalding yourself or softening hoses and plastics with heat. Gather your tools: a high-pressure washer with adjustable pressure, a dedicated automotive degreaser or heavy-duty oil cleaner, stiff-bristled brushes (nylon or brass-bristled), long-handled brushes for reaching the frame rails, plastic scrapers for stubborn spots, and safety gear—gloves and goggles. A proper workspace matters just as much. If you can, direct runoff to a drainage system or use containment mats to prevent oil and cleaning agents from entering storm sewers or waterways. The environmental note here is not an afterthought; it is part of responsible vehicle care and aligns with professional shop practices.
With that foundation, you can approach the undercarriage with a plan that mirrors how a technician would tackle a grease-laden chassis. Start by lifting the vehicle. A hydraulic jack or lift, used with jack stands, provides safe, stable access to every nook and cranny beneath the truck. You want full visibility into the frame rails, crossmembers, suspension, exhaust, and steering components. The undercarriage is a maze of potential trouble spots, and your job is to expose them without causing new issues. The initial rinse is your light touch—the low-pressure pass that loosens loose dirt, mud, and unconsolidated oil without pushing contaminants into seals or delicate connections. Begin at the front, working along the rails toward the rear, and pay attention to the engine cradle, transmission crossmembers, and the area around the oil pan and drain plugs. A careful, wide sweep helps identify where the worst oil accumulations sit, and it sets the stage for targeted cleaning. The objective here is not to blast away every speck of grime but to loosen it enough to be captured and carried away by subsequent steps.
Once the loose material is removed, the real action begins. Identify the areas most prone to heavy oil deposits: engine mounts, crossmembers, the face of the exhaust manifold, pipe joints, brake lines, and any seals or gaskets that have leaked in the past. These are your oil-prone zones. Apply the dedicated undercarriage cleaner liberally to these areas. The cleaner is designed to cut through thick grease without harming paint or rubber seals, and it carries a formulation that resists quick evaporation, giving the oils time to loosen. You’ll follow the cleaner’s dwell time as a rhythm—typically five to ten minutes, depending on the product’s label. This dwell period is essential; it gives the chemical freedom to break the bonds that hold oil to metal and to fight through the carbonized residues that form around hot components. In this phase, you might notice a slight foaming or a darkening of the residue—that is the cleaner at work, not a sign of failure.
As the cleaner works, switch to agitation. A stiff-bristled brush does not merely scrub; it invites the cleaner deeper into the crevices, brackets, and the underside of the frame rails where oil tends to accumulate most stubbornly. Use a long-handled brush for reach, and don’t hesitate to switch to a plastic scraper for dried-on patches. Gentle scraping can lift hardened films without scratching the metal. The goal is to transform sticky, oil-soaked grime into a loose, wipeable film. You might also find that some spots require a second application of cleaner and a second round of agitation. This is not a failure; it is a diagnostic signal that those patches have dented into the matrix of the undercarriage and need extra care. Remember: doing the work slowly and thoroughly reduces the chance of missing a leak or leaving behind residue that could accelerate corrosion.
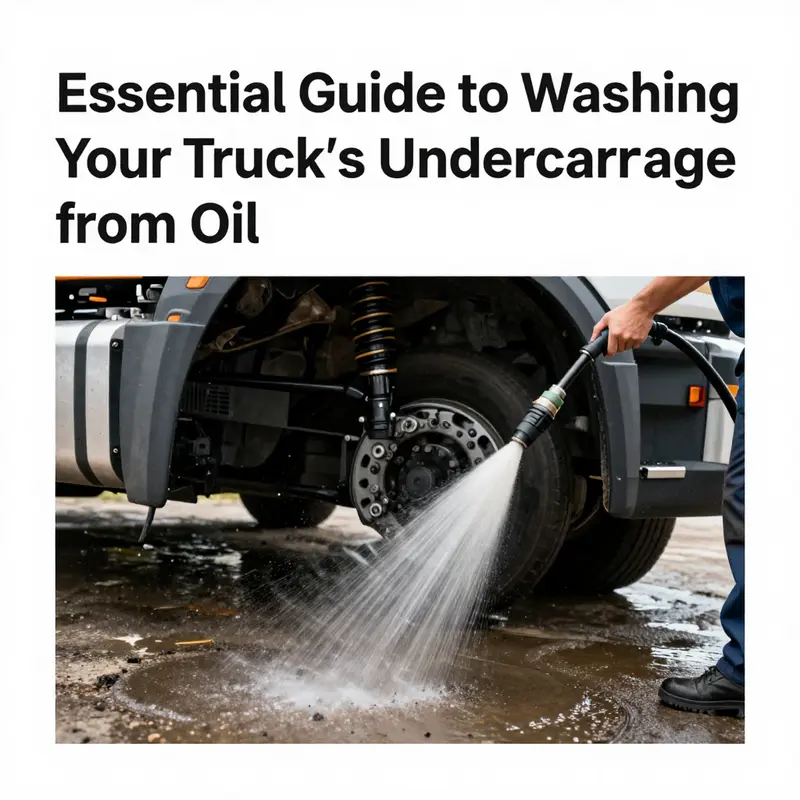
After the agitation and dwell come the rinsing stage, which is where the undercarriage finally begins to show its true cleanliness. You’ll switch to a higher-pressure rinse, ensuring you wash from top to bottom to prevent re-deposited grime from trickling back onto areas you’ve already cleaned. A 45-degree nozzle angle protects rubber hoses, plastics, and electrical connectors from direct contact with spray or pressure. The rinse should sweep across the engine bay frame, across the transmission crossmembers, along the exhaust components, and around all the peripheral brackets and mounting points. Maintain a steady pace so you don’t miss sections or trap cleaner residue in tight spaces. The high-pressure rinse has two essential functions: it clears away the cleaner residue and flushes away any loosened oil that might still cling to surfaces after brushing. It also exposes any areas that require further attention, such as indentations behind brackets or the inner faces of wheel wells where oil can accumulate. If you encounter areas still presenting oily film after a first pass, repeat the cleaner application, dwell, and scrub steps, then rinse again. Persistence pays off when the aim is a uniformly clean undercarriage rather than a patchwork of cleaned and dirty zones.
With the undercarriage visibly cleaner, you now face the drying phase—a step many neglect but that matters for both the longevity of the metal and the effectiveness of any subsequent protective treatment. Moisture trapped under coatings can promote rust and undermine adhesion, making drying more than a courtesy. Air-drying is preferred in moderate climates; it allows lingering moisture to evaporate naturally. In humid or cooler conditions, you can speed up the process with compressed air. If you choose to use a heat source, keep it at a safe distance from exhaust components and avoid direct, concentrated heat so as not to warp or damage hoses or wiring insulation. The ultimate goal is to reach a completely dry state before applying any anti-rust coating or sealant. Any roadmap to a durable protective layer on a damp surface is compromised by trapped moisture, so patience at this stage truly pays off.
Optional layers of protection can follow a thorough dry. If you decide to apply an undercoating or anti-rust spray, do so only after the undercarriage is completely dry. A well-applied layer provides a barrier against moisture, salt, and road grime that can corrode metal and degrade coatings over time. The typical approach—depending on the product—begins with a primer layer, followed by a topcoat, and finally a protective sealant that anchors the finish. The precise sequence varies by product, so you should read the label carefully and apply in a well-ventilated area. This protective layer is not a substitute for routine cleaning; it is an insurance policy against the particular harsh conditions your truck encounters, such as salty winter roads or off-road oil splashes. If you drive on dirt roads or through industrial zones, you will appreciate having a durable undercarriage finish that resists staining and reduces future cleaning effort.
A critical thread that runs through the entire process is the discipline to assess as you go. Cleanliness offers more than aesthetic appeal; it provides a clearer view of the vehicle’s condition. As you rinse, inspect for fresh leaks, loose bolts, or damaged components. Oil leaks are easier to spot when the area around gaskets, seals, and drainage plugs is clean, because the absence of grime makes any new staining obvious. This inspection is not a one-off task; it becomes part of a maintenance ritual. The more regularly you engage in this practice, the more adept you become at noticing small changes before they become bigger problems. If you detect moisture around a connection, a quick wipe with a rag can reveal slow seepage that warrants further attention. If a component shows signs of wear, you now have a baseline image to compare to later maintenance cycles. The aim is a clean undercarriage that doubles as a diagnostic platform, turning routine cleaning into proactive care rather than a static cosmetic exercise.
Frequency is as important as technique. The environment you navigate dictates how often you perform this cleaning. If you regularly drive on salted roads, through muddy boondocks, or in dusty, debris-filled environments, the grime will accumulate more rapidly, and you should plan for more frequent sessions—every two to four months, depending on the severity of exposures and the presence of any leaks. In milder conditions, a semi-annual or quarterly routine may suffice, but you should always tailor the schedule to your driving patterns and the vehicle’s age. The use of a biodegradable, dedicated undercarriage cleaner is preferred for frequent cleaning, as it minimizes environmental impact while maintaining efficacy. Remember that household cleaners are not suitable for this task; they can strip protective coatings and accelerate corrosion on metal surfaces and rubber seals. This is a foundational rule that protects both the truck and the environment you share.
The narrative of care continues with a nod to efficiency and practicality. If you want to elevate your approach beyond the basics, you can consult resources that detail proven strategies for cleaning grease and tar off your trucks fast. These guidelines echo the spirit of the method described here: use the right cleaner, let it dwell, brush away stubborn residues, and rinse carefully from top to bottom. They also emphasize the value of a long brush for reaching those deep recesses and the importance of rechecking the area after the initial rinse. You can find these insights in a resource dedicated to efficient grease removal, which complements the steps outlined above and reinforces the idea that a clean undercarriage is part of a broader maintenance strategy. The goal is not merely cleanliness but a reliable, inspectable platform that keeps your truck performing well and looking cared for.
Finally, the broader context matters. The maintenance philosophy behind this process aligns with manufacturer guidance and professional best practices. It is rooted in protecting metal, avoiding damage to sensitive components, and ensuring that the drive train and suspension remain free from contaminant buildup. For an ongoing education in care practices, visit official manufacturer maintenance guidelines accessible through their sites, which provide detailed instructions and product recommendations tailored to different truck models and years. Following those guidelines helps ensure compatibility with any coatings and seals you may apply afterward and keeps your approach aligned with the standards that certified technicians follow.
In sum, a thorough undercarriage wash to remove oil is a measured, layered process that fuses chemical action with mechanical agitation and careful rinsing. It respects the vehicle’s design, protects critical components, and acknowledges environmental responsibilities. It is a discipline you can perform with confidence, turning a challenging task into a repeatable, affordable maintenance habit. By combining low-pressure initial loosening, targeted degreasing, diligent brushing, high-pressure rinsing, and conscientious drying—and by adding a protective layer only after complete dryness—you craft a clean underbody that supports longevity, performance, and peace of mind. The result is not just a cleaner truck, but a safer and more reliable one, poised to traverse the road with fewer surprises beneath the chassis.
Internal resource for deeper insights:
For a complementary, field-tested approach to grease and tar removal on heavy trucks, consider the proven strategies for cleaning grease and tar off your trucks fast. This resource complements the steps detailed here and can be a practical reference as you refine your technique. proven strategies for cleaning grease and tar off your trucks fast
External environmental reference:
Environmental considerations are integral to responsible cleaning. For guidelines on safe wash runoff and protecting water quality, see the EPA resources on vehicle cleaning runoff and related best practices. EPA guidelines on vehicle wash runoff
null
null
Final thoughts
Regular maintenance and washing of the undercarriage not only enhance your truck’s appearance but significantly extend its lifespan. Implementing the outlined methods and insights ensures that oil residue is effectively managed and the risk of corrosion is minimized. A well-maintained fleet upholds operational efficiency and reduces long-term costs, proving that investment in cleaning processes yields substantial returns.