Regular maintenance of your fleet’s trucks, especially the often-overlooked roof, is crucial for preserving their appearance and extending their lifespan. This article provides fleet managers, trucking company owners, and construction supervisors with a comprehensive guide on effectively cleaning truck rooftops. We’ll delve into preparation steps, choose appropriate cleaning methods, and finalize with rinsing and drying techniques that ensure optimal results. Through a clear understanding of each aspect, you can keep your fleet looking pristine and maintain the integrity of its surfaces.
null
null
Raising the Roof: Mastering Safe, Thorough Washing of the Truck’s Top
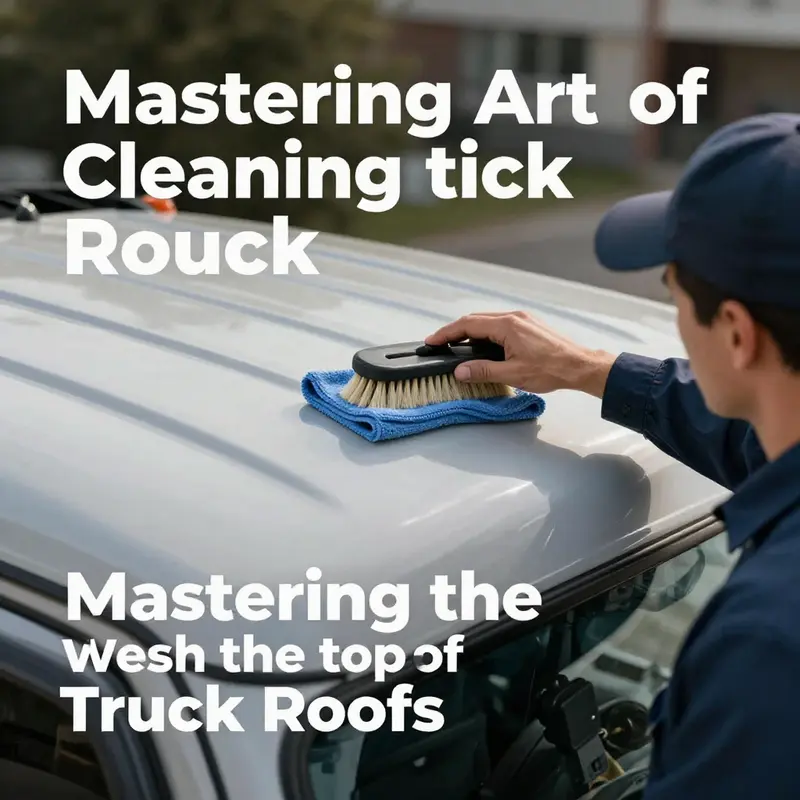
The top of a truck collects more than just sun and wind. It gathers dust, tree sap, airborne pollutants, and stubborn road grime that has crawled upward from the spray and the elements. In a well-kept fleet, the roof isn’t an afterthought; it’s a frontier that, when neglected, dulls the vehicle’s overall appearance and undermines protection offered by wax or sealants. Cleaning the roof is a disciplined operation, not a quick soak and swipe. It requires preparation, the right tools, patience, and a careful touch that respects the finish and the structural components tucked along the edges. This chapter threads together the practical steps with the underlying rationale, tracing a seamless path from dry removal to a final, spotless top that looks as good as the truck beneath it. It invites you to picture the roof as a part of a larger system—one that benefits from consistent practice and a methodical rhythm rather than abrupt, improvised scrubbing. In this sense, washing the top becomes less about a single act of cleaning and more about an ongoing habit that protects the paint, the seals, and the investment in the truck itself.
Preparation begins long before water touches the metal. The first move is to create a zone of control around the vehicle. Dry removal is essential because loose grit, fine dust, and stuck-on pollen can slip across the surface and micro-scratch the paint when you begin washing. Start with a soft brush, a feather duffer, or a microfiber cloth. These tools are gentle enough to lift debris without grinding it into the finish. The goal is to lift—not rub—grit. If you can see a visible film or film-like layer on the roof, commit to a few careful passes with a dry implement before you introduce any moisture. This initial step reduces the likelihood of fine scratches that can become more evident once the solvent or soap begins its work.
From the moment you decide to wash the top, avoid applying high-pressure water directly to the painted surface. High pressure can strip away the clear coat and leave chips that propagate with time. That warning is not merely cautionary; it reflects a fundamental truth about automotive finishes. The roof, with its horizontal expanse, is particularly susceptible to streaking and micro-marks if a jet of water is driven with force. If the roof is thick with mud or caked grime, you may need to break the job into stages: loosen and lift the mud first with a brush, then switch to a gentler approach with soap and water. The key is to respect the surface and use tension carefully—never drag the bristles or towels across the finish with rough pressure. The result should be a surface that remains true to its original gloss, free of micro-scratches that catch light and look like pinpricks in an otherwise smooth panorama.
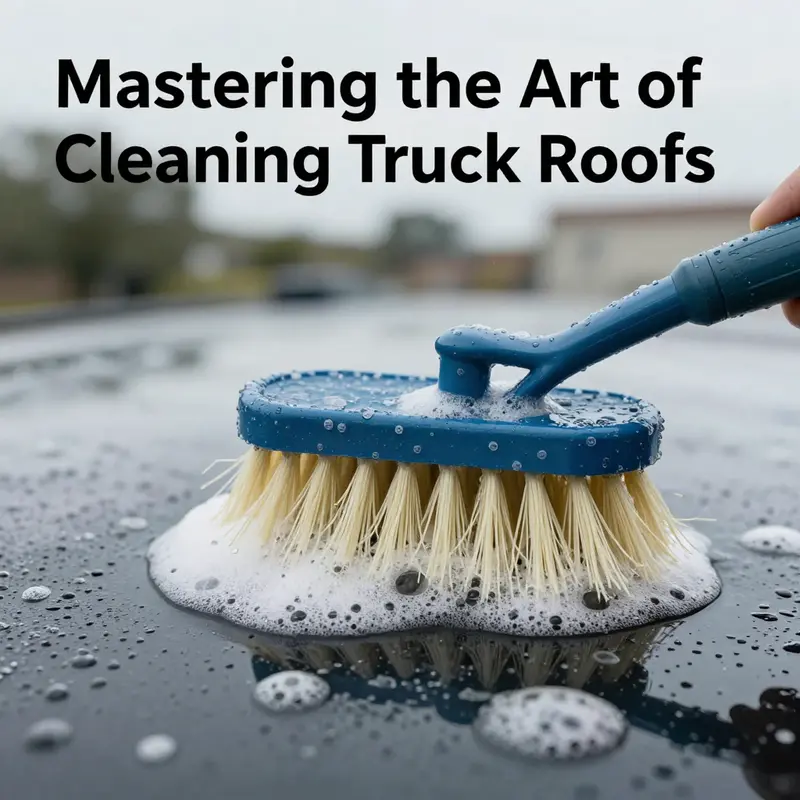
Choosing the right cleaning method for the roof hinges on the degree of dirt and the condition of the finish. For heavy mud and grime, a soft-bristled brush or a long-handled wash mitt becomes your primary instrument. Dip the brush into a bucket of soapy water designed for automotive finishes and gently scrub the roof in sections. Work from one edge toward the center and down toward the periphery, letting gravity assist the runoff. The approach keeps you in control and minimizes the chance of soap running into seals or interior vents, which would complicate the job. Gently scrubbing loosens embedded particles and lifts them away, reducing the risk of abrasion. The technique should feel like a patient, deliberate dance with the surface, not a brute force attack. When the dirt is stubborn, you can pause and reapply soap, then resume with a slightly more focused pass on the stubborn spot. For lighter dirt and dust, the roof can be brought back to life with a damp microfiber cloth or a soft sponge, rinsed frequently to avoid redistributing the same grime across the surface. The cloth should be kept clean and free of gritty matter; otherwise you will be rubbing grit into the paint and creating new micro-scratches in the finish.
A pH-neutral car wash soap is the recommended partner in this choreography. Household detergents—like dish soap—may seem convenient, but they strip wax and erode protective layers with repeated use. For the roof and the rest of the body, a soap formulated for automotive finishes helps preserve the integrity of the paint and any wax that remains. If you are cleaning a surface that has been neglected, you might consider first applying a pre-rinse to soften dry residue. The pre-rinse can be light, just enough to undermine the crust and give the soap a chance to work more effectively. If you decide to use a pressure washer, use it with caution. Keep the nozzle at least 12 inches away from the surface and select a wide-angle spray tip to reduce the force hitting any one spot. Begin from the top, then progress downward so that dirty water flows off naturally rather than pooling and drying on the surface. Do not linger with the jet in one location, and never spray directly at fast-moving, sensitive areas like seals or weatherstrips, which could dislodge or tear over time.
Rinsing and drying are the next crucial phases. Thorough rinsing is essential to remove all soap residues, which can attract dirt and cause streaks. Soap left on the roof can create a chalky film as it dries in the sun, making the surface appear dull and uneven. A complete rinse is more than a flush of water; it is a deliberate rinsing that dislodges all soap sap and ensures the roof emerges free of residual cleaning agents. After rinsing, drying the roof immediately with a clean microfiber towel prevents water spots and mineral deposits from forming. Mineral-rich water can leave specks that mar the surface and are particularly noticeable on dark or highly polished finishes. The sequence—rinsing then thorough drying—helps maintain a glossy, uniform finish across the roof’s expanse. When possible, run a final check with a dry cloth to intercept any small droplets that escaped the towel and to ensure there is no moisture lingering in tight corners or along edges where water might cling and later evaporate as a spot or streak.
Timing is a decisive factor in this maintenance routine. You should avoid washing your truck when the vehicle is hot or in direct sunlight. The sun can heat the paint to temperatures where the cleaning solution dries too quickly, causing streaks, water spots, and an uneven appearance. A shaded area, an overcast day, or a cool morning makes for the cleanest, most controlled session. If you do end up with a sunny day, pause often to test a small area to see how the soap dries and adjust your technique accordingly. The interior also deserves attention during roof washing. Water can drip into the cabin through sunroofs, vents, or window seals, which can soak upholstery or create a damp, uncomfortable environment. To mitigate this, you can place towels or plastic sheets over seats and floorboards as a protective layer. This small precaution ensures you do not create a secondary cleanup problem while addressing the roof. Protection is a common-sense practice, not an indulgence; it preserves the interior’s condition and makes the entire cleaning process more efficient because you avoid chasing water where it should not go.
Working the roof requires attention to the edges, seams, and any vents that may exist on the top surface. A clean roof does not simply mean clear of dirt; it also means surrounding components are safeguarded and not inadvertently disturbed during washing. If you see a seam or edge where moisture can hide, take a moment to re-wipe those zones with a softer, drier cloth to lift any stubborn moisture, then consider a light pass with soap just to refresh the area. A gentle, edge-first technique can prevent pooling in corners where gravity tends to collect water. You want the roof to feel uniform, as if the car’s top is a single plane unbroken by streaks or uneven patches. In practice, this means maintaining a consistent pressure across the surface and checking your progress from different angles to catch any missed spots.
Technique matters as much as product choice. A gentle scrubbing motion is the right approach. Start from one edge and work your way across the surface, letting the cloth, sponge, or brush repeat the action in a controlled, measured manner. This approach minimizes streaking and ensures the soap is evenly distributed and rinsed away. If you encounter stubborn grime—think road tar, sap from trees, or heavy industrial fallout—reassess the soap and water combination rather than escalating force. Sometimes a second pass with a clean cloth and fresh soapy solution is all that is needed. If you feel the surface resisting your efforts, pause, step back, and approach the problem area with fresh direction. This patient mindset—paired with a soft touch and the right tools—tends to yield the clean, gleaming roof you want without creating new problems in the process.
To help ground these ideas in practical realism, consider one long-standing principle of vehicle maintenance: the top of the truck is part of a larger system. You are not just removing dirt; you are protecting the topcoat, preserving the sealants and wax, and maintaining the vehicle’s overall appearance and resale value. When you follow a consistent routine, the roof stays cleaner longer and the subsequent wash becomes faster and more straightforward. The more you do this with care, the less likely you are to encounter stubborn stains or damage from aggressive cleaning. There is a quiet confidence that comes from knowing you have a reliable method you can repeat each time without second-guessing your steps. The routine then becomes less a chore and more a practiced ritual that honors the truck as a work tool and as a moving statement of your fleet’s care.
As you gain experience, you may wish to connect this roof care to broader fleet maintenance practices. The roof can reveal subtle signs about the vehicle’s overall condition. If you notice persistent stains, unusual discoloration, or the appearance of fine cracks, you might be looking at issues that go beyond dirt and into the realm of paint wear, UV exposure, or sealant degradation. Observing these indicators can guide you to more thorough maintenance strategies, such as re-waxing or applying sealants in a manner compatible with the truck’s paint system. The roof thus becomes a micro-local diagnostic site, offering clues about how the vehicle holds up in challenging environments. In this sense, washing the top is not a standalone chore; it is a moment of contact with the vehicle that can inform broader care decisions and help you plan a more comprehensive maintenance calendar for the entire fleet.
To illustrate how this approach translates into real-world practice, you can see this principle echoed in broader guidelines that emphasize safe methodology, appropriate materials, and careful technique. The emphasis on using soft materials—whether a microfiber towel or a soft brush—aligns with the broader industry understanding that scratching must be avoided at all costs. The insistence on a cool, shaded environment mirrors the practical realities of outdoor work, where temperature and sunlight can undermine the quality of a wash. The insistence on rinsing thoroughly and drying promptly is a direct antidote to water spots and residue that attract more dirt in the future. And the careful handling of interior protection during roof washing demonstrates an integrated sense of stewardship toward the entire vehicle, not just a single surface.
Throughout this process, it is helpful to keep a small kit in the truck or wash bay that contains the essential tools for roof cleaning: a soft-bristled brush, a couple of clean microfiber towels, a spray bottle with pH-neutral car wash soap, a bucket of clean water, a damp sponge, and a dry towel for the final pat-down. The presence of a kit reduces the friction that can creep in when you are trying to locate supplies mid-task. It also reinforces the habit of planning ahead rather than improvising on the spot. If you are responsible for multiple trucks, adopting a standardized kit and a consistent procedure can markedly improve efficiency while maintaining quality. The more routine your process, the less you will have to think through each step, enabling you to focus on the nuances—the angle of light on the roof, the way soap beads run down the surface, and the quiet satisfaction of a clean, uniform top.
For readers who want a broader framework beyond the hands-on steps, there is value in considering the roof wash as part of a mobile or on-site service approach. The literature on mobile truck wash services emphasizes method, efficiency, and safety. A well-designed, client-centered approach can standardize the sequence of actions you perform, from initial dry clean to final dry. If you are integrating roof washing into a larger service offering, you may also want to align your process with facility management standards and compliance considerations that apply to truck wash businesses. In particular, the emphasis on gentle cleaning methods, careful waste management, and responsible use of cleaning agents can reinforce a professional image and support sustainable operating practices. The roof, seen through this lens, becomes a gateway to wider quality standards and customer satisfaction. Proven strategies for cleaning grease and tar off your trucks fast demonstrates the kind of careful, targeted techniques that can complement the more general guidelines discussed here.
As you plan future washes, you might consider how to handle more challenging conditions. If you operate in climates with heavy pollen, sea salt exposure near coastal roads, or frequent road tar from industrial routes, you can adapt your approach accordingly. You may need to adjust the frequency of roof washes, increase the attention given to the edges, or allocate extra time for sections that accumulate grime more quickly. The important point is that the method remains consistent: dry removal first, then a measured cleaning with appropriate soap, careful rinsing, and prompt drying. The exact products may vary, but the principles stay the same. With time, you will find your own rhythm—the cadence of the brush, the way the water beads on the surface, and the quiet, satisfying moment when the roof gleams with a uniform sheen.
The top of a truck is a canvas that bears witness to a fleet’s discipline and care. When you apply a thoughtful method, you protect not only the appearance but also the structural integrity of the paint. You minimize the risk of wear on the clear coat and you maintain maximum reflectivity, which contributes to visibility on the road and a perception of professionalism in the yard. The roof’s cleanliness becomes a reliable indicator of the overall maintenance mindset that governs a fleet. It is not just about looking good; it is about taking responsibility for the long-term health of the vehicle and the people who rely on it daily. In this light, roof cleaning transcends its practical function and becomes an expression of stewardship, a small but meaningful part of sustaining performance, safety, and pride in work.
For further reading on the broader scope of mobile truck wash practices, including specifications and applications, you can consult more technical guides that consolidate industry knowledge and practical tips. This external resource complements the hands-on experience described here, providing a broader view of how the top-cleaning process fits into mobile operations and fleet services: https://www.maytech.com.au/blog/a-complete-guide-to-mobile-truck-wash-specifications-types-and-applications. It offers a structured overview of approaches that professionals use in field conditions, including considerations for safety, efficiency, and environmental compliance. While the day-to-day act of washing the roof is the focus of this chapter, understanding the wider framework can help you optimize your own routines and align them with industry best practices.
In summary, washing the top of a truck is a disciplined, repeatable process that respects the finish, protects interior and exterior components, and supports a broader maintenance philosophy. Begin with dry removal to prevent scratches, then choose the right cleaning method tailored to the level of dirt. Use a pH-neutral soap, avoid harsh household cleaners, and employ a cautious, top-to-bottom rinsing strategy if you use water under pressure. Dry promptly with soft, clean towels, and always mind the sun and interior protection. With practice, the roof will stay bright, the rest of the paint will shine, and the truck will project the care that underpins reliability and longevity on the road. This approach makes roof washing a predictable, dependable, and even satisfying part of fleet maintenance, one that you can apply consistently across every vehicle in your lineup.
Rinse with Purpose, Dry with Diligence: Mastering the Top-of-Truck Wash to Preserve Paint, Roof Seals, and Longevity

The top of a truck is both a crown and a work surface, bearing the brunt of wind, weather, and whatever you haul at highway speed. It deserves the same careful attention you give the rest of the sheet metal, if not more. Rinsing and drying are not mere afterthoughts of cleaning; they are critical steps that determine how well the roof resists water spots, mineral deposits, and the slow creep of time on seals and finishes. This chapter threads together the practical sequence of rinsing and drying with a mindset aimed at protecting the roof, preserving the finish, and making future cleaning easier. It is a continuous, integrated practice—one that begins long before the water touches the roof and ends only after the last corner is dry and the surface looks uniform and smooth. Throughout, the emphasis is on control, patience, and consistency, because even small missteps in the rinse or dry phase can leave marks that take more effort to remove later.
The first move is a prelude of caution. Before any soap touches the roof, start with a thorough dry removal of loose dust, sand, and pine needles. A soft brush, a feather duster, or a microfiber cloth can lift the topmost grime without scratching. This dry removal is essential because it guards the clear coat and any painted surfaces against scratches that occur when abrasive particles are dragged across the finish during a wet scrub. The roof is often a victim of finer contaminants that cling to the surface and mask themselves as nothing more than dirt. When you begin rinsing and scrubbing, those particles can become micro-sabers, scoring the finish as you work. If you skip the dry removal step, you may pay later in the form of micro-marring that dulls the sheen and demands more aggressive polishing to restore. The discipline of dry removal sets the stage for a gentler, more effective wash.
Next comes the rinse pattern that prepares the roof for any cleaning solution and the actual scrubbing that follows. The recommended approach begins with a broad, slow, low-pressure rinse over the entire roof to loosen the largest specks of dirt and any caked mud. A garden hose with a gentle spray nozzle is ideal for this stage because it allows you to modulate pressure and keep the water moving rather than concentrating it in one place. This low-pressure pre-rinse serves multiple purposes: it avoids pressure hotspots that can push water under seals or into small crevices, and it reduces the likelihood of blasting away wax or sealant in a single moment. If you are dealing with stubborn grime or heavy mud, you can then move to a more deliberate, controlled scrubbing phase, but you should always start with broad rinsing to reduce the risk of grinding grit into the finish.
For heavier mud or grime, a soft-bristled brush or a long-handled wash mitt is the preferred tool. Dip it into a bucket of soapy water and work in sections, gently agitating the surface rather than grinding. The roof is not a large canvas that benefits from brute force; it is a surface that asks for even pressure and mindful technique. Work from the leading edge toward the tailgate, and from the center out to the edges in a methodical pattern. This section-by-section approach gives you control and helps ensure you don’t miss spots or reintroduce dirt to previously cleaned areas. The goal is to lift grime with the friction of a soft tool, then release it with a rinse so that it does not settle back onto the paint or into seams and joints.
A critical decision point happens when you consider using a high-pressure rinse. High pressure has its place, but it demands restraint here. If used too aggressively, it can lift wax, strip protective coatings, or even push water into roof seals where moisture can later lead to mold or rust. The guidelines are clear: hold the nozzle at least 12 inches away from the surface, use a wide-angle spray tip—such as a 40-degree pattern—and keep the nozzle moving. Start at the top and work your way down, allowing gravity to help the water carry grime off the surface. Do not linger on a single spot; the risk of painting your roof with water pressure increases when the jet remains fixed and concentrated. This approach protects the roof while still delivering an efficient rinse when heavy soils demand extra power.
The choice of cleaning agents follows a simple but important rule: use a dedicated car wash soap that is pH-neutral and formulated for automotive paint. Household detergents can strip wax and dull the clear coat over time, which complicates maintenance and can necessitate refinishing work down the line. The soap should be mild enough to lift grime without attacking the finish, yet robust enough to break the bond between the dirt and the roof. The rinse sequence is designed to remove soap completely after the scrubbing phase. Residual soap residue can leave streaks or attract new dirt, negating the benefits of your careful scrubbing. So, after the scrub, give the roof a full, thorough rinse with the same low-pressure approach you used initially. The objective is a clean, soap-free surface that dries evenly without leaving film or spots.
As the soap and grime are removed, you should watch the surface for any remaining trouble spots. Areas with stubborn stains or minerals call for a targeted approach. A secondary pass with light, deliberate scrubbing in these zones can dislodge residues that resist the first pass, after which a final rinse flushes away the loosened particles. When you have a uniform, slick surface, you are ready to move to drying, the phase where patience is especially rewarded. Drying is not merely a cosmetic step; it is a protective practice that reduces water spots, curtails mineral deposition, and preserves the roof’s finish. The technique you employ during drying has a direct impact on how the roof looks in the morning light and how easy it will be to maintain in the weeks ahead.
The drying stage calls for a clean, dry microfiber towel, chosen specifically for its lint-free and non-abrasive properties. A terry cloth towel or any cotton rag should be avoided; these can shed fibers or trap grit that could scratch the paint. The rule here is simple: dry immediately after rinsing. Allowing water to sit on the roof invites mineral deposits and water spots, especially if the roof sits in direct sunlight or continues to be warm after washing. The microfiber towel should be large enough to cover substantial sections of the roof, and you should work in a pattern that ensures you dry each area completely before moving on. If you leave a patch damp, it can attract dust and create a subtle haze as the water dries and mineral content is left behind.
A practical technique that contributes to a streak-free finish is the “pat, don’t rub” method. Instead of vigorous rubbing that can grind minerals into the paint or push water into tiny seams, gently pat the towel onto the surface and lift away. This technique minimizes friction and reduces the risk of micro-scratches. You should also work in sections, especially on large or tall roofs, to make sure no area is overlooked. Completing one section before moving to the next helps avoid missed spots that can become obvious as water evaporates and leaves streaks.
Washing the roof in direct sun invites another set of challenges. Even with a cool, moist day, sunlight can speed up evaporation and leave water spots or mineral residue more quickly. If possible, perform the rinse and dry in a shaded area, or choose early morning or late afternoon when the sun is lower and the temperature is milder. If shade isn’t available, you can mitigate sun exposure by working rapidly but carefully and using a slightly cooler rinse water, if your supply permits. The goal is to give the surface enough moisture for easy rinsing while preventing rapid drying that leads to spots and mineral films.
Beyond the mechanical steps, there are practical considerations that tie together the roof’s materials, its seals, and the long-term upkeep of the vehicle. The roof may be painted metal, aluminum, fiberglass, or a composite with different coatings. Each material responds a bit differently to soap, water pressure, and drying techniques. For painted metal and aluminum, the emphasis is on minimizing abrasion, protecting paint seals, and preventing oxidation or micro-damage that can later translate into flaking or dullness. For fiberglass and composite roofs, the emphasis shifts slightly toward avoiding chemical interactions that could dull or craze the surface and ensuring that any sealant or coating remains intact. In all cases, the drying step remains essential because moisture can seep into seams and small gaps, especially around sunroofs, vents, or roof rails. A well-dried roof is less hospitable to mold, mildew, and water-driven issues that could undermine the roof’s integrity over time.
As a closing note on rinsing and drying, consider the role of the finish you apply after the roof dries. A light wipe of wax or a paint sealant can add a protective layer that helps repel water and makes future washings easier. The choice of finish should be compatible with the roof material and any existing coatings. If you have questions about the compatibility of a sealant with your roof material, the best practice is to consult guidance that covers the specifics of surface chemistry and protection. The point to remember is that a good rinse and a careful dry do not end with the last towel stroke; they set the stage for the next wash and contribute to a longer-lasting, more uniform finish that stands up to sun, rain, and road grime.
For readers seeking deeper discipline around rinse protocols, there is a broader discussion worth reviewing. A deeper dive into rinse discipline and operational wash standards can provide a more structured framework that aligns with fleet maintenance practices. For a deeper dive into rinse discipline, see best-practices-for-cleaning-food-grade-tankers. The emphasis there on controlled water use, consistent technique, and meticulous rinse sequencing mirrors the approach described here and reinforces the idea that the top of a truck deserves the same care as the rest of the vehicle. The underlying principle is simple: control the water, control the dirt, and control the outcome.
In the end, rinsing and drying the top of a truck is not a separate, isolated task. It is an integrated piece of a larger maintenance routine that keeps the vehicle looking good and performing well for years. The process requires attention to sequence, respect for the roof’s materials, and discipline in the drying method. With dry removal, controlled rinsing, gentle scrubbing, a careful final rinse, and a methodical drying pass, you cultivate a finish that resists water spots, breathes with better luster, and presents a professional, well-kept appearance on the road. This is how a truck’s top becomes not a hidden surface but a testament to meticulous care, a surface that stands up to time, weather, and the daily demands of life on the road.
Final thoughts
Maintaining the cleanliness of your truck fleet, particularly the roofs, is an essential task that contributes to aesthetic appeal and vehicle longevity. By implementing the preparation methods, choosing suitable cleaning techniques, and practicing effective rinsing and drying, fleet managers can dramatically enhance their vehicles’ appearance and protect against damage. Keeping your trucks in top condition reflects positively on your company’s image, solidifies your commitment to quality, and safeguards your investment.