Washing a truck bed is more than just a routine chore; it’s essential for maintaining the integrity and longevity of the vehicle. For fleet managers and operators in logistics, trucking, and construction, a clean truck bed not only enhances the appearance of the fleet but also prevents potential damage to the bed’s surface and underlying materials. This guide will walk you through detailed strategies on preparing for the wash, effectively rinsing, thoroughly cleaning, and properly drying and protecting your truck bed. Each chapter is designed to provide you with practical insights that can be implemented across your fleet, ensuring maximum efficiency and durability.
Preparing the Bed: Laying the Groundwork for a Safe, Thorough Truck Bed Wash
Preparing a truck bed for washing is more than a ritual of cleanliness; it is a deliberate set of decisions that protect the finish, prolong the life of protective coatings, and make every subsequent scrub more effective. When you treat preparation as a careful, guided process, you reduce the risk of scratches, water intrusion into seams, or lingering residue that can attract more grime later. The bed becomes a controlled zone in which dirt succumbs to the action of a brush and cleaner rather than a stubborn opponent that forces you to overwork the surface. In this sense, preparation is the backbone of a successful wash, a quiet but essential act of stewardship for a vehicle that carries its value in the sturdiness of its bed and the clarity of its coat. The goal is straightforward: create an environment where grime yields to care, where tools glide with purpose rather than wrestle with resistance, and where the finish remains as pristine after the rinse as it was before the job began.
Begin with a clean slate by clearing the bed of everything that could get in the way or cause damage. Remove cargo, tools, tarps, hoses, and any loose items that might shift during washing. Even tiny objects can scratch a surface if your hands slip or the brush catches on a corner. If your bed has a removable liner or rubber mat, consider taking it out. Liner removal grants you full access to the bed’s corners and seams and allows you to dry those areas thoroughly after washing. If removal isn’t practical, shield the liner with plastic sheeting or drop cloths to keep cleaner and water from saturating the substrate where you cannot fully dry it later. This step isn’t merely about tidiness; it protects the layers beneath from unintended chemical exposure and helps you spot trouble spots that would otherwise hide under a pile of cargo.
As you clear the space, give special attention to any electrical components or wiring near the bed’s edges. Exposed wiring and sensors deserve a careful eye because moisture and cleaners can cause corrosion or short as you work. A quick inspection for loose fasteners or protruding bolts is prudent as well; catching a snag before you start scrubbing saves you from misdirected scrubs or accidental tool impact. With the area ready, you’ll approach the pre-rinse with a clearer sense of where grime hides, and you’ll have a safer, more efficient workflow when the water begins to move.
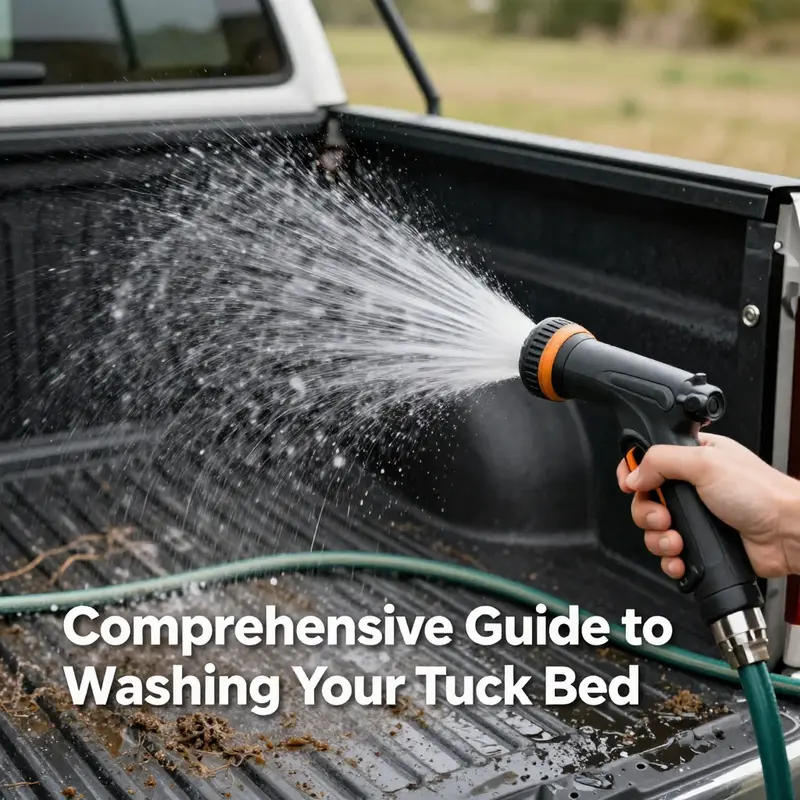
The next phase is the pre-rinse, a step that dramatically reduces the effort required to remove grime and protects the coatings you intend to preserve. A garden hose or a low-pressure spray is ideal for this stage. Begin at the cab end and work toward the tail; gravity will help the dirty water travel away from channels and seams, reducing the chance of redepositing dirt. The aim here is to loosen and whisk away loose dirt, dust, and debris without driving water into crevices or lifting coatings. High-pressure jets should be avoided, especially if your bed has a liner or painted surfaces. A blast of indiscriminate force can push moisture where you don’t want it, and it can push grime into corners where it will resist removal later. A gentle, controlled rinse sets the table for the cleaning phase by exposing the true extent of the grime and revealing any spots that will demand more attention.
With the bulk of the loose soil out of the way, choose a cleaning solution that respects the bed’s material and coating. For painted beds, a mild, pH-neutral car wash soap is generally the safest choice. It cleans effectively without compromising protective layers and rinses away more completely than harsher degreasers. If your truck bed includes aluminum or stainless steel components, you may opt for a cleaner formulated for metal surfaces, ensuring residues won’t dull the finish or promote corrosion. The overarching guideline is clear: avoid bleach, ammonia, or strong degreasers unless the manufacturer explicitly approves them for your bed material. Neutral cleaners that are gentle on coatings reduce the risk of damage while still lifting oil, brake dust, and road grime. Keeping a mild approach at this stage doesn’t limit your results; it protects the integrity of the bed for years of use.
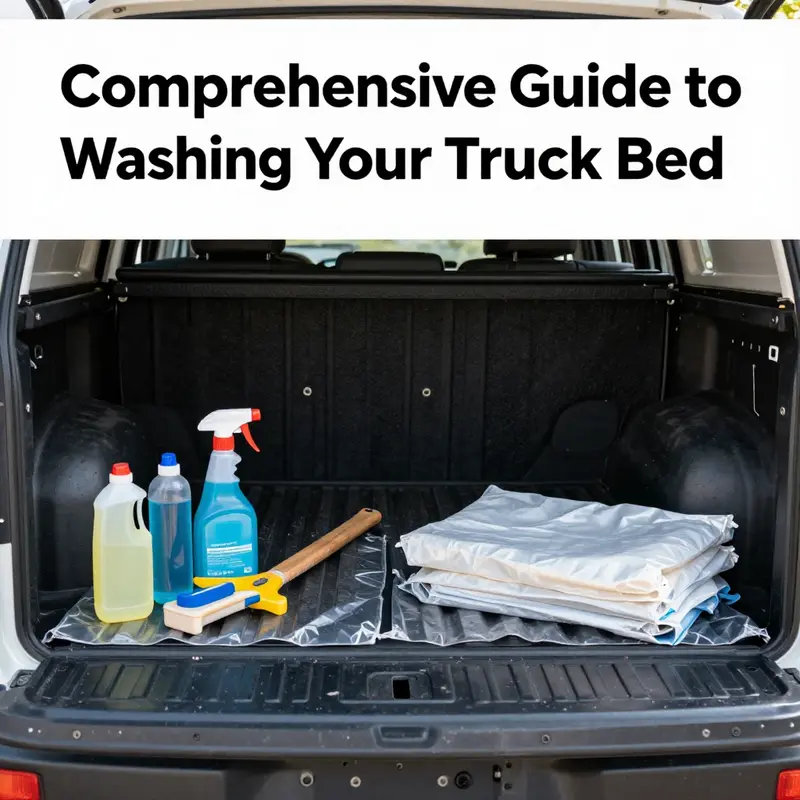
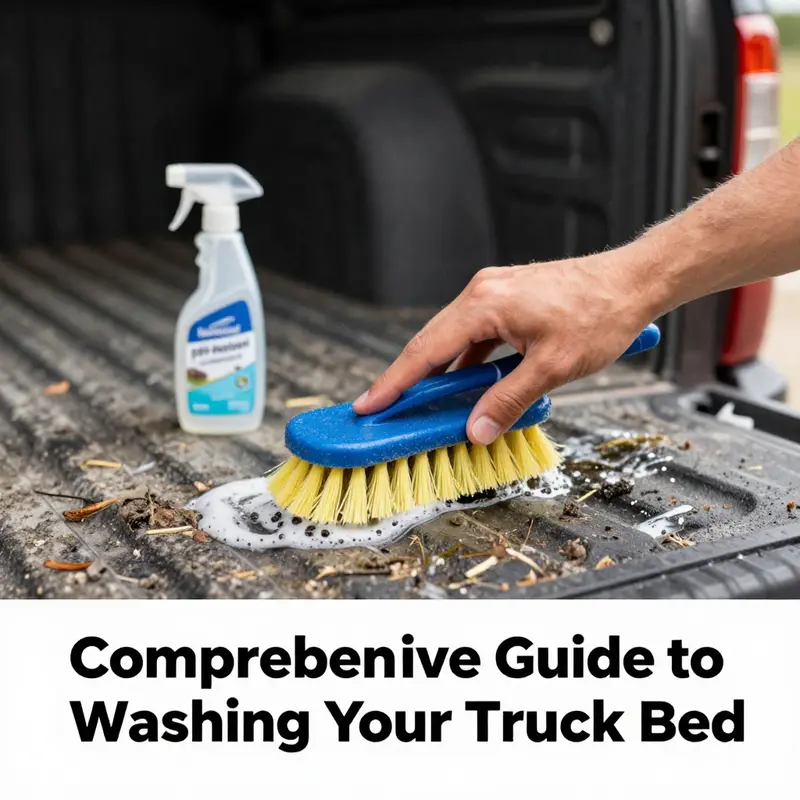
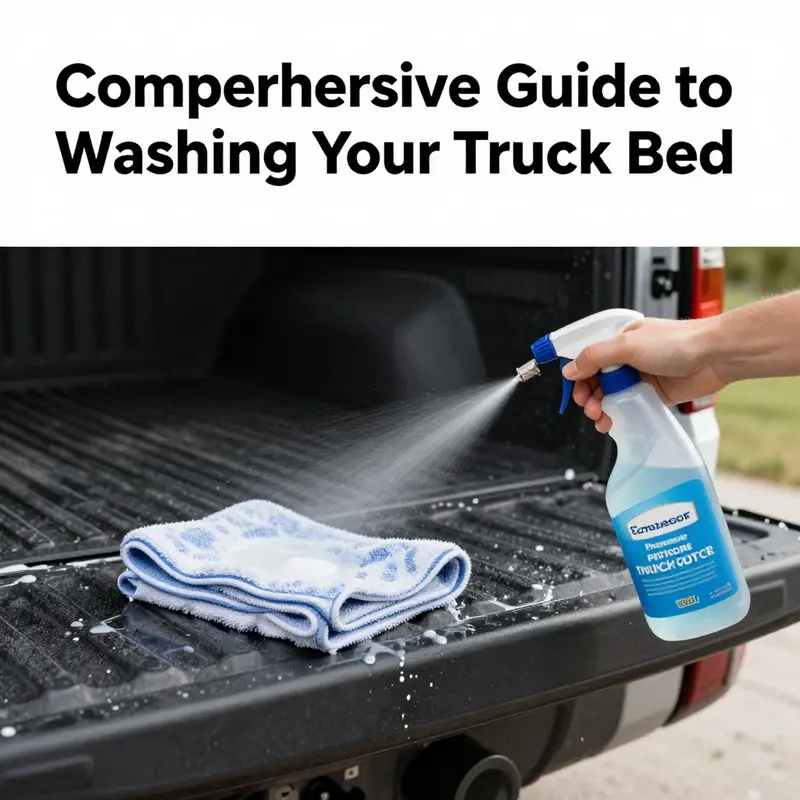
As you gather supplies, arrange your tools so they are within easy reach. A soft-bristled brush or sponge, a bucket of warm, soapy water, a non-abrasive scrubbing pad, and a clean microfiber towel or chamois form the core toolkit for the job. A dedicated sprayer helps you apply cleaner evenly without soaking crevices, and a small, flexible brush is invaluable for corners, bolts, and seam lines. For stubborn stains—like dried mud near the walls or oil residues near the tailgate—keep an old toothbrush or a small detailing brush handy. The trick is to stay composed and methodical. Rushing invites missed spots or accidental scratches, while a calm, measured pace yields a uniformly clean surface that is easier to dry and less prone to water spots after the session.
A practical workflow that many technicians find effective is to work in sections. Dividing the bed into front, middle, and back zones ensures you do not overlook any area and helps you regulate the amount of cleaner you apply. This approach is not a rigid checkpoint but a rhythm that makes the process feel manageable rather than monumental. When you encounter a liner or a more sensitive surface, tailor the technique to that material. For rubberized or polyurethane liners, consider a cleaner specifically formulated for liners to protect the texture and resilience of the surface as you lift grime away. For guidance that extends beyond basic washing and into handling stubborn contaminants, you can explore proven strategies for cleaning grease and tar off your trucks fast, which offers expert approaches that apply across many cleaning contexts: Proven strategies for cleaning grease and tar off your trucks fast.
Environment and timing also play a critical role in preparation. Whenever possible, choose a shaded spot for the wash. Direct sun can cause cleaners to dry too quickly, leaving streaks that are harder to wipe away and increasing the risk of water spots forming as the surface heats unevenly. Shade helps you maintain a consistent dwell time for cleaners and reduces the likelihood of heat-related expansion or warping in certain bed materials. If shade isn’t available, work briskly and rinse promptly, keeping dwell times short so the solution remains effective but not overly aggressive. A cool, controlled environment also minimizes the chance that the liquid evaporates too fast, which can leave behind mineral deposits that may require extra scrubbing later.
Understanding the bed’s construction is part of preparation. Rubberized beds behave differently from fiberglass or painted steel beds, and each surface reacts to cleaners in its own way. If you know you have a liner, you should confirm the compatibility of your chosen cleaner with that liner, since some models tolerate milder formulas while others require more specialized products. If a liner is temporary or removable, you gain additional flexibility to target difficult spots and to dry the area thoroughly after washing, reducing the chance of moisture becoming trapped in seams. The same caution applies to any contained coatings or specialty finishes; test a small, inconspicuous patch first and observe for any change in color, texture, or gloss before proceeding. This measured approach isn’t hesitation; it is a precaution that ensures your method remains safe and effective over time.
Before you rinse again, it’s worth revisiting the cautions that keep your wash safe and durable. Never use a pressure washer directly on a bed liner or painted surfaces. The force can lift coatings, force water behind protective layers, and create bubbling or rust over time. Never mix bleach, ammonia, or strong degreasers unless you have explicit manufacturer approval for the bed material you are treating. These guardrails protect the bed and the vehicle’s longer-term value, and they remind you to respect the material you are cleaning rather than trying to “power through” the grime. If you have edges where cables, lights, or seals are vulnerable, shield them from spray and solution to prevent unintended damage, and consider limiting spray to the bed area while keeping nearby components covered.
This careful preparation then transitions into the actual washing phase with a sense of control and assurance. The prep work you completed—emptying the bed, guarding sensitive areas, and choosing appropriate cleaners—creates conditions that allow the wash to proceed efficiently. The result is a cleaner bed that dries evenly and a finished surface that remains durable. If you want more contextual guidance about handling tough contaminants, you can explore the internal resource linked earlier for a broader technique set tailored to heavy soils and tar. The core principle remains the same: respect the surface, pick the right tool for the job, and maintain a steady, thoughtful pace. This mindset reduces the risk of damage and increases the likelihood of a uniform, glossy finish that will stand up to exposure and use.
Finally, although preparation is often seen as a preliminary chore, it plugs directly into the quality of the final result. When the bed is ready, the actual wash goes smoother, and you are better positioned to preserve the bed’s integrity during future cleanings. If you choose to apply a protectant after washing and drying, select one that is compatible with your bed’s material. A protectant can help repel water, resist staining, and enhance the coating’s longevity, but it should be applied only after the bed is completely dry and free of cleaner residue. This optional step can compound the benefits of a thorough wash, giving you a bed that not only looks clean but also resists the next round of dirt and weathering. As you move forward to the washing stage described in the following sections, you’ll appreciate the grounding that preparation provides: a bed that accepts cleaner evenly, dries without drama, and stays better protected through the seasons.
For readers seeking further reference on care beyond the wash itself, broader maintenance guidance can be found in industry resources that discuss long-term bed maintenance and protective strategies. External materials such as dedicated bed liner care guides offer practical tips that extend the life of coatings and improve overall durability. To keep the chain of knowledge balanced, reference materials that focus on coatings, liners, and the interplay between cleaning and protection can help you maintain a vehicle’s utility and appearance without guesswork. If you later want to explore how professional fleets maintain bed integrity during regular servicing, you’ll find relevant perspectives in the broader fleet care landscape. And as you advance to future chapters, you’ll see how preparation links to ongoing care, enabling you to keep your truck bed looking and performing at its best across seasons and workloads.
The Gentle Flush: Mastering the Rinse to Protect Your Truck Bed’s Finish
A proper rinse is more than a quick splash of water. It is the foundation of a clean, well-preserved truck bed. When done with care, rinsing clears away loose dirt and debris, prevents soap from sneaking into seams, and sets up the deeper cleaning stage for success. If you want the bed to look good and last longer, you start with a rinse that respects the bed’s coating, its liner, and the metal beneath. The goal is a thorough, even flush that carries grime toward the tailgate rather than pushing it into hard-to-reach corners. This approach reduces the risk of streaks, rust formation, and moisture buildup, all of which can quietly shorten the life of a bed that carries heavy use.
Preparation is the quiet first act that makes the rinse work. Begin by removing all contents from the bed. Tools, straps, lumber, or any loose items can create hidden shadows of dirt when the water starts moving. With the bed empty, step back and safeguard areas that could be harmed by spray or splashes. If your cab windows or trim could collect water droplets or splatter, protect them with plastic sheeting or towels. The surface you’re about to rinse is not a battlefield; it’s a living space for coatings designed to shield metal from the weather. Covering vulnerable points reduces the chance of water finding its way into seams, bolts, or edges where it could cause discoloration or corrosion over time.
With the space prepared, the cleaning approach hinges on choosing the right water pressure. The instinct to blast away grime with high pressure is strong, but a powerful stream can pry at edges of bed liners, force water under a liner, or knock loose coatings. The objective is to remove debris without compromising the protective layer. A garden hose with a wide spray nozzle—set to a gentle yet effective setting—fits this purpose well. Treat the rinse like a careful sweep rather than a power wash. Gradually increase coverage across the bed, and work from the highest point down toward the tailgate. This top-to-bottom flow mirrors how gravity helps carry grime away from critical seams and into the open, where it can be flushed out rather than pressed into corners.
As you begin the rinse, stay mindful of the bed’s material. Plastic, fiberglass, and painted steel each respond differently to water, and some liners are more sensitive than others. For painted beds or rubberized coatings, the rinse should remain steady and moderate. If the bed has a liner, the rinse should not rely on pressure to dislodge stubborn grime; instead, minimal force and sustained spray will often do the job. The moment you notice the spray pushing at a seam or bubbling along a surface is the moment to ease back and adjust. The bed is a curated surface that rewards patience, not brute force. After all, a clean bed is not only about removing visible dirt but also about preventing the micro-damage that appears as discoloration, dullness, or small spots of rust after heavier use.
Now comes the practical choreography of rinsing the bed clean. Before applying any cleaner, give the surface a light, even rinse to remove loose dirt. This pre-rinse prevents the cleaner from binding dirt into the coating and makes the subsequent cleaning more effective. If the bed has deep grooves, corners, or seams—areas where mud, sand, or brake dust tend to accumulate—make a focused pass with the spray to loosen grime trapped in those crevices. The goal is to reduce the amount of agitation needed later. A soft-bristle brush can be reserved for areas that stubbornly cling to the surface, but only after the initial rinse has softened the grime. Gentle scrubbing is the rule: the bed’s coating is not an adversary to be conquered, but a surface to be respected and maintained.
Having prepared and pre-rinsed, you can move into a more deliberate cleaning sequence that blends rinsing with targeted brushing. Apply a cleaner that is appropriate for your bed type—one that is pH-balanced and designed for coated or painted finishes. Let the cleaner dwell for a short interval, typically three to five minutes, to break down soils without drying out or weakening the finish. During this dwell time, you can use a soft brush or a non-abrasive pad to address stubborn spots. Focus especially on mud encrusted in the corners, oil stains near the cab line, and brake-dust accumulations along the walls. For rubberized or polyurethane bed liners, use a cleaner formulated for that specific material to preserve texture and color while maintaining the integrity of the liner’s surface. The mechanical action of brushing should be gentle but persistent, targeting the places where grime clings most stubbornly.
After the cleaner has done its work, it’s time for a thorough rinse that removes both cleaner and loosened soils. Use the same low-pressure setting to rinse away all soap residue. The objective is a spotless surface with no lingering cleaner in crevices or along seams, because any residue can attract new dirt or, in time, lead to dulling or staining. The rinse should sweep across the bed in a continuous flow, guiding water toward the tailgate so that soiled water can drain away naturally. A pause to re-check corners and edges is wise; sometimes a second light pass is needed to clear stubborn residues that have found small pockets of dirt near bolts, seams, or bed-wall junctions.
Drying is the next quiet act that seals the work. A microfiber towel or soft chamois is ideal for removing the last traces of moisture and preventing water spots. Drying not only improves appearance but also reduces the risk of moisture lingering in small crevices where rust could take hold in metal beds. If you’re in a rush, you can let the bed air dry, but do so in shade to avoid sun-induced streaking and uneven blotches. A final wipe-down after air drying can ensure every panel is clear of moisture before you consider protectant applications. This moment of care matters; moisture left behind can become a magnet for dust and more moisture, especially in humid climates or during periods of high rain exposure.
If you choose to apply a protectant after drying, select a product compatible with your bed liner or finish. A protectant or wax that is formulated for bed surfaces will help repel water, resist future stains, and extend the coating’s life. It is essential to verify compatibility with your bed’s material before applying any product. A protective layer can make future rinses even easier, as water will bead and sheet rather than cling. The decision to protect is a proactive investment, one that pays dividends in the long run through easier maintenance and better preservation of the bed’s aesthetic and structural integrity.
Beyond technique, there are practical notes that help ensure the rinse remains safe and effective. Never use a pressure washer directly on the bed liner or painted surfaces. The high-pressure jet can pry at edges, push water under liners, and start the process of bubbling or peeling that takes years to remedy. Harsh cleaners, including bleach, ammonia, or strong degreasers, should be avoided unless the manufacturer explicitly recommends them for your bed type. Each bed type—rubberized, fiberglass, painted steel—has its own set of sensitivities. When in doubt, consult the care guide appropriate to your bed type and stick to mild, designed cleaners. If you need a quick reference for material-specific care, you can explore broader cleaning strategies for troublesome contaminants such as grease and tar, which often require a slightly different approach than ordinary dirt. For more on that topic, you can check proven strategies for cleaning grease and tar off your trucks fast.
The rinse sequence also invites a broader reflection on the bed’s environment. Prepare the space so runoff is managed and the truck is parked on a level surface. If possible, position the vehicle over a drain or use a tarp to catch runoff to prevent environmental contamination. This is not only responsible practice; it also keeps the workspace tidy and reduces the chance of water pooling in corners where it can encourage mold or corrosion. If your bed is in a workshop or a commercial setting, the same principles apply, and the space can be organized to minimize movement and wear during routine washing. An orderly approach—clear workspace, gentle water pressure, thorough rinsing, careful drying—pays dividends in reduced maintenance costs and longer bed life.
As you finish this rinse routine, you’ll likely notice that the bed looks refreshed and ready for the next phase of care. The combined effect of proper pre-rinse preparation, gentle agitation, and meticulous drying is a bed that resists moisture retention and maintains its luster. The process is not merely about removing dirt; it is about preserving coating integrity, preventing rust, and extending the life of any liner that protects the metal beneath. In many fleets, the habit of a careful rinse translates into fewer touch-ups and lower long-term maintenance costs. The routine you establish today becomes the baseline for the next wash, ensuring consistency and reliability across every truck in the lineup.
For those seeking a broader context within the maintenance ecosystem, remember that the rinse is only one part of a complete care plan. Regular inspections of bed seams, bolts, and wall corners can reveal early signs of wear that a routine rinse might uncover. When you treat rinsing as a step in a longer sequence—rinsing, cleaning, drying, protecting—you align with best practices that emphasize prevention rather than reactive repair. This mindset is especially valuable for fleets that log heavy use, transport varied payloads, or operate in environments where dirt and grime accumulate quickly. The rinse then becomes not a mere chore but a strategic shield against degradation, a simple step that supports durability, appearance, and performance over time.
To connect this rinse-focused approach with practical resources, consider the broader body of care guidelines that exist for bed liners and painted surfaces. While the guidelines vary by bed type, the core principle remains consistent: use gentle water, targeted cleaning, and careful drying to minimize wear. If you’d like to explore a deeper, material-specific care pathway or case studies that illustrate how fleets maintain bed integrity over years of service, you’ll find that the essential rinse practice remains a consistent, dependable part of the routine. In addition, examining how other fleets implement these steps can provide inspiration for workflow improvements, staff training, and environmental safeguards that align with your shop’s capabilities. The rinse is the hinge between dirt removal and coating longevity, and getting it right unlocks smoother maintenance in days to come.
External resource for broader protection guidance: https://www.armorall.com/truck-bed-liner-care/
Deep Care, Deep Clean: A Thorough, Damage-Free Wash for Your Truck Bed
A truck bed endures a lot. It bears cargo that sprays, spills, and scavenges grit from the road. It faces sun, rain, and the occasional chemical or solvent spill. A thorough wash is not just about looking clean; it is a careful act of preserving paint, protecting coatings, and extending the life of the bed liner. When you wash with care, you remove corrosive grime before it can seize on metal, bake into corners, or creep under seams. The goal is a finish that resists moisture, resists staining, and resists rust. Achieving that outcome requires a plan that respects the bed’s materials and coatings. The approach is straightforward, but it must be deliberate. Begin with preparation, move through rinsing and cleaning, then finish with dry air or towel drying, and finally consider protection that matches the bed’s construction. This sequence works whether your truck wears a factory-painted bed, a rubberized liner, a polyurethane liner, or a fiberglass bed. Each surface has its own sensitivities, and the right cleaner can make the difference between a quick shine and a dull, hazy patch that begs to be redone.
Preparation is the first and most important stage. Start by removing every item from the bed. Tools, straps, tarps, and leftover cargo will distort your view of grime and can scratch coatings if dragged across the surface. Once the bed is empty, protect the cab windows and trim with plastic sheets or towels. Water and cleaners can creep into places you do not want, and you will not enjoy chasing little drips that appear on glass and chrome later. The next step is selecting the right cleaner. Household soaps and dishwashing detergents are tempting for their ubiquity, but they are not your friends here. They can strip protective coatings or cause discoloration over time. Instead, choose a pH-neutral cleaner designed for coated or painted truck beds. If you own a rubberized or polyurethane liner, you may need a cleaner formulated specifically for those materials so you do not dull the finish or degrade the liner’s integrity. A careful choice now saves you from corrective work later.
Rinsing follows, and it is not merely a prelude to scrubbing. Start with a gentle, wide-spray rinse from a garden hose. The nozzle should deliver a soft, even spray that lazily dissolves loose dirt and dust without blasting the surface. Work from top to bottom. This downward approach helps prevent streaking and makes the final appearance more uniform. Above all, avoid high-pressure washing directly on the bed liner or painted surfaces. The force of a strong jet can drive water into seams, lift coatings, or trap moisture beneath layers that were never meant to be exposed to such pressure. If your bed is equipped with an appended liner, you may be tempted to treat it like a stubborn rust, but restraint here is essential. The goal is to remove the surface debris without inviting water into places where it can do harm.
Cleaning the bed means applying cleaner evenly and letting it work. Spray the cleaner across the entire surface or apply it with a sponge. Allow it to sit for three to five minutes. This pause gives the cleaner time to break down grime, oil, and residue that cling to the metal or liner. The amount of contact is deliberate, not rushed. When it comes to stubborn spots, switch to a soft-bristle brush or a non-abrasive scrubbing pad. Gently work those areas where mud, brake dust, or oil tend to accumulate. If you are dealing with a rubberized or polyurethane liner, use the cleaner that matches the material. Some products are designed to maintain the look and integrity of these surfaces, and using the right cleaner helps prevent fading or cracking. Focus on corners and edges because these zones collect grime that often hides behind fasteners, seams, or the edges of the bed walls. A small brush or even an old toothbrush can reach around bolts and in tight seams where larger tools cannot.
At this point, you may encounter dried-on residues or resin spills. Resin can be particularly stubborn because it bonds to metal and can smear if scraped incorrectly. A practical approach is to address resin with absorption first. If resin is liquid, covering the spill with a thick layer of dry sand can absorb the resin more effectively than dirt or mud. Allow the sand to sit for five to ten minutes; this gives time for absorption to take place. Then, use a sturdy shovel or scraper to remove the sand and resin together. This method helps prevent spreading the mess and makes disposal easier. After removing the resin-sand mixture, continue with the cleaner and scrub as needed. If the resin has already cured, you may need to repeat the absorption step or switch to a cleaner formulated to tackle resin-like residues. The key is patience and a steady hand rather than brute force, which can scratch the coating.
After the cleaner has had its moment, it is time to rinse again. Use the same low-pressure setting and repeat the downward rinse from top to bottom. Make sure to remove all soap and cleaner residues—any linger can attract dirt or degrade the finish over time. Pay extra attention to corners, seams, and the edges where cleaner can pool. A final, thorough rinse ensures none of the cleaner remains to interact with subsequent scrubbing or with future exposures to sunlight and heat.
Drying the bed thoroughly is crucial. A clean surface can still become dull if water spots form or moisture remains in seams. Wipe the entire bed with a microfiber towel or a chamois. This not only dries the surface but also helps you detect any missed spots that need an additional pass. If you have the time, allow the bed to air dry in a shaded area. Sunlight can create uneven drying and leave marks that resemble water spots, even on a freshly washed surface. If you choose to air dry, giving the bed extra time is wise. The goal is a uniform, dry finish that resists rust and staining.
After drying, you may choose to apply a protectant. Not every bed requires this step, but if your bed liner is compatible with a protectant or a wax, applying a light layer can help repel water, resist stains, and extend the coating’s life. A protectant can also ease future cleanings by making grime less likely to cling. The blend you choose should be compatible with the bed’s material. If you have a painted surface, make sure the product is safe for painted finishes. If you have a rubberized or polyurethane liner, confirm compatibility with that material.
A few practical notes help keep the process smooth. Never use a pressure washer directly on the bed liner or painted surfaces. The high pressure can damage the coating and promote bubbling or peeling over time. Harsh chemical cleaners, including bleach or ammonia, are not recommended unless the manufacturer specifies their suitability. For liners composed of rubberized or fiberglass materials, confirm that cleaners are approved for that specific surface. Different materials react differently to solvents, so knowing your bed’s makeup matters more than you might expect.
This framework is not merely about aesthetics. It is about longevity. A clean bed is less vulnerable to moisture damage, rust, and staining, which can compromise the bed walls, seams, and even the bed’s structural integrity. A careful wash routine helps preserve factory finishes and keeps the vehicle ready for heavy use. The rhythm of this process—prepare, rinse gently, clean with intent, rinse again, dry completely, and protect thoughtfully—creates a reliable habit. In time, this habit becomes a routine that protects your truck’s value and performance.
For stubborn grime that seems to resist ordinary cleaning, consider strategies tailored to tough residues. Heavy-duty degreasers can be effective for grease and oil films, especially in corners and near seams. If you encounter tar or adhesive residues, a targeted approach with a degreaser and a soft brush often yields better results than brute scrubbing. When dealing with these tough spots, some experienced operators reference proven strategies for cleaning grease and tar off your trucks fast. proven strategies for cleaning grease and tar off your trucks fast. This approach emphasizes controlled application, thorough scrubbing, and a careful rinse to prevent redeposit of grime.
After you finish the wash, you can take a step further by validating your work with a final visual check. Do a walk-around in good light to confirm there are no missed creases, corners, or drips. The bed should look uniform, with no sticky spots or uneven shading. If you notice any area that looks dull or has a leftover film, a quick rewash on that spot is often all you need. The goal is a consistent, clean look that reflects the bed’s health rather than the presence of grime.
As you integrate this routine into your maintenance, keep in mind the bed type and liner material. Rubberized liners, polyurethanes, fiberglass, and painted beds each respond differently to cleaners and protectants. Reading manufacturer guidelines remains important. If you ever question whether a cleaner is appropriate for your liner, a quick test in a small, inconspicuous area can prevent damage. This approach preserves the bed’s finish while enabling you to perform a thorough cleaning. The balance between cleaning power and surface safety is the heart of a dependable wash.
In sum, a thorough wash is not a ritual of brute force but a careful dialogue with the bed. It respects the materials, acknowledges where grime hides, and proceeds with steps that minimize risk while maximizing cleanliness. When done correctly, the bed looks finished, feels smooth, and carries a quiet sense of resilience. It will be ready for the next load, the next trip, and the next round of weather and use. The method described here keeps the bed in service longer and helps maintain its value through time.
External resources can expand your understanding of the protective finishes and finishes that accompany a clean bed. For additional guidance on bed liner care and maintenance, refer to reputable sources that focus on finish preservation and protective coatings. External resource: https://www.armorall.com/truck-bed-liner-care/
From Wet to Shielded: Mastering Drying and Protecting Your Truck Bed After a Thorough Wash
A clean truck bed is more than a visual achievement; it’s a shield against the elements, a foundation for cargo safety, and a key to extending the bed’s life. The step from washing to protecting isn’t a leap so much as a careful sequence designed to seal moisture out of corners, seams, and coatings. When you wash a truck bed, you remove the grime that wears metal and liners. Then, drying becomes more than drying. It becomes the moment you decide how well your bed will resist rust, staining, and abrasion in the months ahead. This chapter stitches together the practical reasoning from cleaning into a deliberate drying and protection routine, so the bed not only looks refreshed but stays durable through heavy loads and weather cycles.
Begin with the truth that a bed is not a flat, isolated surface; it is a network of corners, cross members, bolts, and joints where moisture delights in lingering. The preparation you did during washing—removing contents, shielding sensitive areas, and using the right cleaners—sets up what comes next. Now you must confront the bed’s damp state with a calm, methodical plan. The goal is to push lingering moisture from every crevice while avoiding any sleepiness in the coating or liner. The logic is straightforward: thorough drying reduces the risk of rust, mold, and degradation that can undermine a coating long before its time. It’s this simple premise that makes the drying phase the unsung hero of a long-lasting truck bed.
After you rinse and scrub, you may be tempted to move directly to storage or reassembly. Resist that impulse. Even when a bed appears dry to the eye, micro-dots of moisture cling to bolts, seams, and the textural texture of liners. The bed may seem dry on the main surface, yet moisture can linger in the edges where water wicks into tiny pores or beneath the bed walls where grit hides. A careful, deliberate drying process ensures those hidden pockets are empty, so no moisture has the chance to evaporate and press against coatings in the long term. It is here that a single, well-executed step can dramatically extend the bed’s life.
Start with a visual sweep and a tactile check of the entire surface. Look for any damp patches along the floor, in the corners, near the tailgate, and around any bolts or seams. A quick wipe with a microfibrous cloth can reveal dampness that a casual glance misses. As you scan, listen for the subtle sounds of water that may still be trapped in crevices. If you hear a faint hiss or feel a damp cool spot under your hand, you’ve found a place to focus your drying effort. Have a plan for those spots: a combination of air movement, towels, and a small amount of heat if the environment permits. The key is patience rather than force. Rushing this step invites moisture to linger and, later, rust or coating failure to show up.
In the absence of a dedicated heat source, a simple, effective approach is to use a clean, dry microfiber towel to wipe surfaces thoroughly, starting at the far end of the bed and moving toward the tailgate. Work methodically across the bed, paying extra attention to the floor grooves and any recesses that can trap debris and moisture. A squeegee can be invaluable for pushing water toward the drain channels or away from seams where it might seep in. The aim is a uniformly dry surface with no standing water in corners or crevices. If you must speed the process, a portable fan drying setup in a shaded area can accelerate air movement without exposing the surface to direct sun. Sunlight can cause fast drying on exposed sections, but it tends to create dry spots unevenly and can lead to sun-induced drying marks on some coatings. A shaded, ventilated space is usually the best compromise for even drying.
Once you’ve minimized surface moisture, scrutinize the bed walls and the inner seams. Liquids that find their way into the joints often leave residue and can corrode finishes over time. The mild, patient approach here matters as much as the drying itself. In some bed liner configurations, moisture can linger beneath ridges or around the edges where the liner meets the metal. A flexible, lint-free cloth or a soft brush can dislodge any remaining dampness from tight corners. If your bed features a rubberized or polyurethane liner, remember that these materials are designed to resist moisture but can still trap it in minute troughs or around bolts. Never use aggressive solvents in those areas, and avoid high-pressure jets that could force water under the edges where it would be difficult to remove.
With the surface clean and visibly dry, the next phase is protection. This is where the decision between an integrated bed liner and a removable mat comes into play. A bed liner spray can provide a robust, durable barrier that resists scratches and repels moisture. It forms a continuous layer over the bed’s surface and can be applied in multiple coats, depending on the product and climate. The regimen typically calls for two to three coats with drying time between applications. The math is straightforward: more coats in the right sequence equal a thicker seal that stands up to heavier cargo and harsher environments. When choosing a coating approach, ensure you are working in a well-ventilated area and following the manufacturer’s directions. Ventilation matters, not only for safety but for achieving an even, defect-free finish. A rushed or uneven application can leave pinholes—the kind of flaws that trap moisture and compromise protection just as surely as an unwashed bed.
An alternative path is the bed mat or liner approach. A custom-fit rubber or plastic mat can be lifted out for cleaning, making it a practical choice for heavy flows of dirty cargo. Mats give you a quick recovery option when loads are frequent or when time is limited. They also provide an immediate, tactile sense of protection: a soft, forgiving surface that cushions impacts and resists wear. When installing a mat, confirm a snug fit around the bed walls, the corners, and the tailgate interface. Even small gaps can collect dirt and moisture, defeating the mat’s protective intent. Mats are easy to clean, and because they can be removed, you can access the bed’s metal surface for inspection more readily. If you choose a liner spray, the bed walls benefit from a uniform bond that behaves as a shield across the entire cargo area.
In either path—spray-on liner or mat—the protection is only as good as maintenance. After the coating dries, inspect the bed for wear, cracking, or peeling. A few troubled spots can propagate if left unaddressed, so a quick, regular check is worth the time. If you notice a crack or thinning, plan a reapplication or a mat replacement as needed. The maintenance rhythm matters more than the one-time treatment; a little routine upkeep prevents the need for a large repair later.
The maintenance philosophy ties neatly into broader fleet care. This approach echoes the principle behind the importance of regular trailer maintenance. Keeping the bed well-dried and protected reduces the likelihood that loads will introduce moisture into seams or that surface flaws will become corrosion paths. The bed’s coating and liner are a frontline defense against rust, staining, and the everyday abrasion caused by tools, dirt, and cargo. A well-protected bed not only survives daily use but also contributes to preserving the truck’s overall value over time. The link between treating the bed with respect and sustaining the vehicle’s longevity is clear: small, consistent actions produce durable results. importance of regular trailer maintenance
As you move from protecting to preserving, consider the practicalities of your specific bed type. Rubberized liners behave differently from polyurethane coatings, and each has its own set of care guidelines. A spray-on liner benefits from patience and a precise layering, while a mat benefits from removal for deep cleaning and dry storage. The key is to respect material differences, follow safe application practices, and maintain a clean, dry environment inside the bed. In environments with wide temperature swings or heavy exposure to moisture, recurring inspections and timely reapplication become even more critical. The goal is not merely to restore appearance after every wash but to cement a durable, moisture-resistant boundary that lasts through cycles of use and weather.
To close the arc of washing into lasting protection, allow the bed to remain in a well-ventilated, shaded area until the coating is completely cured if you used a spray-on liner. Curing time is a critical step; premature exposure to moisture or cargo can undermine bond strength and lead to micro-chipping or patchy coverage. This patience yields a protective surface that won’t peel or separate when faced with heavy loads or rough terrain. If you opted for a mat, ensure it has fully settled and that the edges are secure before loading. The mat can trap dirt, so a routine cleaning cadence—washing the mat separately and allowing it to dry completely—remains essential to preserving its protective benefits.
The interplay of drying and protection is a discipline of paying attention to detail. It’s easy to race to the next task—moving on to cargo reloading, spray paint touch-ups, or routine maintenance—and overlook the quiet, vital moments when moisture evaporates and finishes cure. Yet those moments are where the bed earns its future resilience. The habit of performing a deliberate dry, a thoughtful protection, and a mindful maintenance check after every wash becomes part of the owner’s stewardship of the truck. It is a habit that translates into fewer rust spots, longer coating life, and a bed that continues to perform under heavy use. In this way, the seemingly modest act of drying after washing becomes a strategic step in preserving the truck’s capability and value over years of service.
As you consider the broader arc of care, keep the sequence clear in your mind: remove contents and protect sensitive areas during wash, rinse with a gentle touch, scrub as needed with non-abrasive tools, dry thoroughly with attention to corners, apply protection with patience, and maintain regularly. This rhythm, when practiced consistently, turns a routine wash into a durable defense against wear and moisture. The bed’s surface becomes not just clean but resilient, a prepared foundation that supports every load—whether it’s gravel, tools, or cargo stacked to the rim. In the end, drying and protection are not separate chores but a continuum of care that reflects a deeper philosophy of vehicle maintenance. The truck bed, once damp and vulnerable, becomes a testament to careful stewardship, a place where every detail—from the way you wipe the corners to the choice between a spray liner and a mat—counts toward lasting performance.
External resource: https://www.armorall.com/truck-bed-liner-care/
Final thoughts
In conclusion, washing a truck bed requires a methodical approach to ensure both cleanliness and the preservation of the truck’s materials. By following the steps outlined in this guide—preparing adequately, rinsing with care, cleaning thoroughly, and applying protectants effectively—you can enhance the lifespan of your vehicle’s bed while maintaining its appearance. Regular maintenance and proper care routines not only protect your investment but also contribute to operational efficiency for your fleet among logistics and construction companies.